That’s a good solution. Another would be removing the existing ball end and drilling out the stud. Replace with a button head socket head cap screw into the SAE ball end using loctite blue.
Weekend Update: Found a solution I liked for the switched 12v. I needed this for the relays and the ECU and did so by tapping into the distributor connection, as that was no longer used. That just leaves the Permanent 12v and I still haven’t decided where I want to tap that into. Being that this car has a completely different wiring setup I am hesitant to tap into unknowns, and I’m terrible with a Voltmeter. I SHOULD be able to figure this out, but trying to eat this elephant one bite at a time. Feel free to give me the elementary education here, I wont be offended.
Back to the Throttle Cable, I actually can and plan on using the ball end that came with the Jenvey kit. They wont let me return it, so I fully plan to cannibalize the linkage, but I wish I could just modify the supplied kit to gain hood clearance at this point as that nearly sounds easier at this point, but who knows.
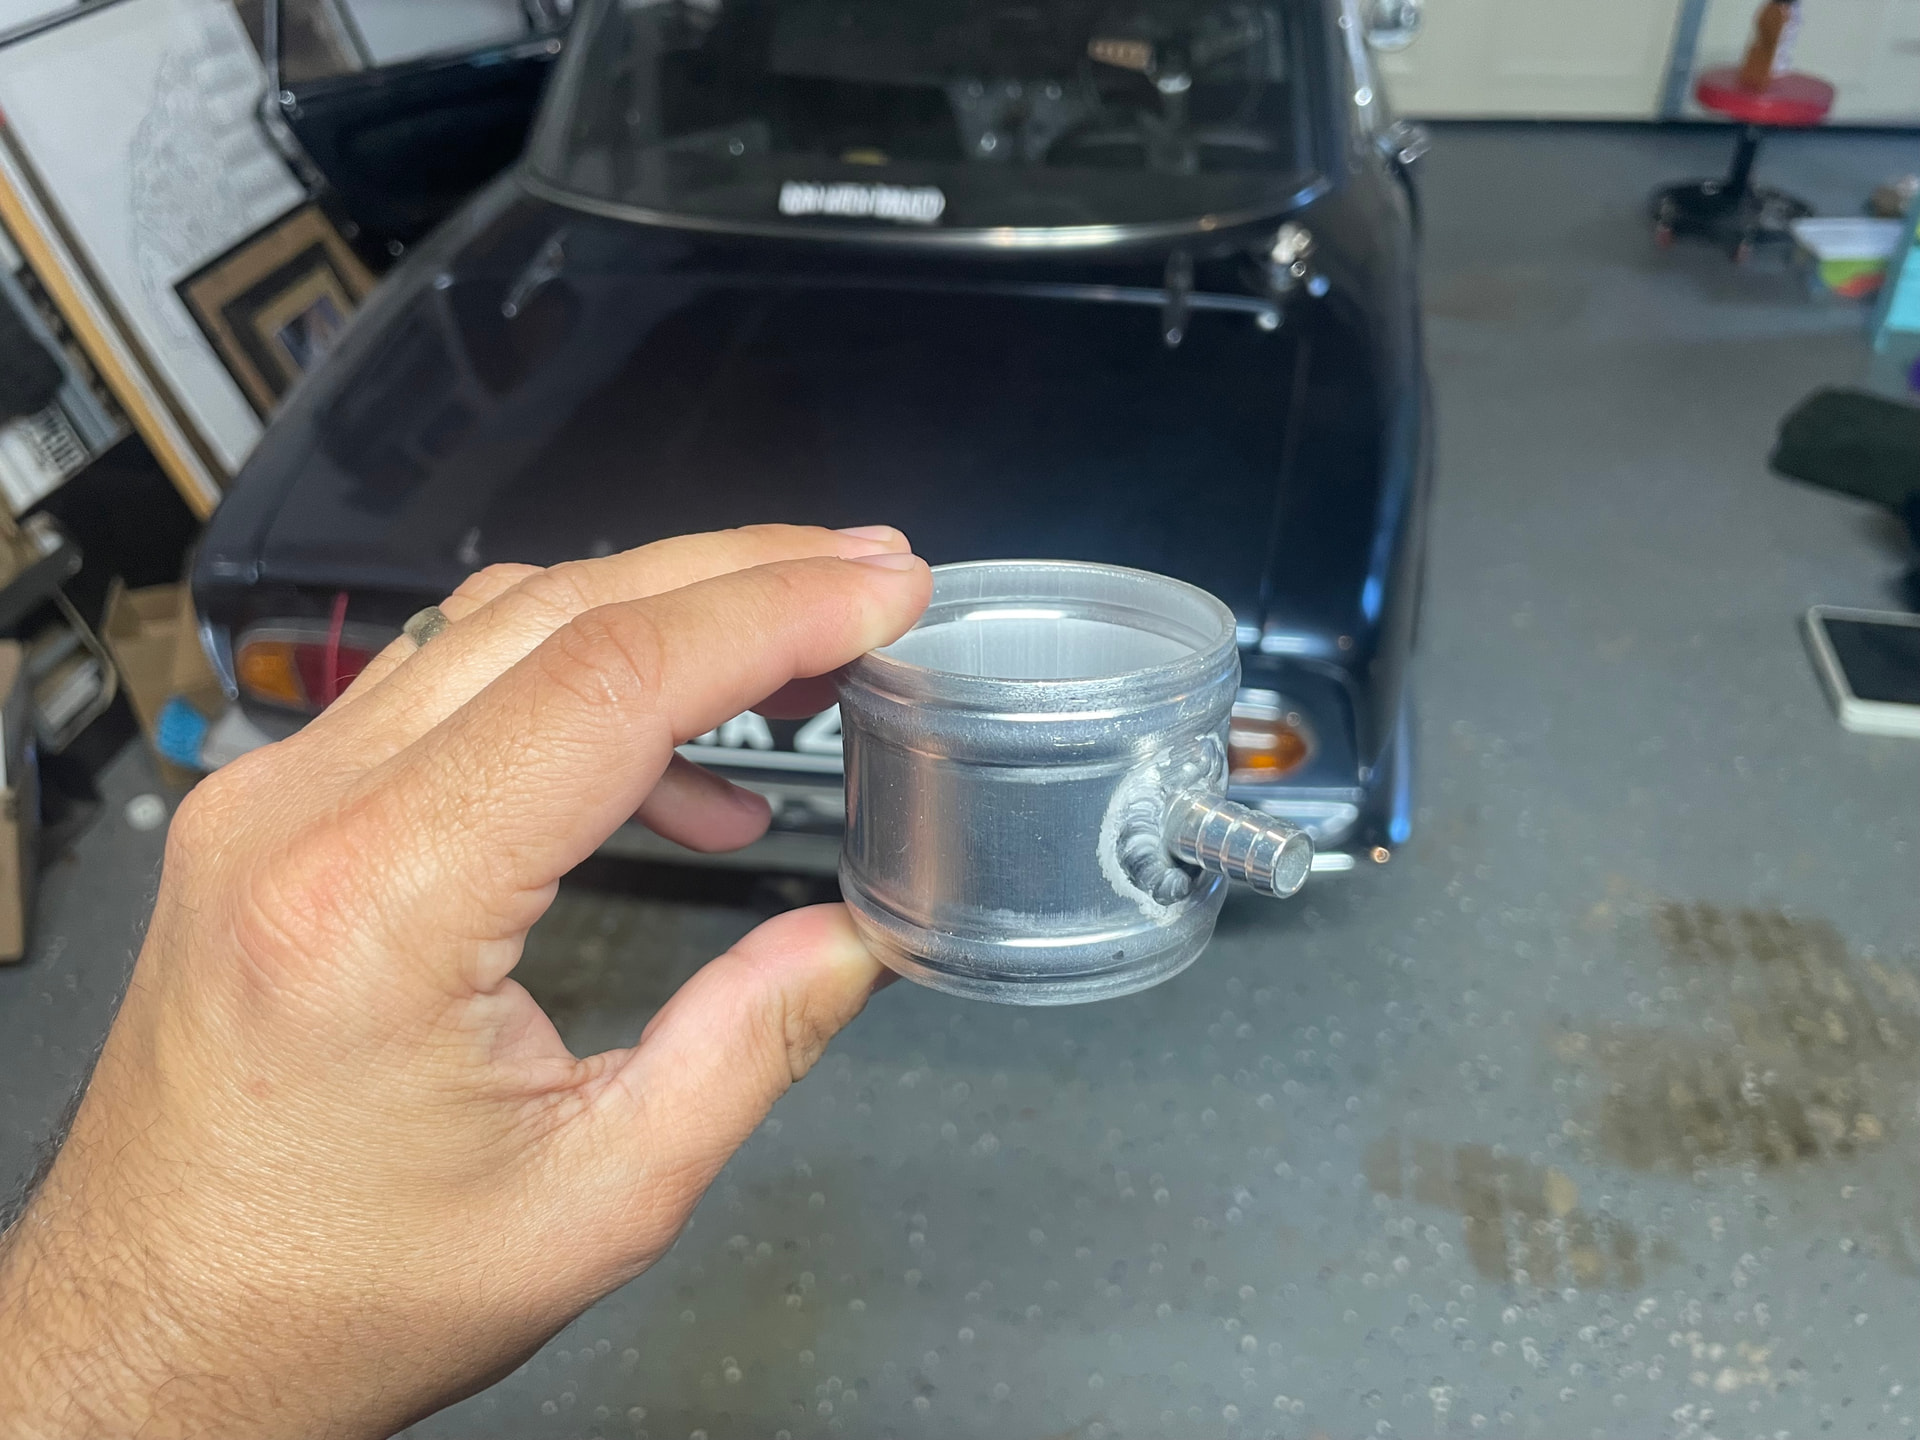
No pics, because its really not anything interesting. My fabricator friend shipped out my fuel return setup. I had planned to buy the Moroso setup but they use a 2" OD pipe, and mine measured out to ~2.25" OD with a 2" ID… so close …
Fabricated fuel return pipe arrived and looks great, however the rubber hoses are still en route.
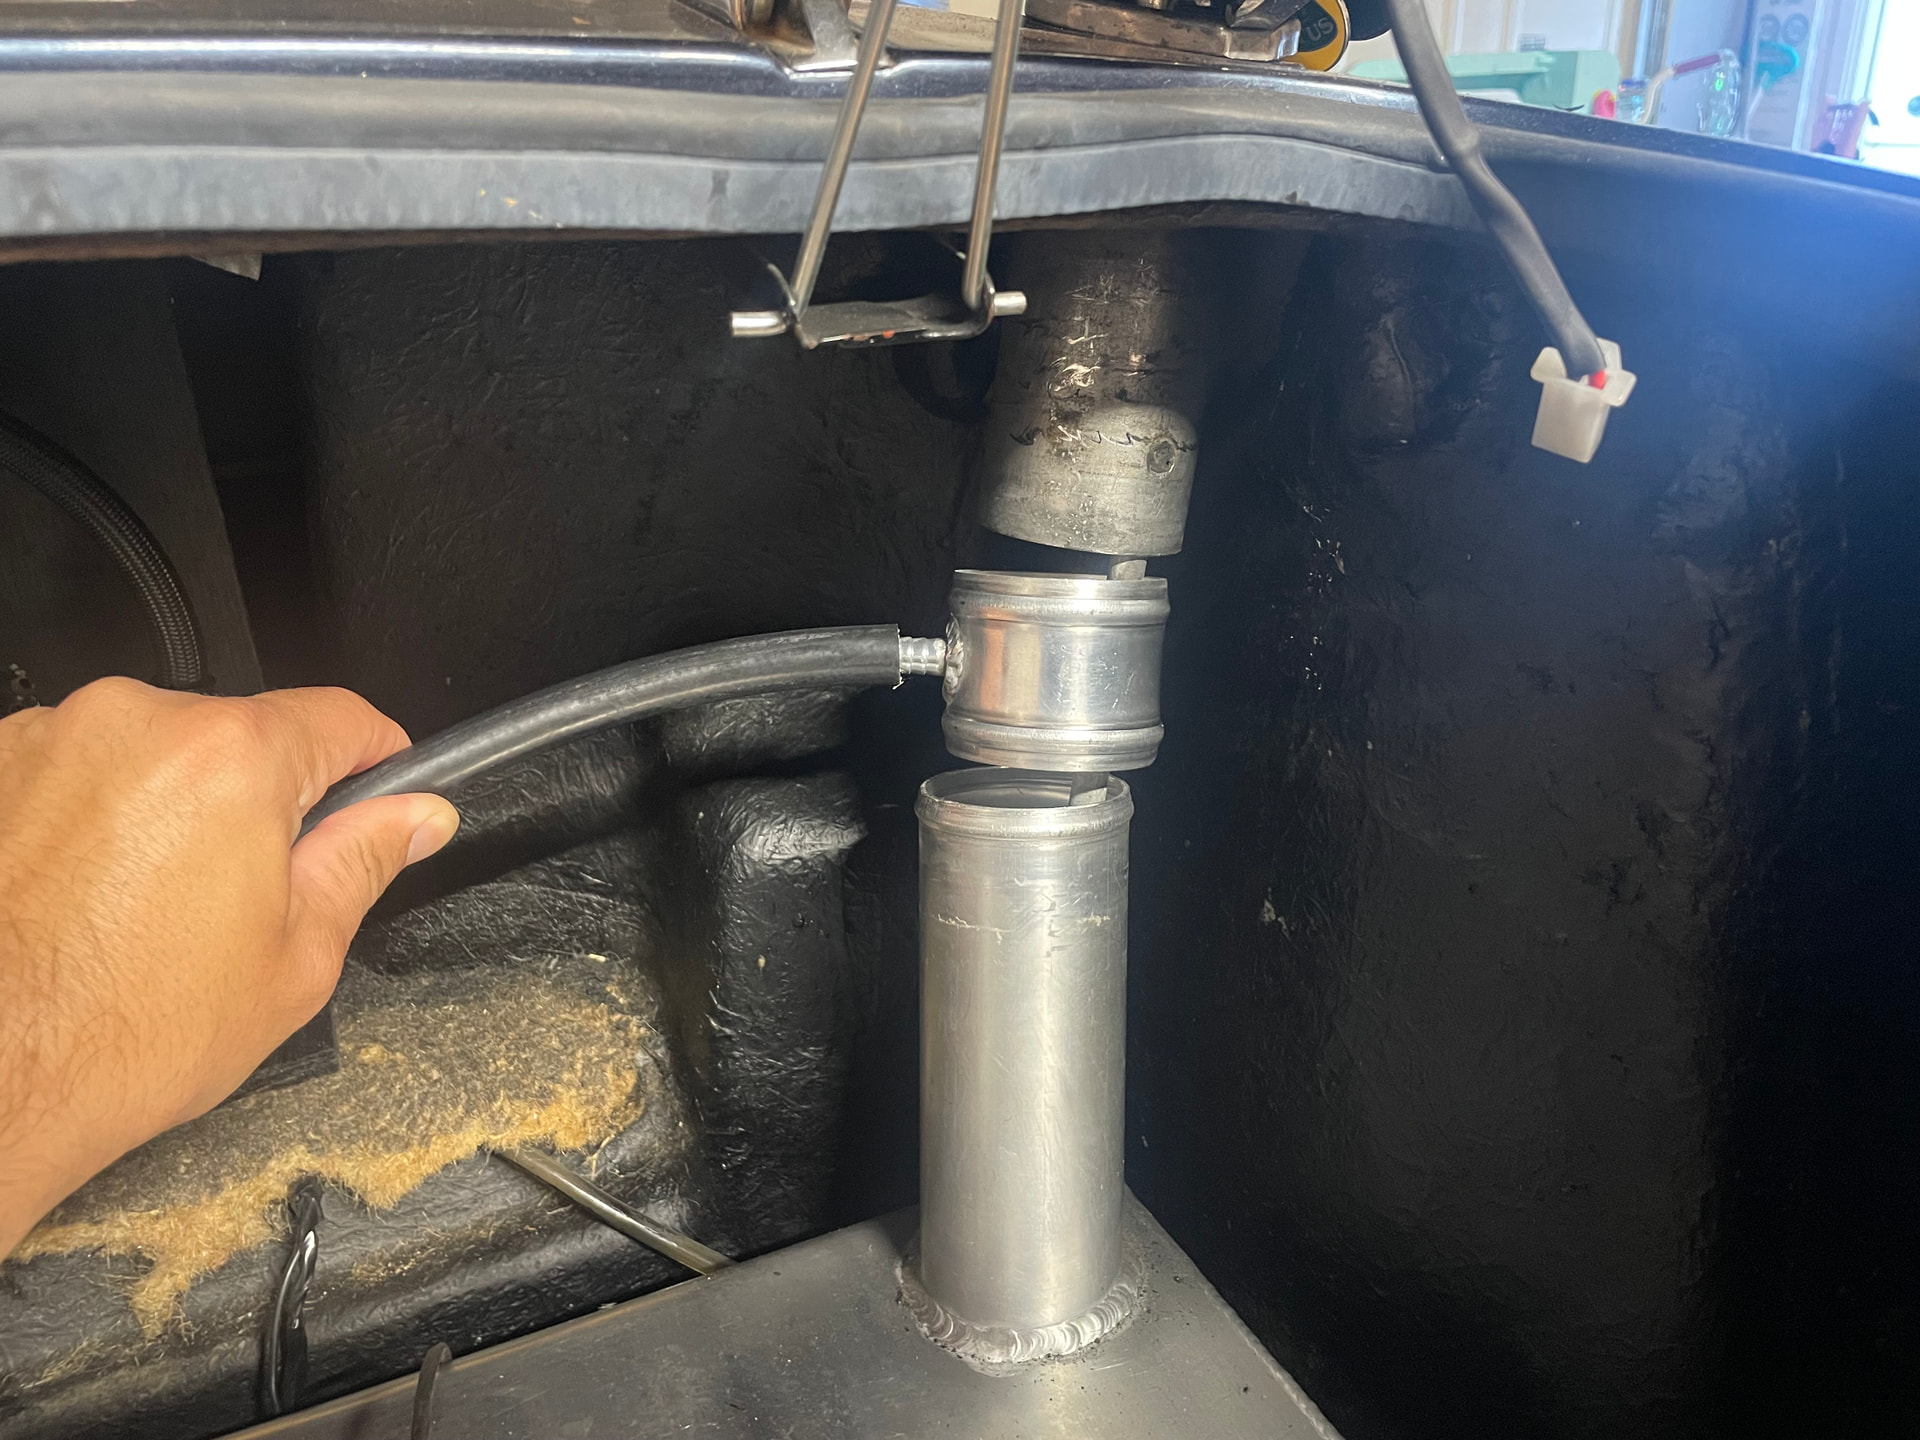
It’s not quite the straight shot I was hoping but should still be just fine.
1 Like
All looking great. Brings back memories of my install. Love the Idea for the shift light. The loom from DTA is the same as the one fro QED by the way.
Might have missed it but are you putting an inertia switch for the fuel pump. Good accident precaution.
Cheers
Tim
1 Like
Thanks Tim, slowly crawling across the finish line , and then the part involving all the tuning comes into play.
Curious what you guys used to tune/ setup the DTAfast? Good to know that QED used the same setups wish id bought it earlier… anyways…
I’m hoping for a “mobile” tuning option that I can keep in the car versus a laptop, as I also hope to use that for the PDM (I think that’s what it’s called). This car doesn’t have a fusebox and the builder Sean couldn’t remember what he used so I’ll have to look through all the paperwork that came with the car and hopefully there’s a manual somewhere related to it.
I take it as you are using the DTA loom you are using the DTA ecu. If the injectors are the same as those in standard jenvey throttle bodies then I could send you my map. This is for a big valve twincam and works pretty well. Still needs some fettling on cold starts/cold idle. Should mean you can run the car and drive it. I tuned the car myself using some software I wrote aided by chatgpt. Happy to also share that but you have to run it using a python compiler. Equally if you collect a log of normal driving using my initial map you could send these data to me and I can process it and send you an optimised map.
Happy to help whichever way.
Tim
2 Likes
I would call around for a dyno tuner in your area once you have a base map loaded and functional. I suspect some will not want to work with unfamiliar (british) electronics and only want to touch the usual Motec/Link/Holley/ECUMaster etc. stuff but its all the same principle once you have the tuning suite on a laptop. Setting trims just right at variable load is worth every penny for drivability and for a street car especially It would be insane to spend the money on all that hardware and not have it dialed in on a dyno, in my opinion.
Some places will rent out supervised dyno time so you can just bring your laptop with the tuning suite and have a go with a bit of professional guidance.
2 Likes
Only took ~10 days to go from above to this…
The progress continues. My friend who made the fuel return pipe has an idea for the throttle, so we’ll see what he comes up with. This car would never finish without his help!
2mAn,
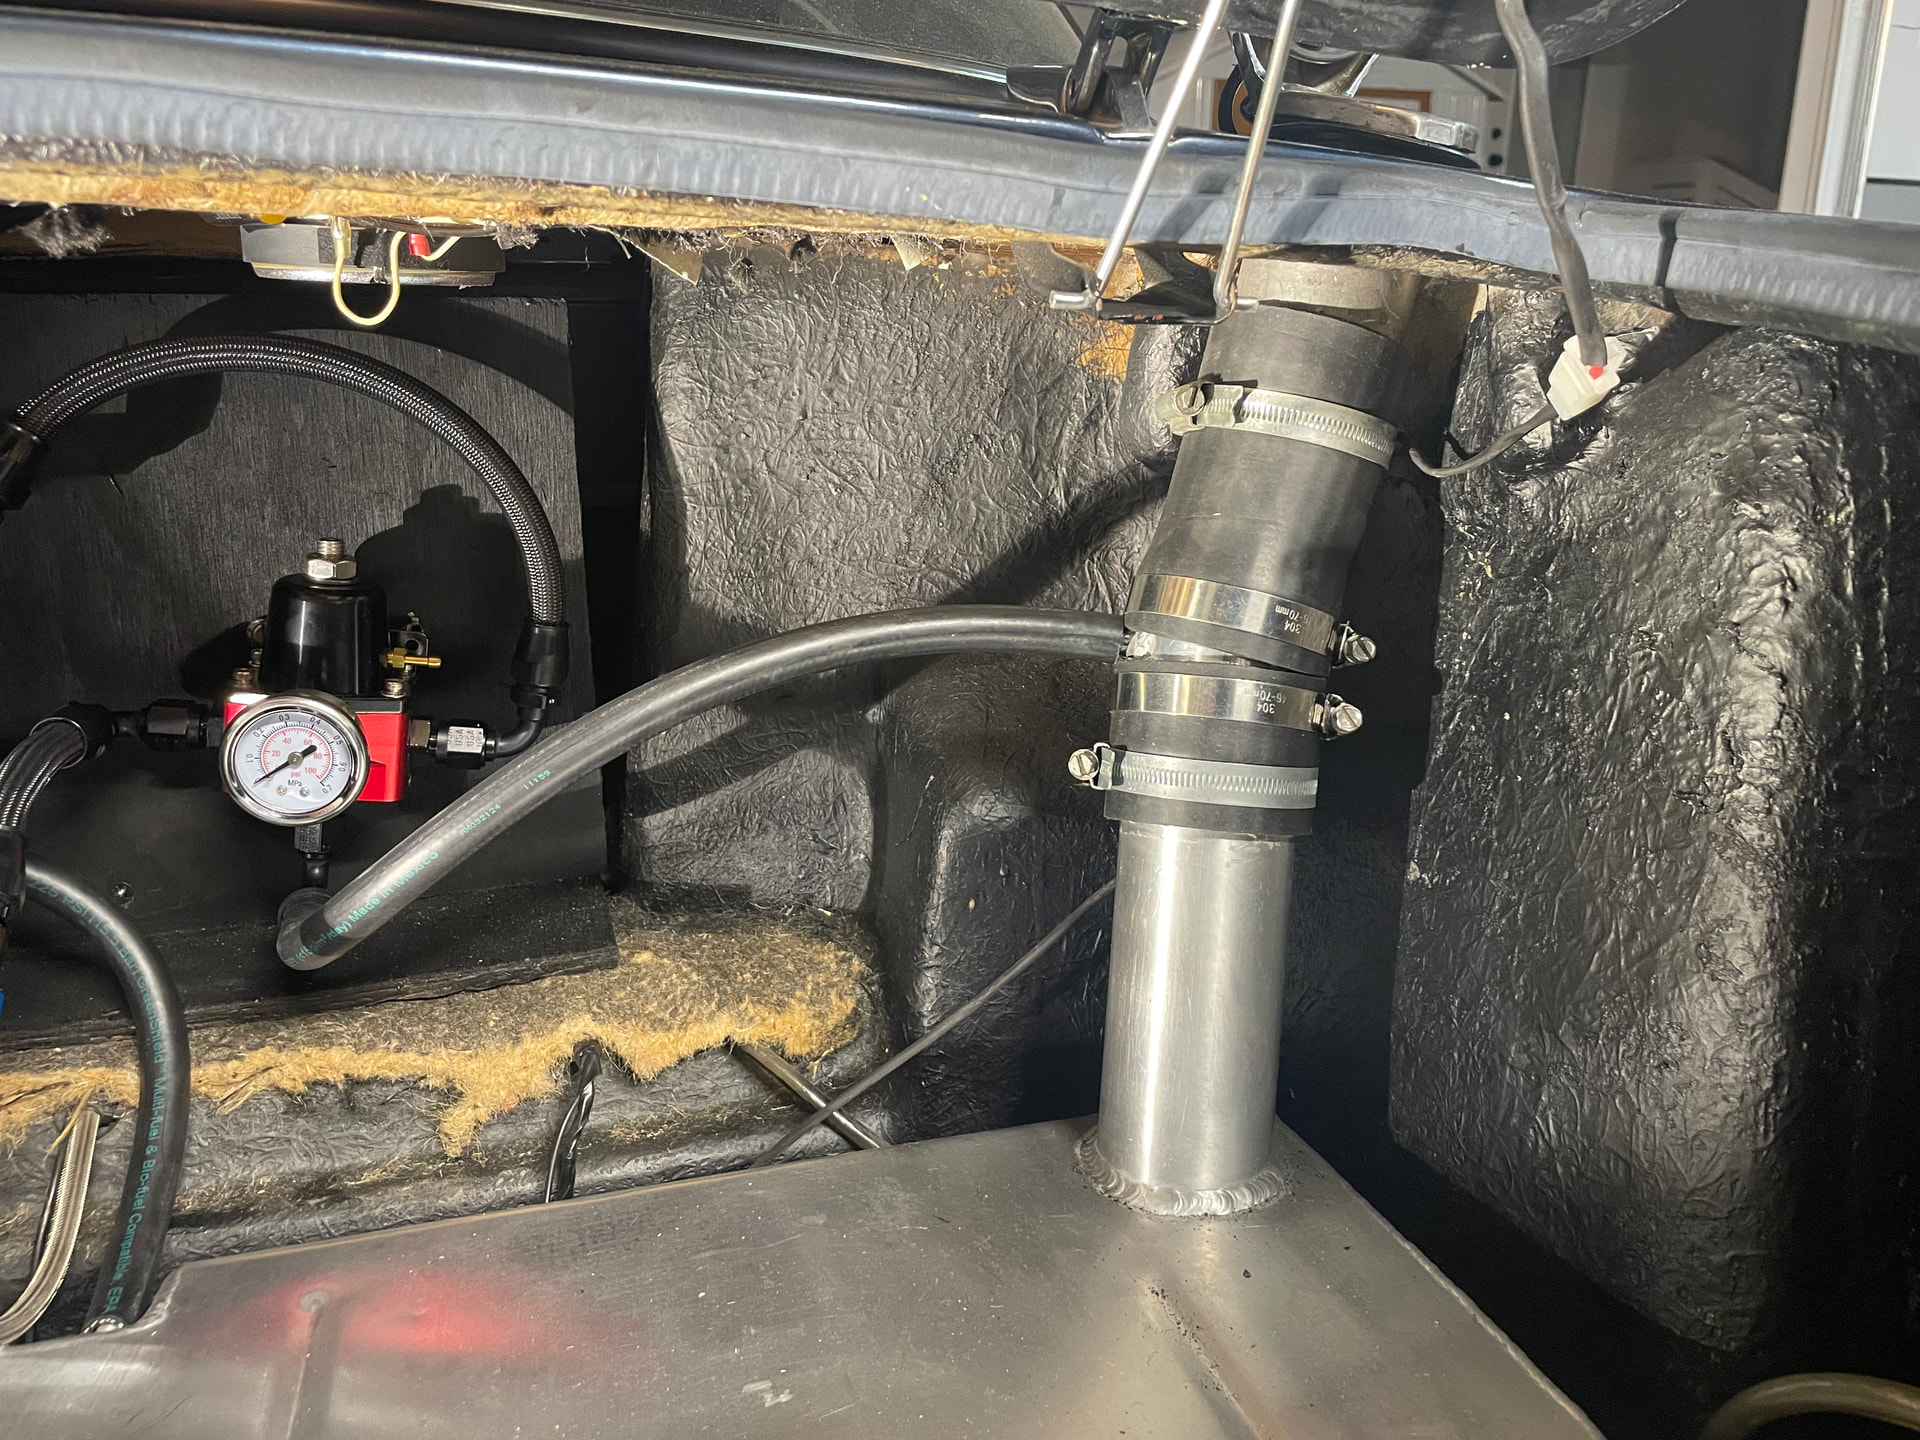
When I installed my new aluminium fuel tank, it looked a lot like yours, the filler neck did not align with the large entrance pipe on the tank. I spoke to the manufacturer ‘Andy Wiltshire’ who advised me that the pipe could be aligned easily as the tank and pipe are quite soft. Having spent what I considered was a lot of money on tank and installation, I was nervous about doing damage, which is probably more about my nature than the tank. I took a piece of 1" bright bar and some plastic round bar, both left over from other jobs. I turned the plastic down until it was the same diameter as the inside of the tank inlet, I cut off two discs about an inch long, and spaced them on the round bar so that they are the same distance apart as the filler pipe is long. I removed the filler neck from the body and put my pipe alignment tool into the tank entrance pipe through the hole in the body where the filler neck had been. You need to be careful not to drop it into the tank. The tank entrance pipe could then be pulled into alignment quite easily, my piece of round bar is about 2’ long. Andy was probably correct that the pipe could be aligned easily by hand, but I thought that if the aluminium was that soft I might bend it out of round.
I we weren’t on different side of the Atlantic I would lend it to you.
Richard Hawkins
1 Like
Hi,
I had the same issue many years ago when I restored an S4, but I had mine cut and welded. Says a lot for the quality, a small adjustment to the angle is all it would take when making the tank.
Just my 2p
The mandrel technique is smart but the inlet pipe doesn’t really need to be perfectly round anyway, the rubber hose section will deform to fit an ovalised pipe.
I get that its not ideal for a new part but getting a little heat on it and tweaking it over a bit with a pipe is not a big deal