I am reassembling my door window frames which have been re-chromed, which makes me a little nervous about doing damage.
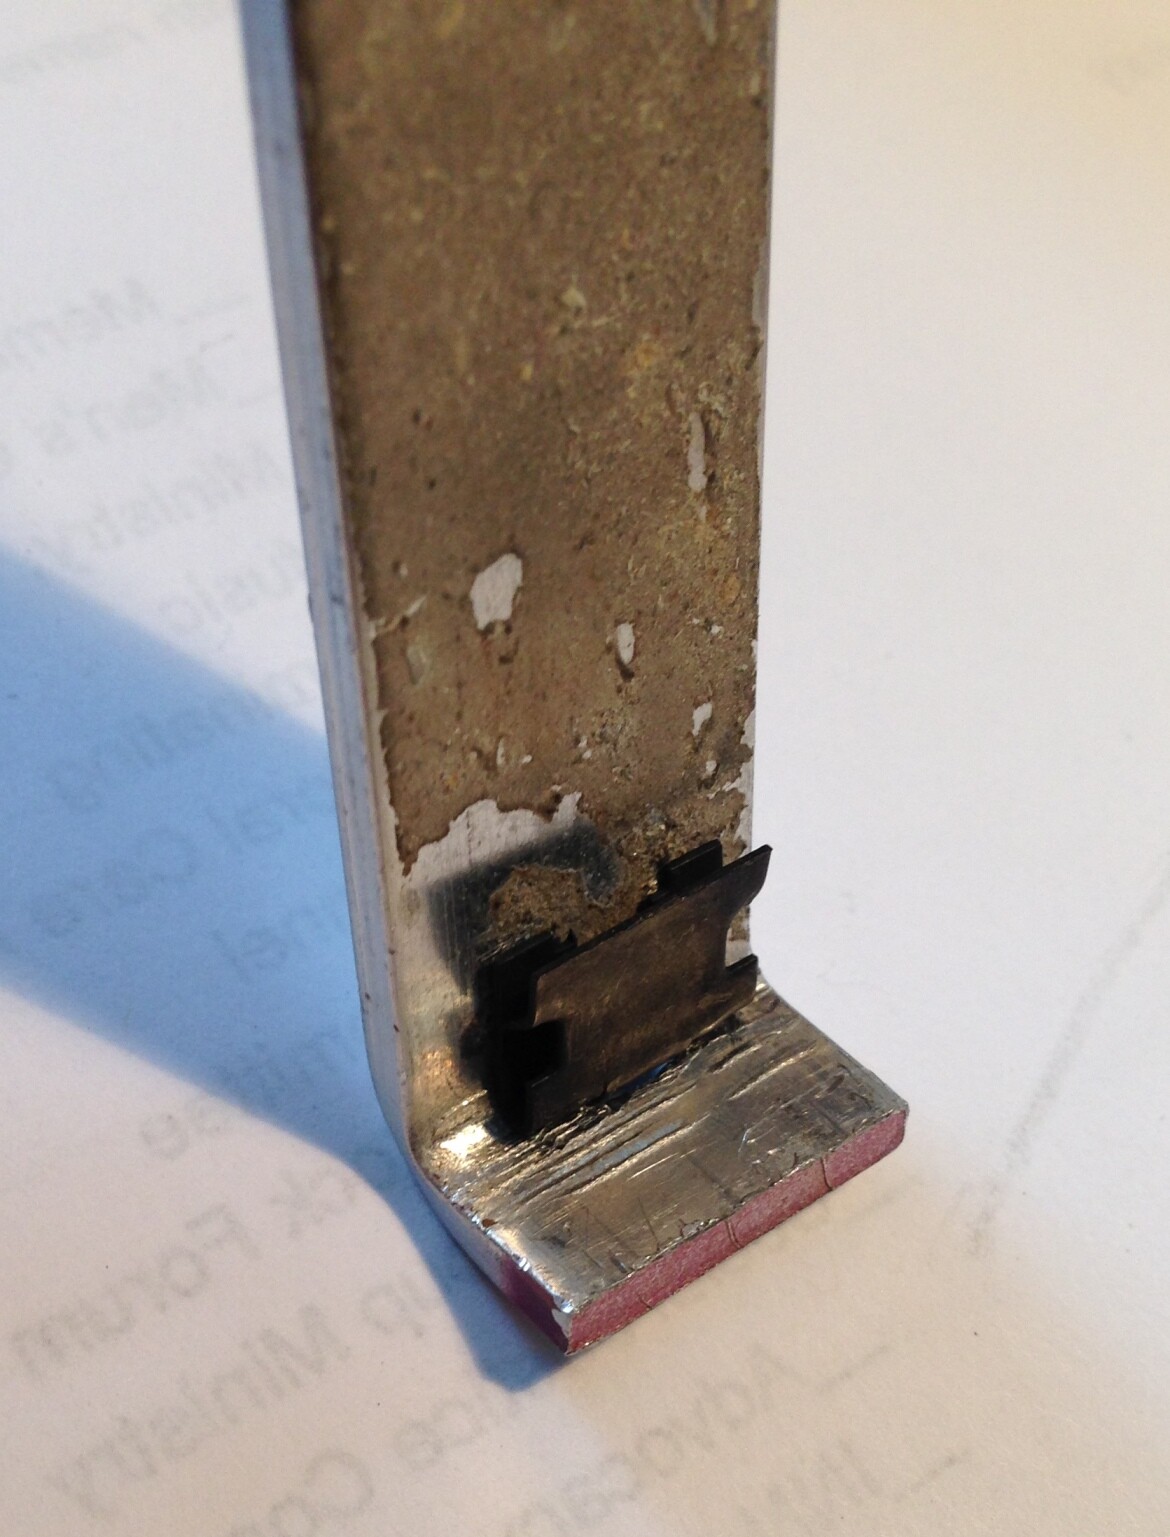
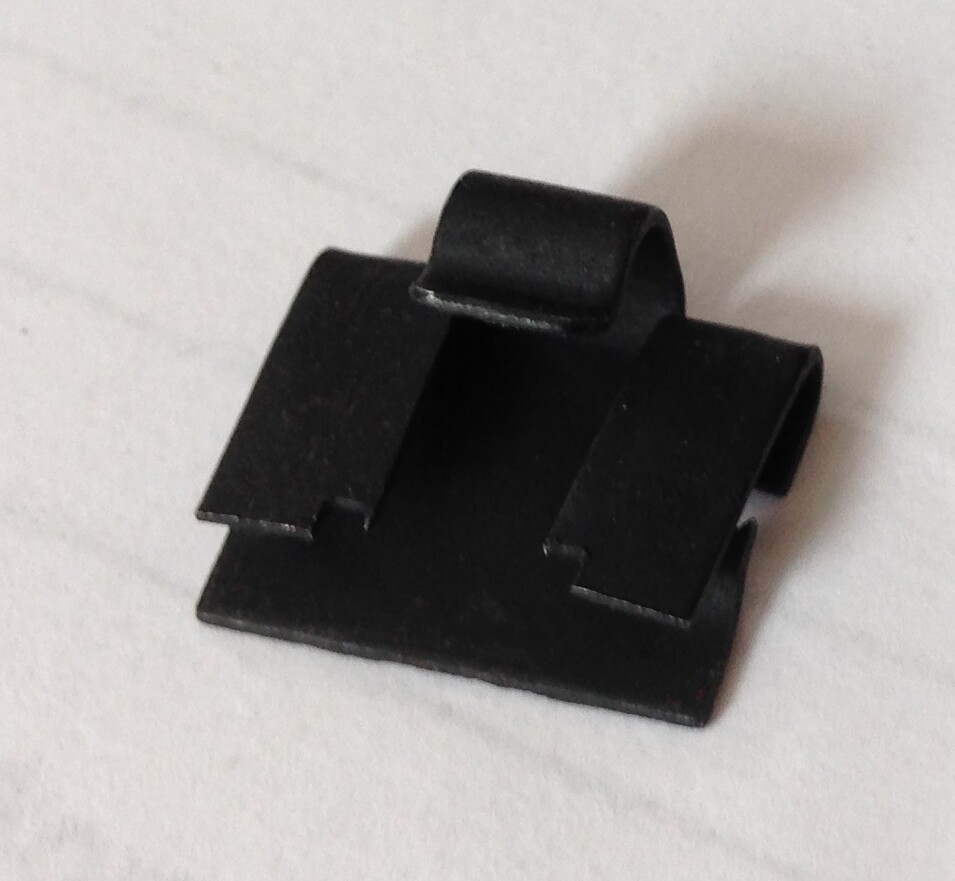
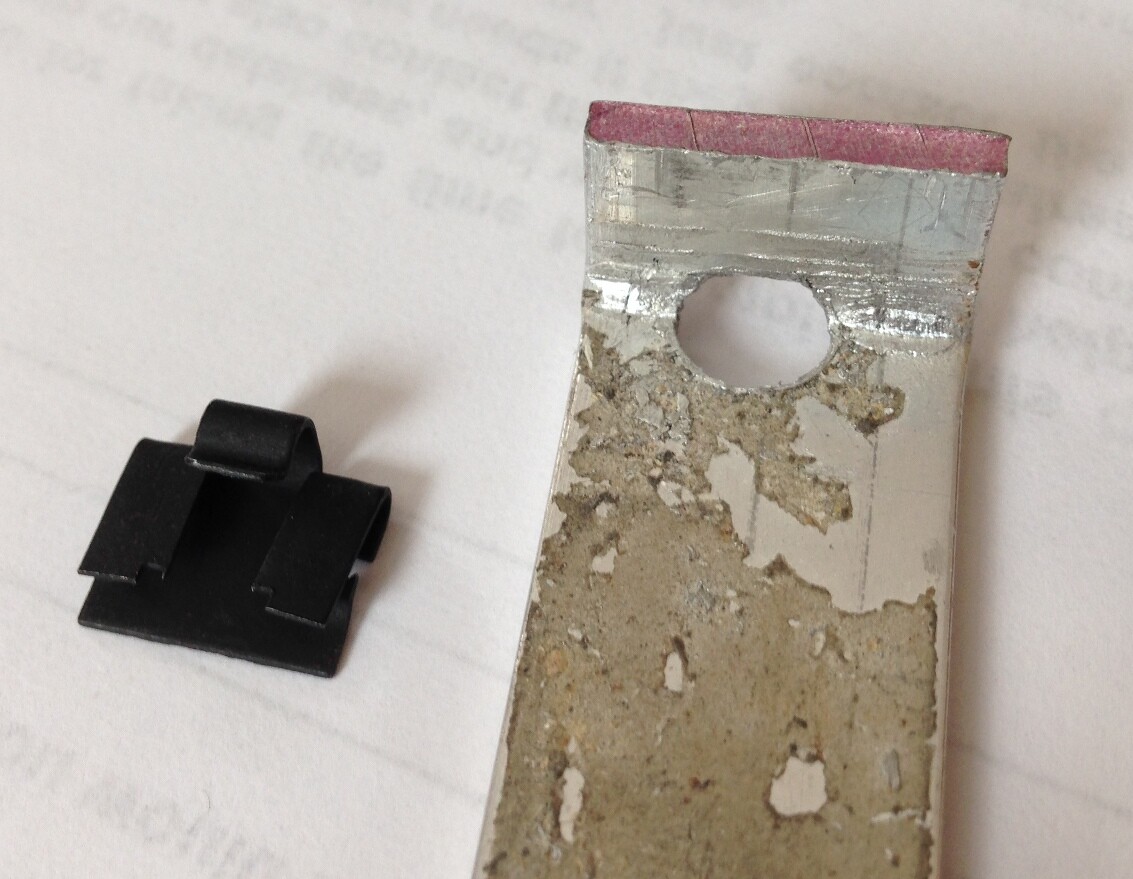
The Workshop Manual does not mention them, the parts book lists them, Buckland mentions them but has no advice as to how they should be fitted. The small clips that hold the strips to the window frame have a barb to retain them on the frame and another section to hold the felt strip in place.
How the assembly should look when complete is fairly obvious. I have spent two hours today and failed to fit any clips or strips. What is the sequence for fitting these things? Should I fit clips to frame and then felt strips to clips, or is it clips to strips and then assembly to frame? The clips seem too tight to fit the frame should they be eased open before using?
Hi Richard,
I did that job last year and had no real difficulty.
So, just to check:-
The flat side of the strip goes to the frame and the fluffy side to the glass.
The turned over metal edge goes at the bottom so the top is black.
The clips are pushed up from underneath. there are some holes in the frame to allow access to the clips on one side.
Sorry if this is too obvious but someone recently fitted them either wrong way up or wrong way round. It is easily done.
While you are there check that the horizontal anti rattle strip is OK
It is below the window opening, is about 2" wide and is fitted between the horizontal cable and the frame. It was missing on my car and was the reason I stripped the door down. It is not shown in the workshop manual but there was adhesive residue showing where it should go.
Good luck
Eric in Burnley
1967 S3SE DHC
Thanks for the reply, I am an old man now and perhaps don’t have the strength. Do you remember if you fitted the clips to the frame then the strip to the clips or clips to strip and then the assembly to the frame?
As I had no difficulty with it I cannot remember it definitely, but I think that the strip was held in place and then the clip offered up and pressed into place.
I think it is unlikely that you are older than me because nobody is any more. I will be 86 next week or so they tell me. I believe this is caused by a calendar malfunction.
Have another go.
Cheers
Eric
you are correct I am 76, but in my defence cancer has me in its claws and is beginning to squeeze. As to the calendar malfunction is that like stairs getting steeper and items I put away gaining weight with time so that I can no longer move them.
I am sorry to hear that, but its great that you are still fighting and working on the car! Those clips sound like the same as on the +2, and when I did mine recently (both sides) they were not easy. As Eric says they go on from underneath. People have made slim Jim type shaped tools to slide down, hook the base of the clip and pull up. I tried that, got a couple on that way, but ended up taking the frames out and putting them on with some vice grips set appropriately.
Hi Richard,
I also had cancer when I was your age but the wonderful team of surgeons at Blackburn hospital saved me.
Now then, Berni may have answered this. I did not think that you might be fitting the strips with the frame in the door.
I had the frame on the bench and the glass was probably out as well.
I had removed the frame to find the cause of a rattle. Maybe that is why it went better for me.
At the same time I replaced the window lift cable and pulleys which were in a poor state. All parts supplied by Sue Miller using the cable clamp studs which I make for her.
Sorry about that but I have to get a plug in when I can. All proceeds go to Cancer Research UK.
Best of luck
Eric
Thanks for the replies and encouragement. I have the frames out and on the bench but am completely unable to get the clips onto the frame. In the end I found a bit of scrap steel sheet almost the same thickness as the window frame brass, held this in the vice and pushed the clips on then removed the clips and I could just get the clips onto the frame. I tried putting clips on the felt strips but still could not get the clips onto the frame. My final solution was to expand the clips a little with the bit of scrap steel sheet, fit the clips to the frame, then push the strip into the clips. In all this has taken me two days to fit these felt strips to one window frame.
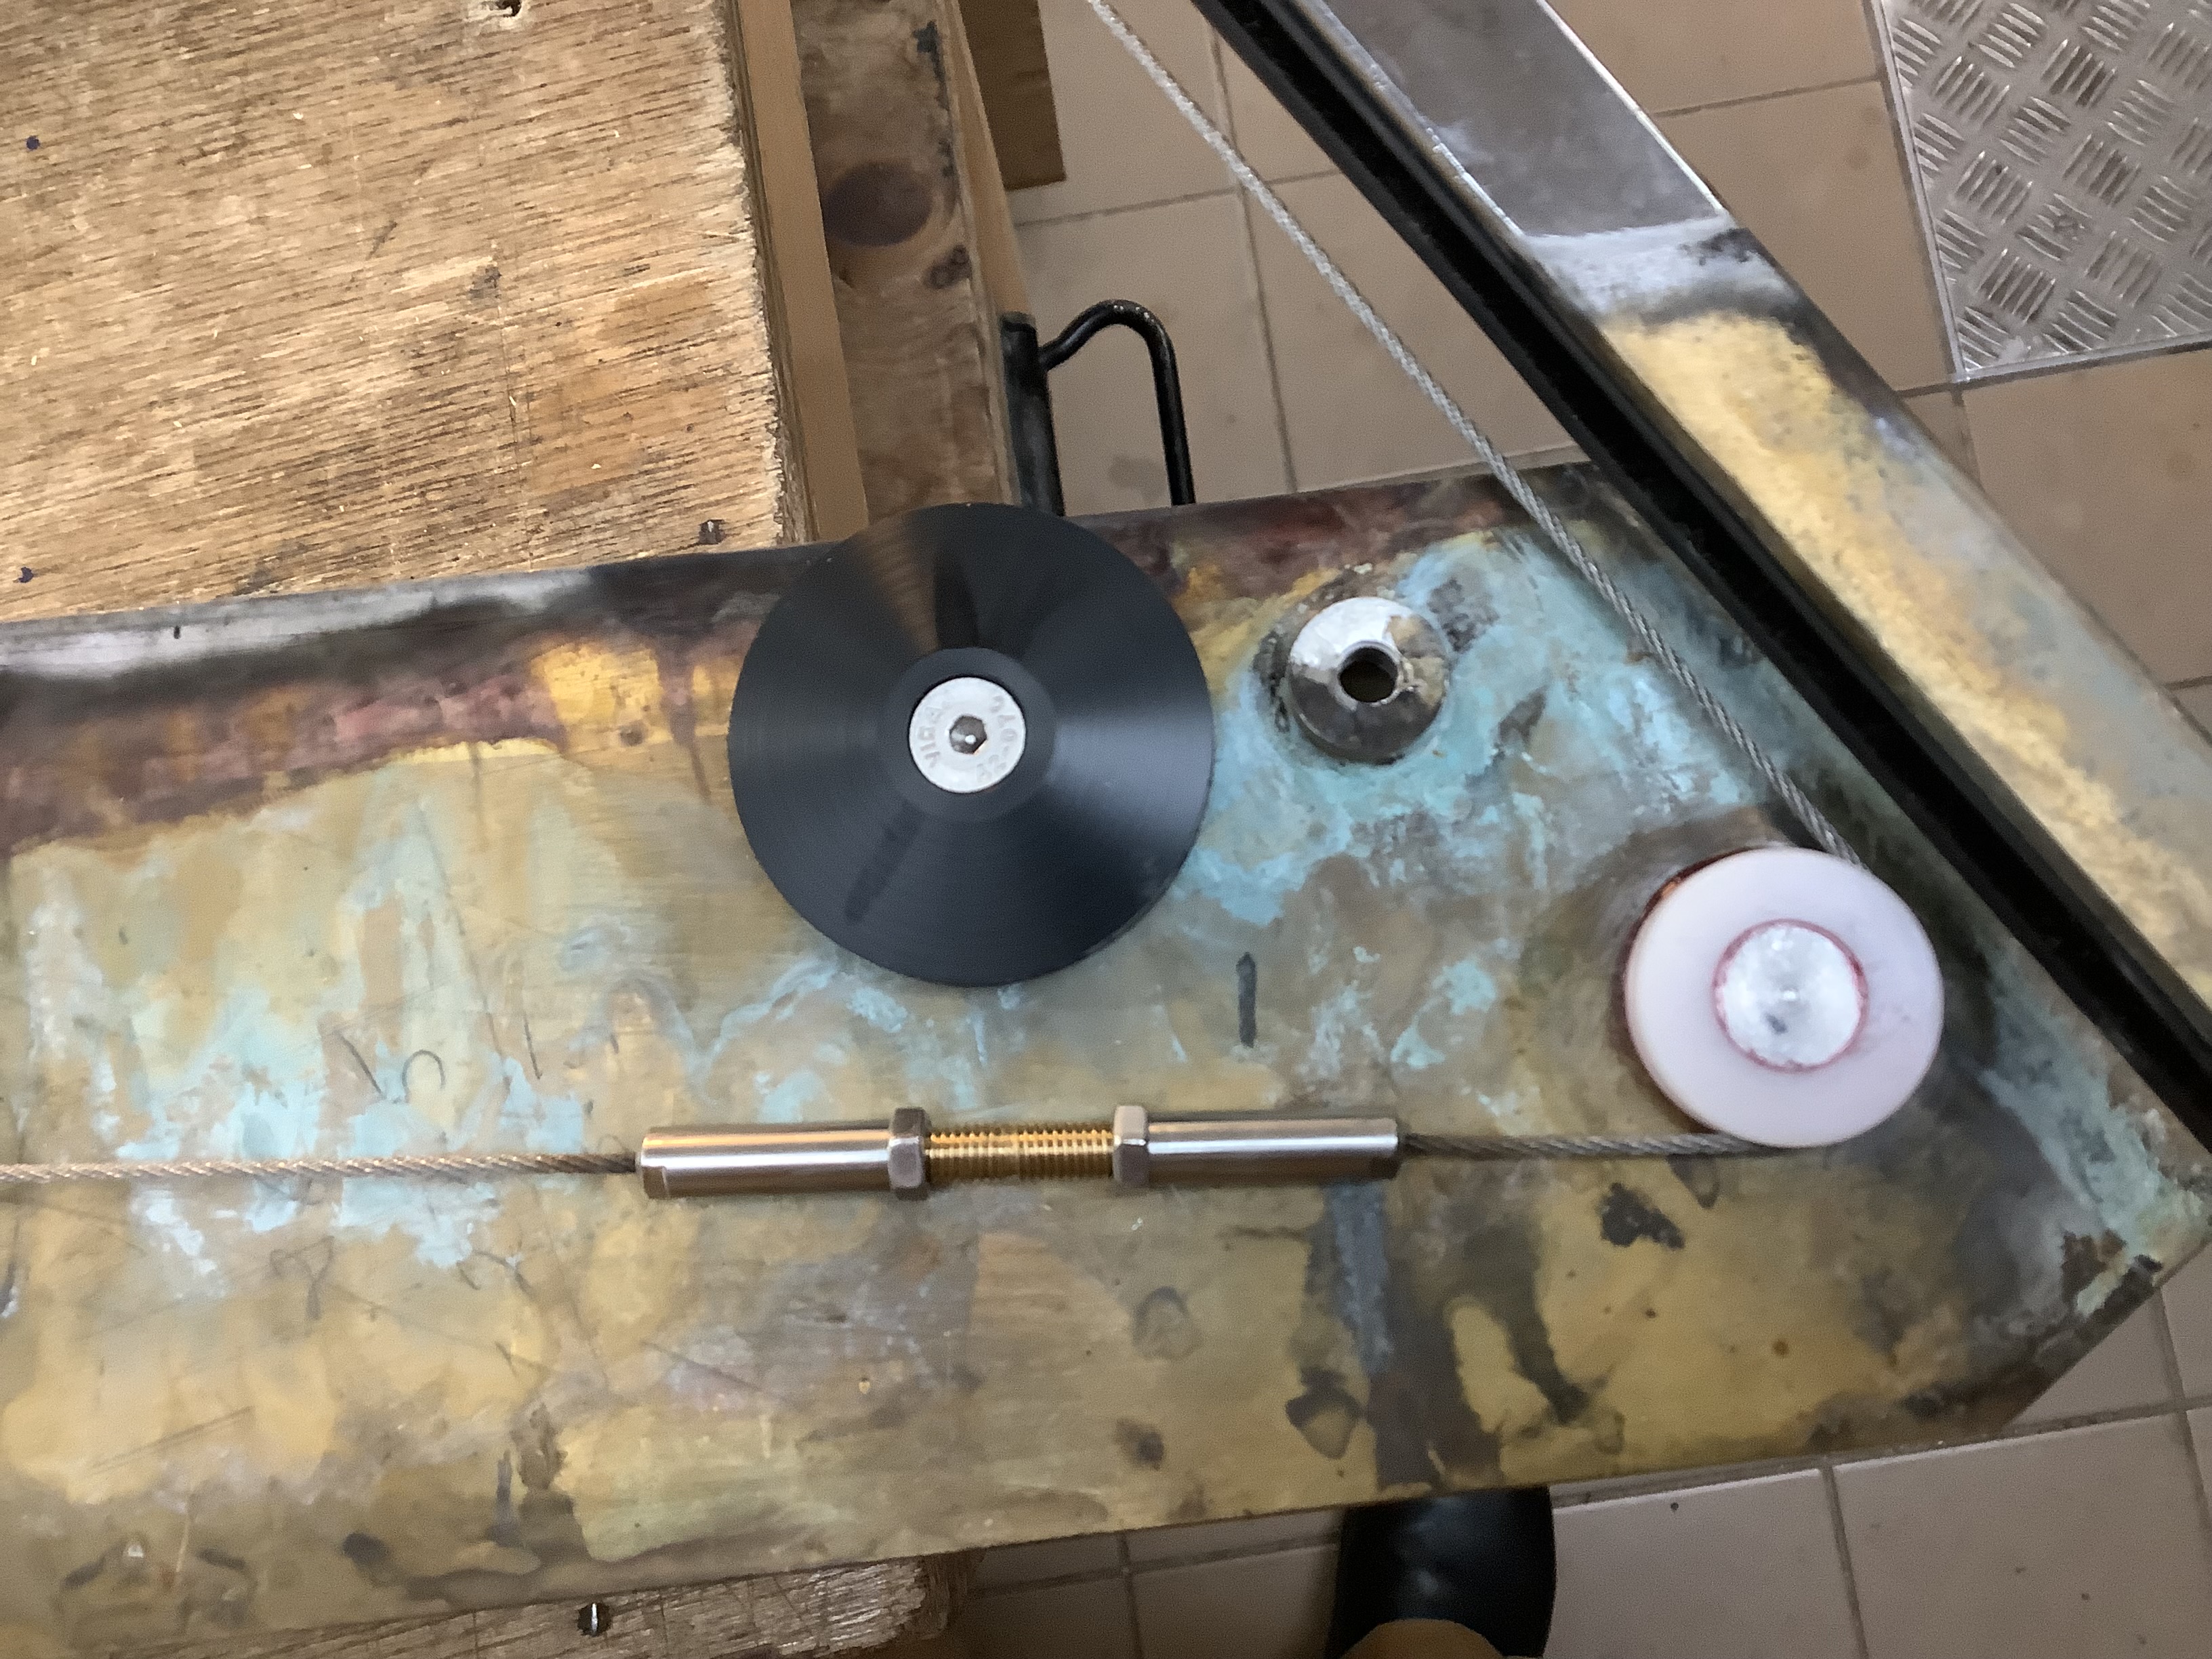
Eric my cancer is inoperable but I have been very fortunate with long term management. Like you I think the lotus wire rope affair needed improvement. I have replaced all the sheaves making them a little larger to reduce the bending of the rope, they should be larger still but there is insufficient room. I have also increased the size of the rope drum as much as there is room for and altered the rope attachment. One should not knot wire rope. My solution to the rope joint and rope securing to the glass is a small turnbuckle which enables the rope to be tensioned without risk to the glass. If I can work out how to take and attach photos I will include some.
Hi Richard,
Sorry to hear about the cancer. having something to work on, even something difficult helps you along the way.
I am curious to see how your fixing to the glass works.
As you start to reply to this a row of icons appears above the text.
One is a strange unfamiliar (to me) one with an arrow pointing upwards from the middle. This will take you to your files on the computer and your photos. It seems like you have a result anyway.
Well done
Eric
I don’t know what I am doing here but when I checked my post there were no images but I sent it anyhow and then the images appeared and now I cannot work out how to add text to the images.
Will try again.
Years ago there was a man in our group who would sign off apologising for his poor spelling whilst also listing the various things he could do. Computer technology for me is rather like spelling for him. I took early retirement partly because I couldn’t adapt.
You have done very well there and there is no need for apologies.
The tensioner looks great.
With the ones I make you have to pull both ends of the cable where they go through one of the clamp screws while someone else tightens the internal grub screw. It works very well but yours looks neater. I found that two Molegrips is the best way to pull the ends.
I trust that wisteria arch is yours. My wife is a keen gardener, when are you open?
Thanks for the photos,
Eric
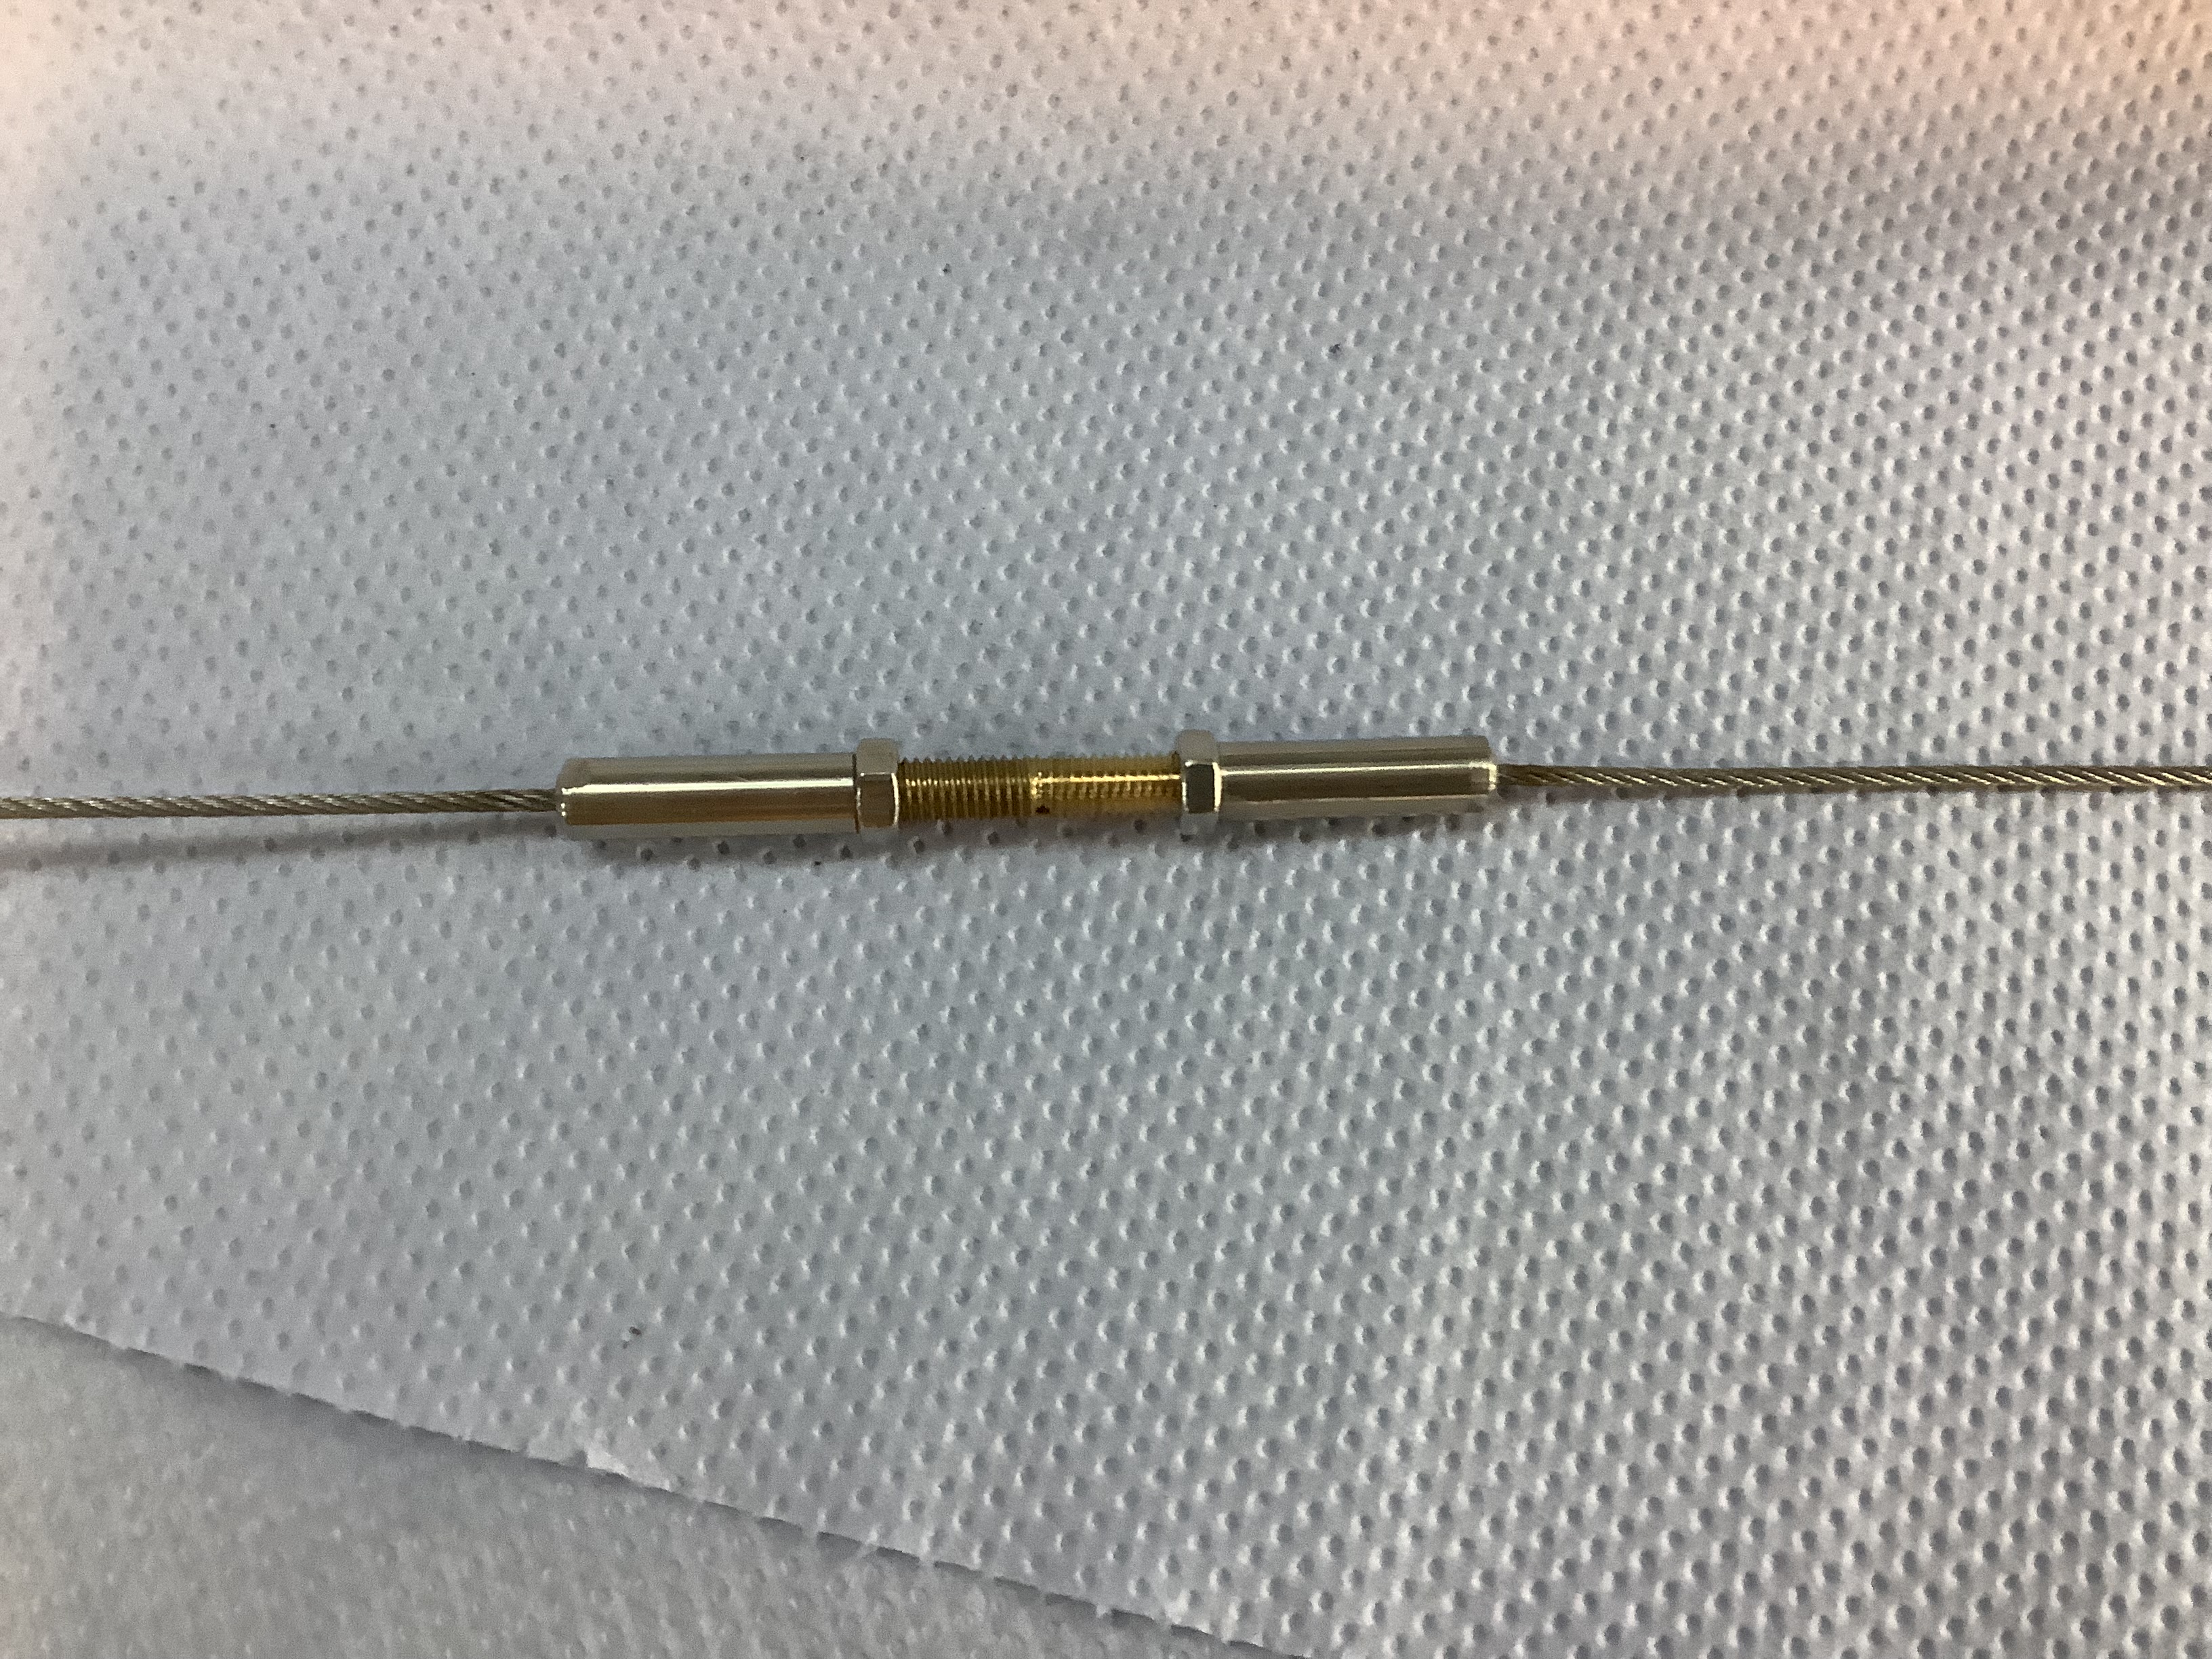
If I could work out how to add photos and text I would have said that I have used 1.5mm stainless wire rope with a brass nipple silver soldered to each end. The tensioner is made from 6mm diameter stainless round bar one half of which is drilled and tapped with an M5 right hand thread the other with an M5 left hand thread. I have filed flats on the outside of the round bar to fit a 6BA spanner. The brass bar that you can see in the centre has a right hand thread on one end and left hand thread on the other, in the gap between the left and right hand threads is a 1mm diameter hole for a tommy bar. I have used stainless and brass as they are unlikely to seize, and resist corrosion. With a spanner on each half of the stainless and a small bar through the brass item the wire rope can be tensioned without twisting.
Took 1/2 an hour to make the tool & made fitting the clips super easy. Before that I tried to use needle nose pliers & kept on dropping the clips inside the door cavity. Once on the door frame the felt seal just pushes onto the clips - easy!
Thanks for the help and information. I am doing this job with the frames out of the doors and on the bench. I think the problem is mainly with my age and lack of strength.
Here is a photo of how I attach the glass to the rope. The photo is not large enough to see the detail, but I start with an M6 hex set screw, I then screw a nut onto the screw and drill a hole between the head of the screw and the nut. This produces half a hole, that make sense, in the head of the set screw. I then slim the head of the screw until it is similar in thickness to the original screw and clears all the stationary parts of the window frame. The rope can then be clamped by a thin nut without fear of breaking the glass or fighting to tension the rope. Then I put a washer on top of the thin nut and thin rubber washer between the steel washer and the glass. I made a plastic bush to line the hole in the glass, this was from a piece of plastic tube I had left over from a water softener, I don’t know what plastic it is. On the other side of the glass is a rubber washer steel washer and nut. The nut does not need to be tight as the rope is clamped separately.
This is a photo of how I tension the wire rope. It consists of a piece of 5mm diameter brass with a left hand thread on one end and a right hand thread on the other end. In the centre is a 1mm diameter hole for a small tommy bar. The left and right hand lock nuts are 7mm af to provide clearance. The cylindrical bits are from 6mm diameter bar with an M5 left hand thread in one and M5 right hand thread in the other. Each piece has flats filed on it for a 6BA spanner which enable the cylindrical bit to be held still while the brass bit is turned.
I have soldered brass nipples onto the ends of the rope. All this enables the glass to be mounted separately and the wire to be be tensioned without twisting or risking damage to the glass.
As for your request for photos, it took my daughter amatter of a few minutes and point out to me a little icon of a computer monitor thatihad not noticed or clicked on.
I seem to have lost the first photo I will try and add again, apologies if you get two.
Hi Richard,
I understand how your clamp stud works now. That looks quite ingenious and a neat job. As you say the nut does not need to be tight I assume it is fixed with loctite or something similar.
The ones I make for Sue Miller have an internal grub screw to clamp the cable and a Nyloc nut. As I wanted to use brass I was not confident that M6 thread was strong enough when it had a 3mm cross drilling through it. So the plain shank is a little larger than M6.
Well done that man
Cheers
Eric
On my car about the only things that were not rusted were because they were fibre glass. The window frame fittings inside the door are stainless or brass with the intention that whoever takes it apart next will be able to so.