That’s why the top half of mine is bright yellow! ![]()
I once saw an ambulance going slowly down the road, lights flashing, hi-lo siren on. Cars were pulling over left and right except one Gent toodling along just ahead of the ambulance. Finally the loudspeaker blared,
“THEY’RE PULLING OVER FOR US NOT YOU!”
I don’t understand the current fashion for road-colored cars but people have to look before they can see any color.
Bill,
My car is also bright yellow. After decades of yellow, I thought I’d make a change to something else that is bright.
Colorado Orange is another possibility. I also have some fiberglass damage at the front of the car that needs to be repaired.
USA64,
That’s a funny story about the guy driving ahead of ambulance. I don’t care for most new car colors much either. Dodge has some nice bright colors on the Challenger. One them is called White Knuckle. ![]()
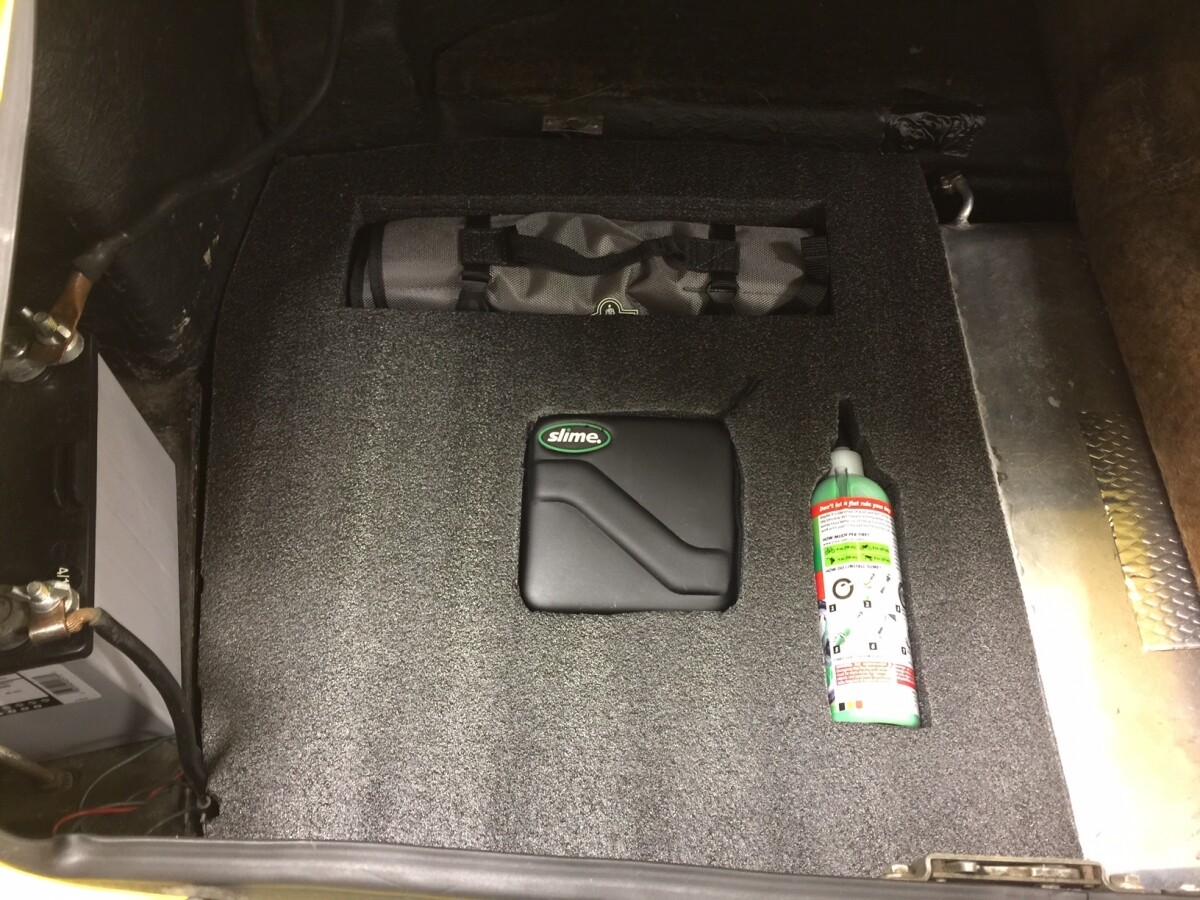
Given my car came without a jack, I decided to ditch the spare tire and replace it with a small air compressor and Slime tire sealant for tube-type tires (XAS FF go on later this week). To keep those items from moving around when underway and to offset the cabin noise increase resulting from removing the spare, the spare tire well was filled with 3 layers of 2-1/4? foam and voids were cut to tightly hold those parts in place. A void was also cut for a tool roll since…well, it’s a Lotus and I might need tools to get home. Net savings sans tool roll is over 24 lb, and everything is hidden from site with the boot floor covering in place.
-John
Graeme, I’m at same stage as you with 26R, cage fitting into new shell. Who’s making yours seems to have adopted same thinking as I have with rear legs to top out rear turrets to improve angle ab=nd allow main hoop to move back for my height.
What colour is the car going to be?
Merry Xmas
V
My S3 Coupe hasn?t been on the road for 20 years, but I?ve always kept it running and driving. This summer, it wouldn?t start, and with no petrol getting up to the carburettors it was obvious that the pump had to be sorted. Also, the brake pedal went straight to the floor, as did the clutch pedal, so some work was needed on the hydraulics.
The first horror I found after taking the carburettors off was the state of the petrol pipe (pump to carburettors). It?s one of the SS braided types that I fitted about 12 years ago. The rubber inside had turned to chewing gum, and it would have seeped petrol from several places if the pump had been working! I guess that this is down to having ethanol in the petrol, but it was a good lesson to only use the high-octane non-ethanol petrol from now on. Check out your pipes!
The petrol pump was overhauled, once I?d got it out. What a pig of a job. With just a ? inch gap between the pump and the body, it takes a bit of patience and fiddling. Getting it back in was worse, and took nearly 2 hours to fit the tank to pump pipe and the two bolts that hold the pump to the block.
The master cylinder caps had seized onto the bodies, and were wrecked in getting them off. The cylinders are very easy to get off and were overhauled on the bench in a few minutes, and put back on. The clutch slave was a different matter! That had seized onto the bell housing, and with the exhaust in place, it?s just about impossible to get any leverage on the thing to twist it.
Not wanting to move the exhaust, I though it would be easier to re-build the slave in-situ. And it was! The only tricky bit was getting the pushrod out, as the adjustment isn?t quite long enough for it to come out without pushing the clutch arm in, and they are very strong. But it came out after jacking the clutch arm forward, and the slave overhauled. I then added an extra few turns of thread onto the rod so that it could (just) be put pack in without having to push the clutch arm.
The calipers were all played with to ensure all the pistons worked properly, and the systems bled. The car now had a clutch and brakes.
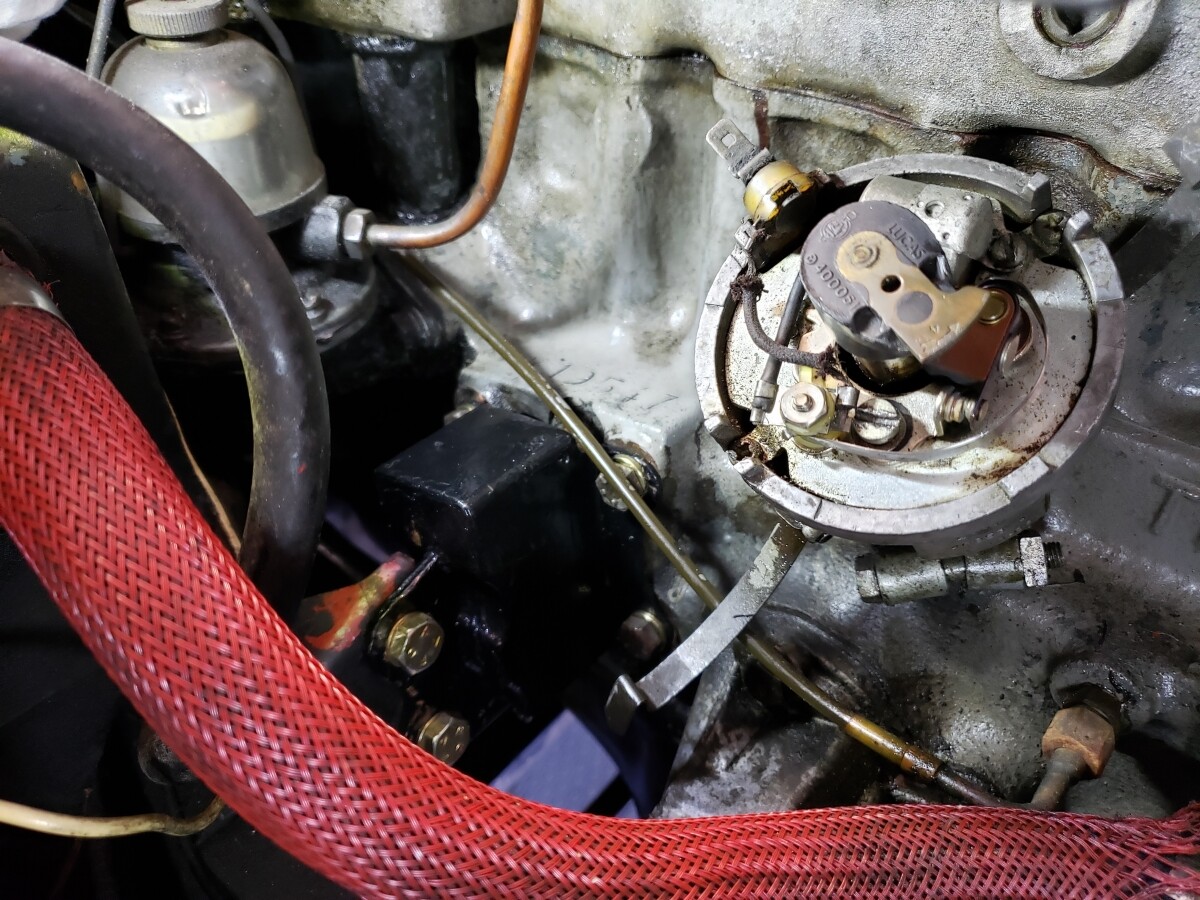
The carburettors were cleaned, new points, condenser, coil, rotor arm fitted, and the car started up like it had last been run yesterday. The clutch wasn?t even stuck, which was very surprising.
The work only took 10 hours or so over a few weeks (waiting for parts and doing other jobs). So if your car has been laid up for a while, and it was good when laid up, it’s not necessarily a big job to get it all running again. Next year the calipers with be overhauled / plated etc. by Classicar Automotive, and with new flexible pipes the hydraulics will all be sorted. Then it?s on to the Rotoflex couplings?.either new ones or solid drive shafts.
Doing this work on the S3 was just a fill-in job whilst waiting for things to be done on a full restoration I’ve taken on, but I?ve got my Mojo back for working on cars now. The S4 convertible is lined up to get it?s new chassis fitted next year, along with overhauling everything that goes onto the chassis, including the engine. It?s been off the road for more than 35 years now, so it won?t be such an easy job as the S3.
Mark
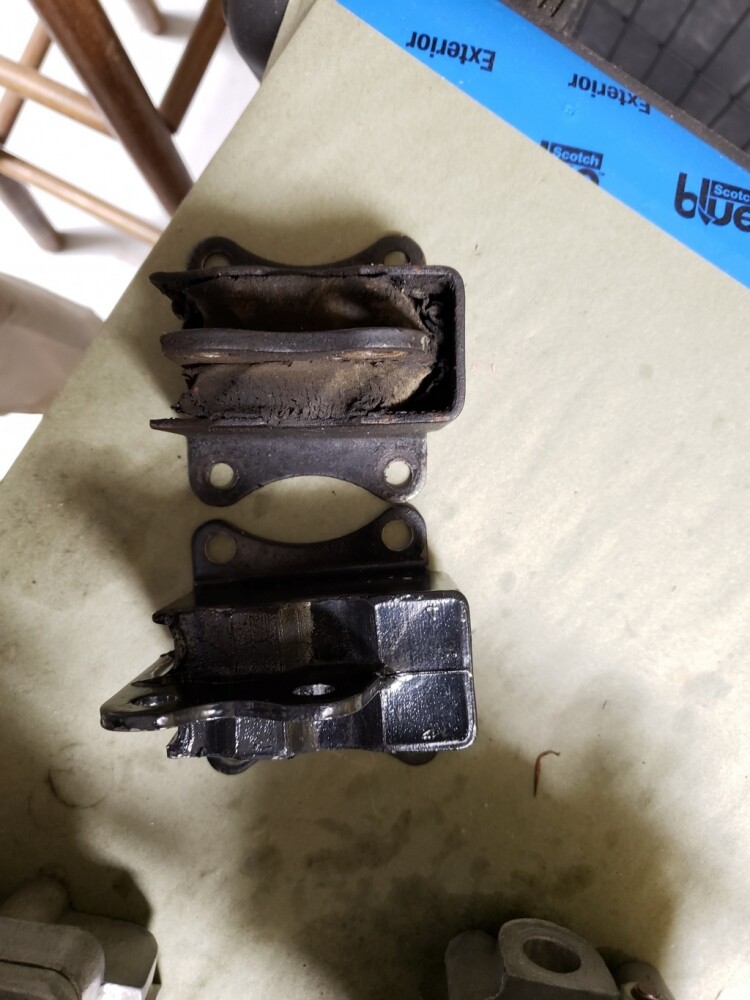
RHS motor mount. I need to figure out how to shrink my hands. LHS next, then start remounting carburettors.
Working on the front hubs for my Elite.
Does anybody have a diagram showing how the fan heater motor goes together? I think it’s the same Smith’s unit that was fitted to the Elan.
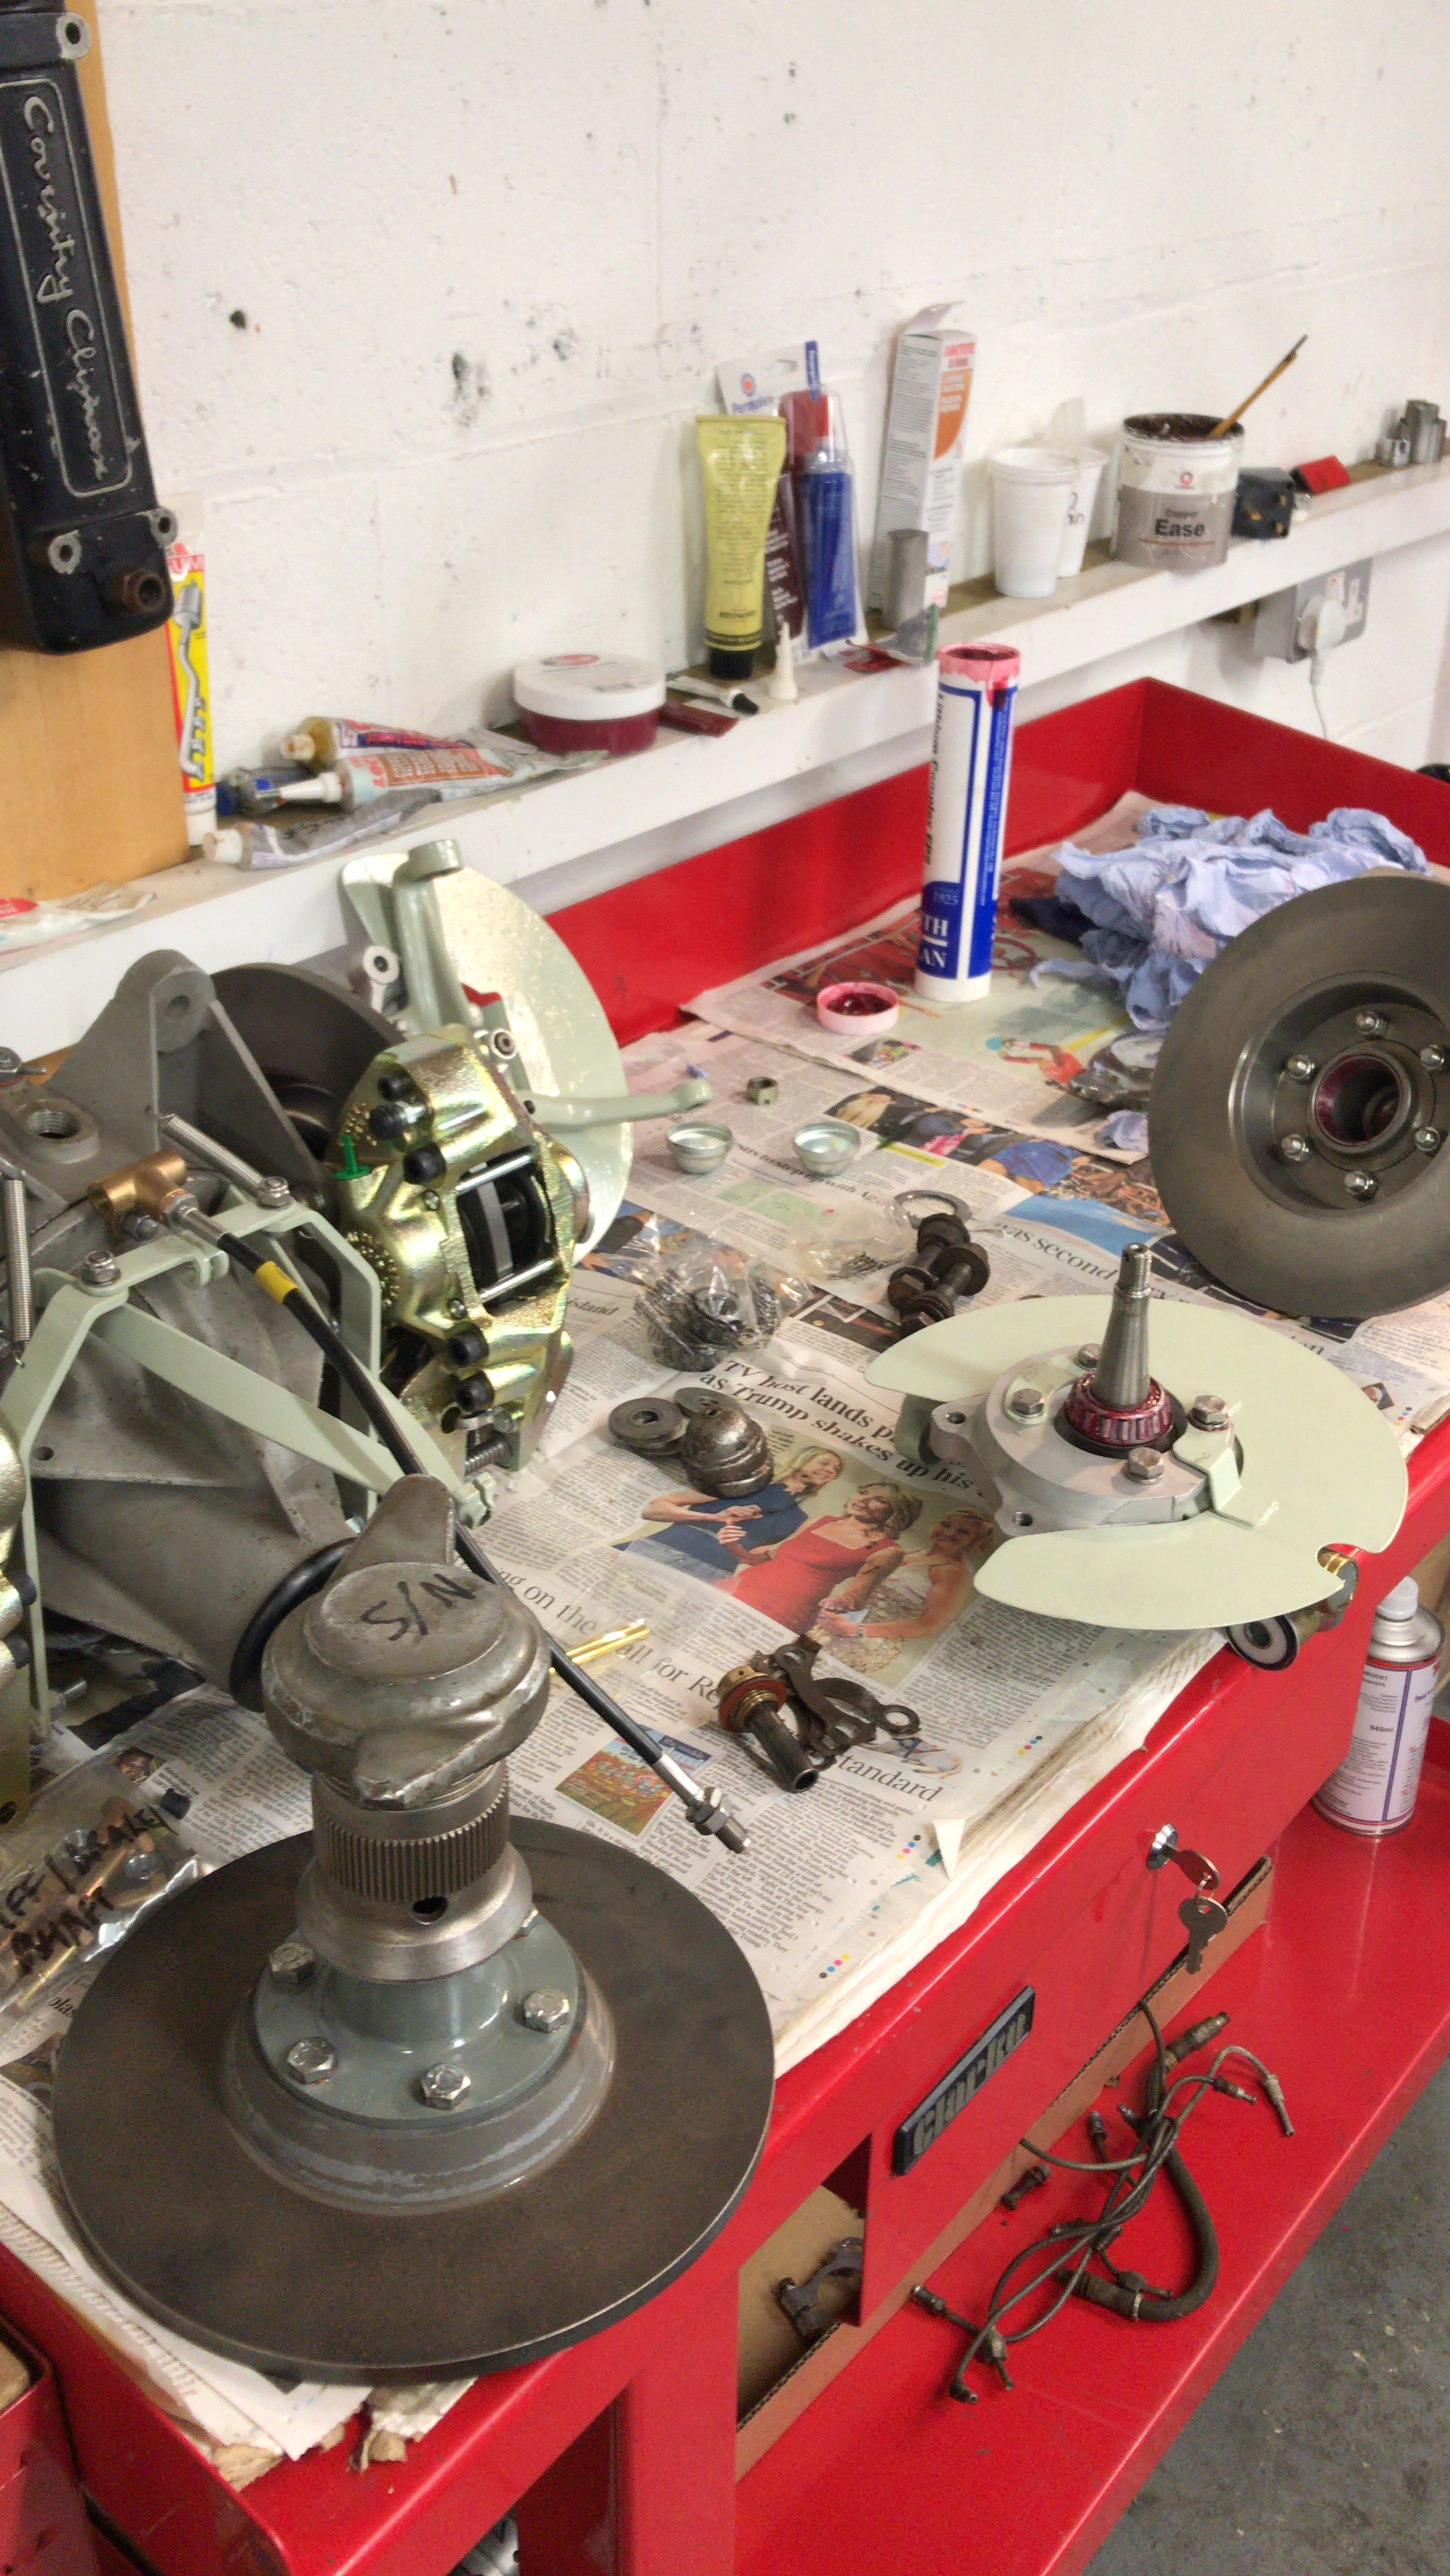
Another ‘not today but yesterday’ item was that I got the rear wishbones removed. I’ll need to enlist the aid of another chap to get the bushings out of them as the cross-pieces are too close to the ends to get the ends far enough into my press.
I also got the dirt-shields removed, possibly the last ones still fitted! ![]()
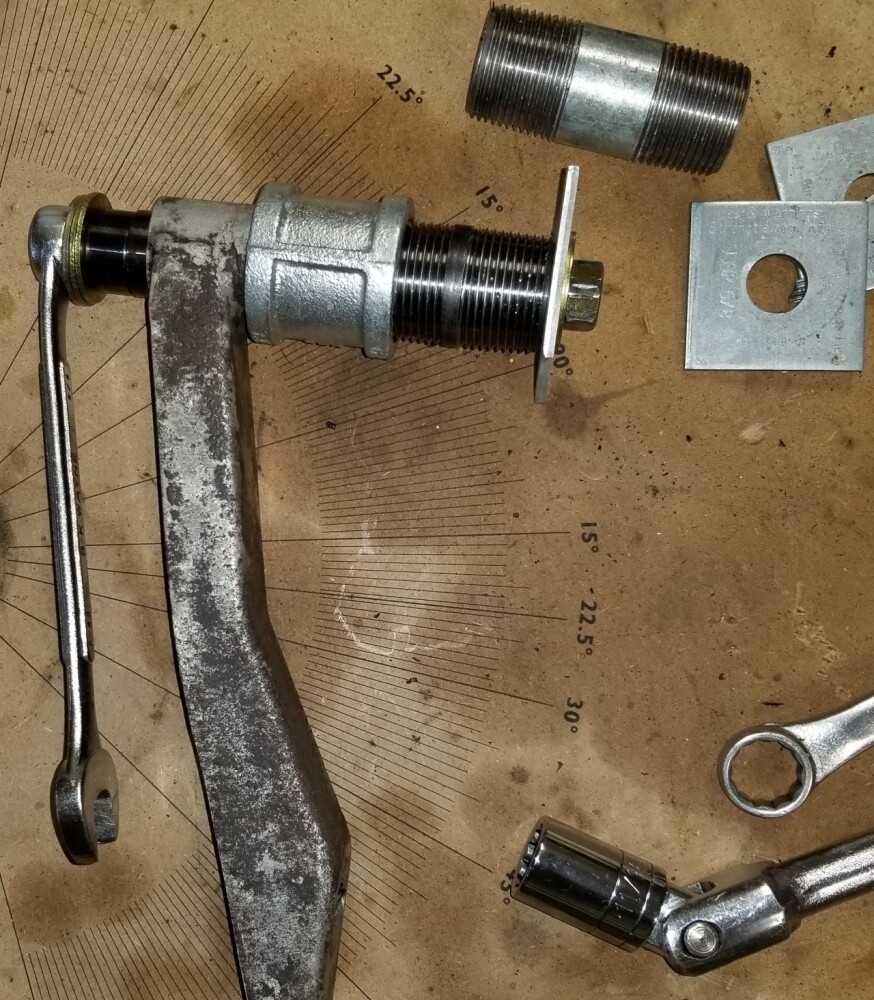
Veg - Make up something like this out of pipe spares, anchor plates, thick washers and a long 7/16 bolt - or run to HD and pick up what you need for less than $10. Grease the bolt, washers, and nut well to reduce friction and heat. This picture is in use on a front bone but the rear works with the same concept, just need a piece of pipe big enough for the bush to fit inside and small enough to have good contact with the wishbone. Mine needed some heat applied to get the moving - that plus a small cordless hammer drill had them sliding out pretty easily.
Soldered up and fitted a new throttle cable, after discovering that the existing one had completely seized - a strand of the cable had broken and completely unwound itself inside the sheath.
Paddy
This topic contains photos of the bush extractor/insertor that I made, many years ago when I had a functioning lathe.
lotus-suspension-f42/suspension-bush-removal-t16368.html#p290008
One pic from the list:

Graeme,
Glad to see you bought one. I posted the other year after helping them get the dims right for our cars.
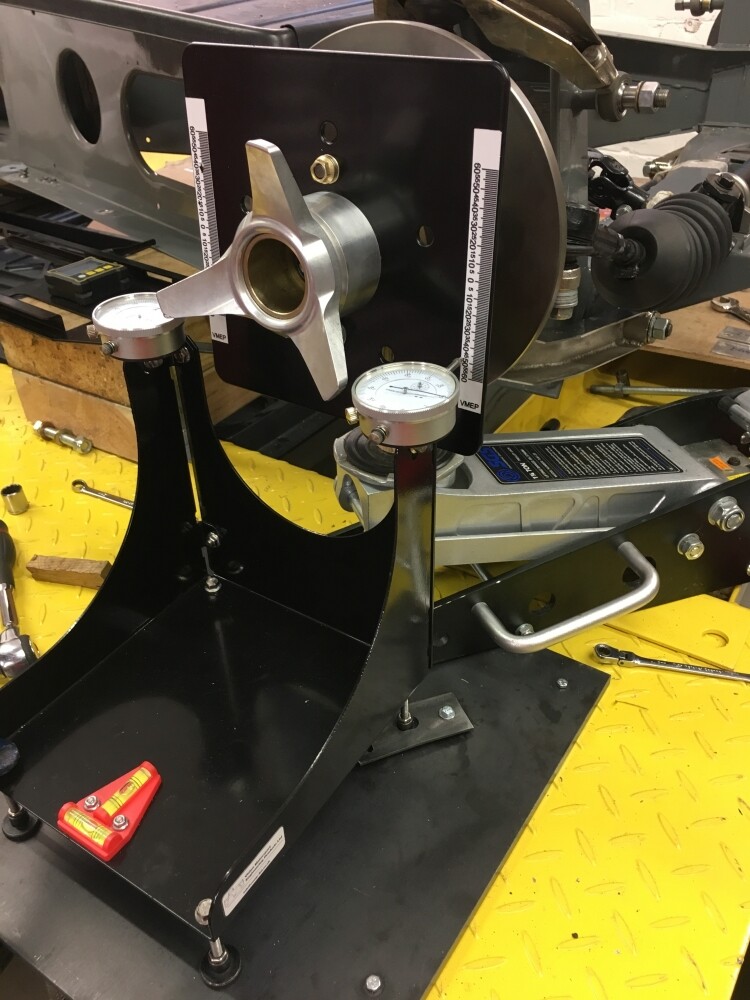
Quite interesting watching how much camber change there is from bump to droop. I know it makes it harder watching two clocks but once you get set up at ride height with the clock plungers mid postion you get to see everything as you go up and down.
Good luck. Did you see the little clevis i made bolted to a socket for consistent jacking without slipping and damaging wishbone paint. Cheers Mike
Replaced points, condenser, rotor, distributor cap, coil and shortened the spark plug wires in my S2. Then adjusted the timing. Purrs like a kitten.
It’s a great piece of kit. I’m jacking on a wooden stick to the hub so it pivots with the camber changes.
The hub plate is drilled for 26R hub and the 5 pin hub.
Graeme, Mike,
Who produces this adaptor and where is it available?
Cheers
V
V, if you you google VMEP bump gauge you will find the company VMEP.
Mike ![]()
I watched the you tube video and learned how easy it should be to install the wiper motor. That’s my next project on the S2 SE.
Also painted the engine covers base coat for the Elise. Red. Tomorrow will be to do the green, yellow and silver.
Frank
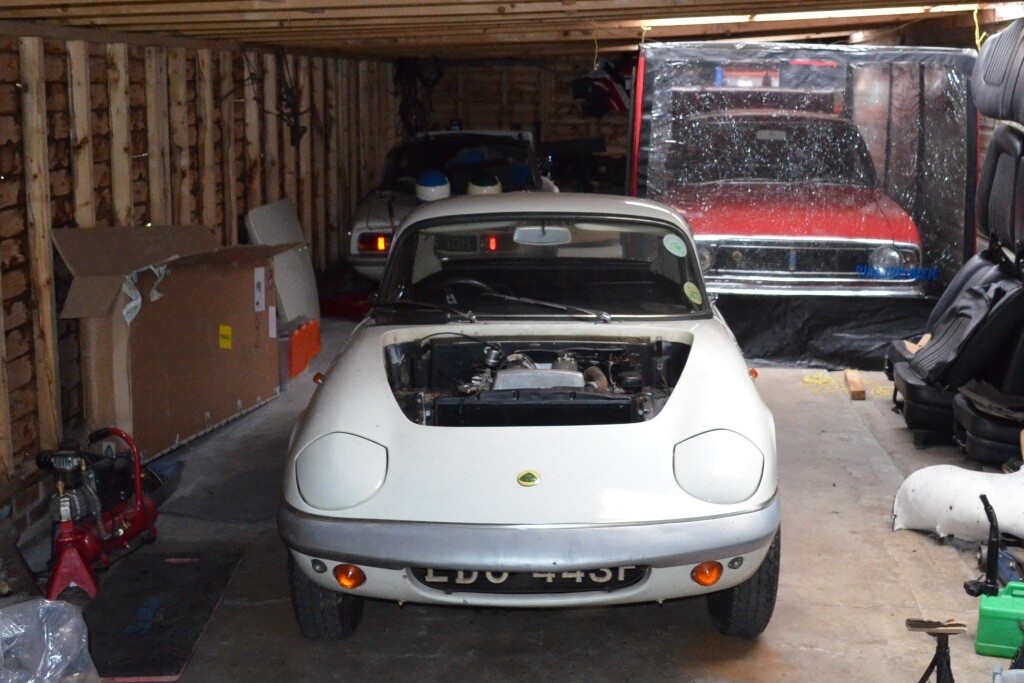
Took my Lotus 46, the S1 Europa for a run with the wife !
It’s set up more for hillclimbs than the road - so no heater or carpets.
Good fun
Kevin