wdb's S3 SE adventures

I’ve made threads about other cars I’ve owned and worked on, and although that does not seem to be as much of a norm on this forum I hope it will be accepted. I recently became caretaker of a 1967 Elan S3 SE DHC, purchased from its original owner. He put 80-ish thousand enthusiastic miles on the car under his tenure, including doing a bit of hillclimb racing and several long journeys across swaths of the US. It had literally been part of his family for almost 60 years. When I discuss its acquisition I use the word ‘adopted’ rather than ‘bought’ because that is what it feels like.

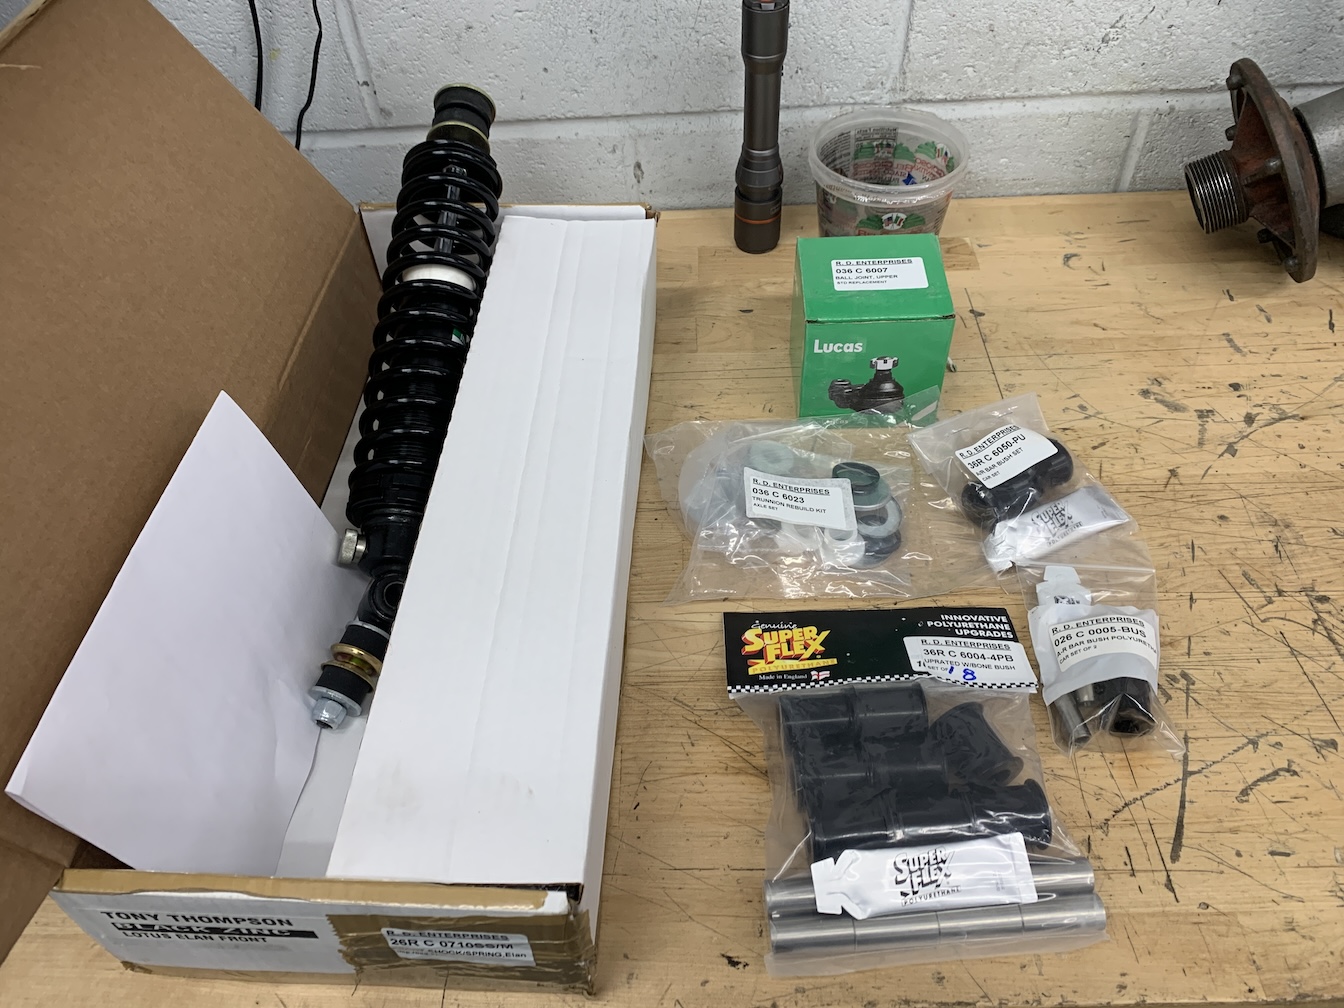
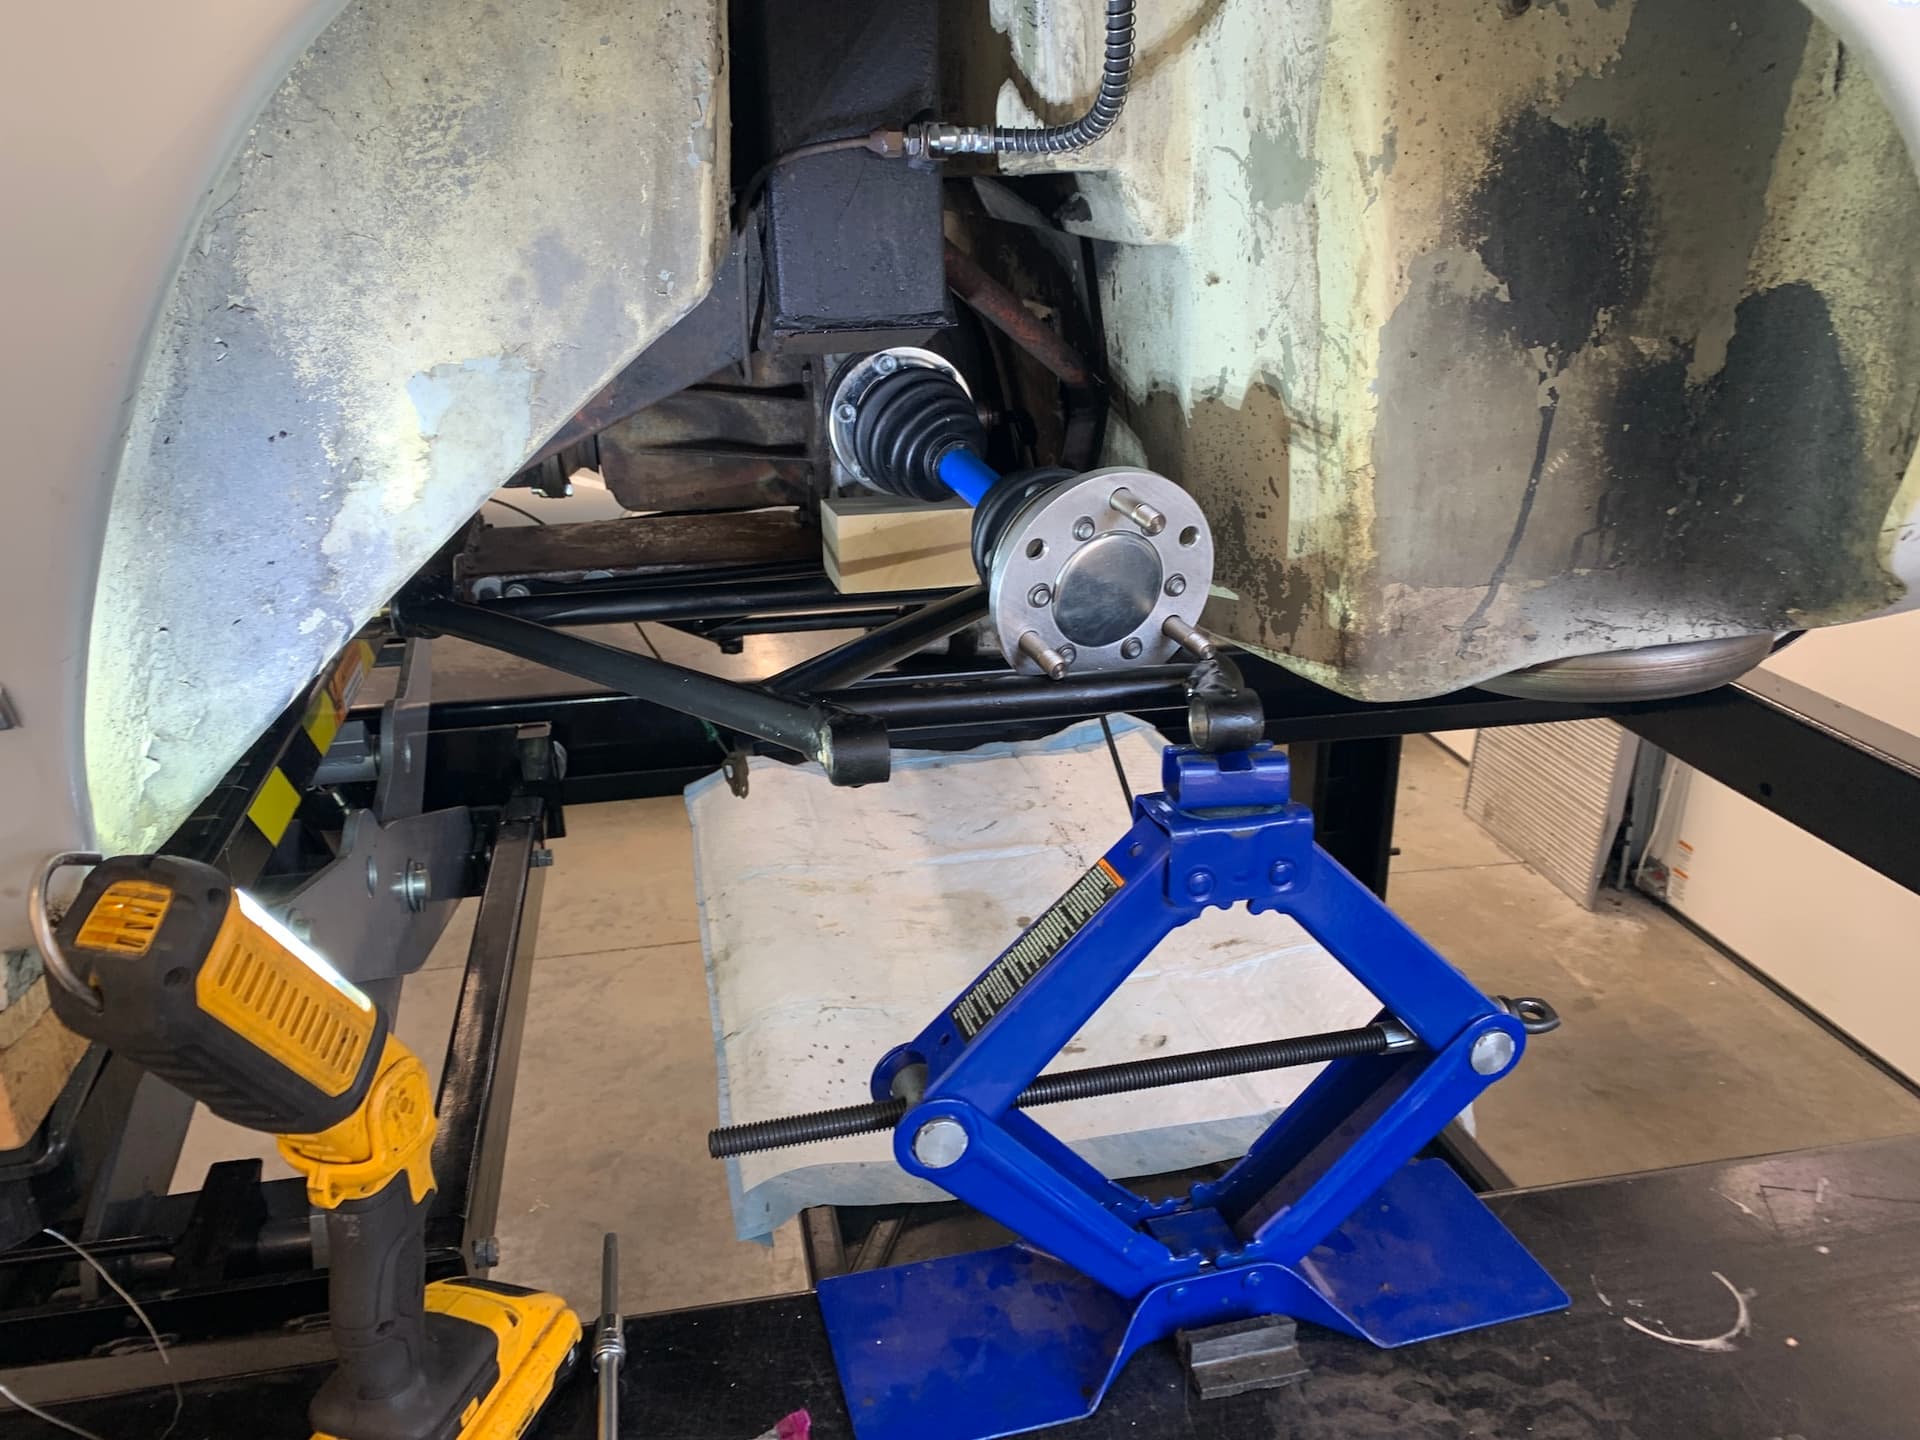
I’ll use this thread to document the work I do to the car as I go. My main objective – for now at least – is to bring the car back towards as-new mechanical performance while preserving as much as possible. The car is largely original, and had been well maintained by the original owner, so it still has its original paint for example. But 80K miles and 60-odd years is still a lot of use and so I have some work ahead.

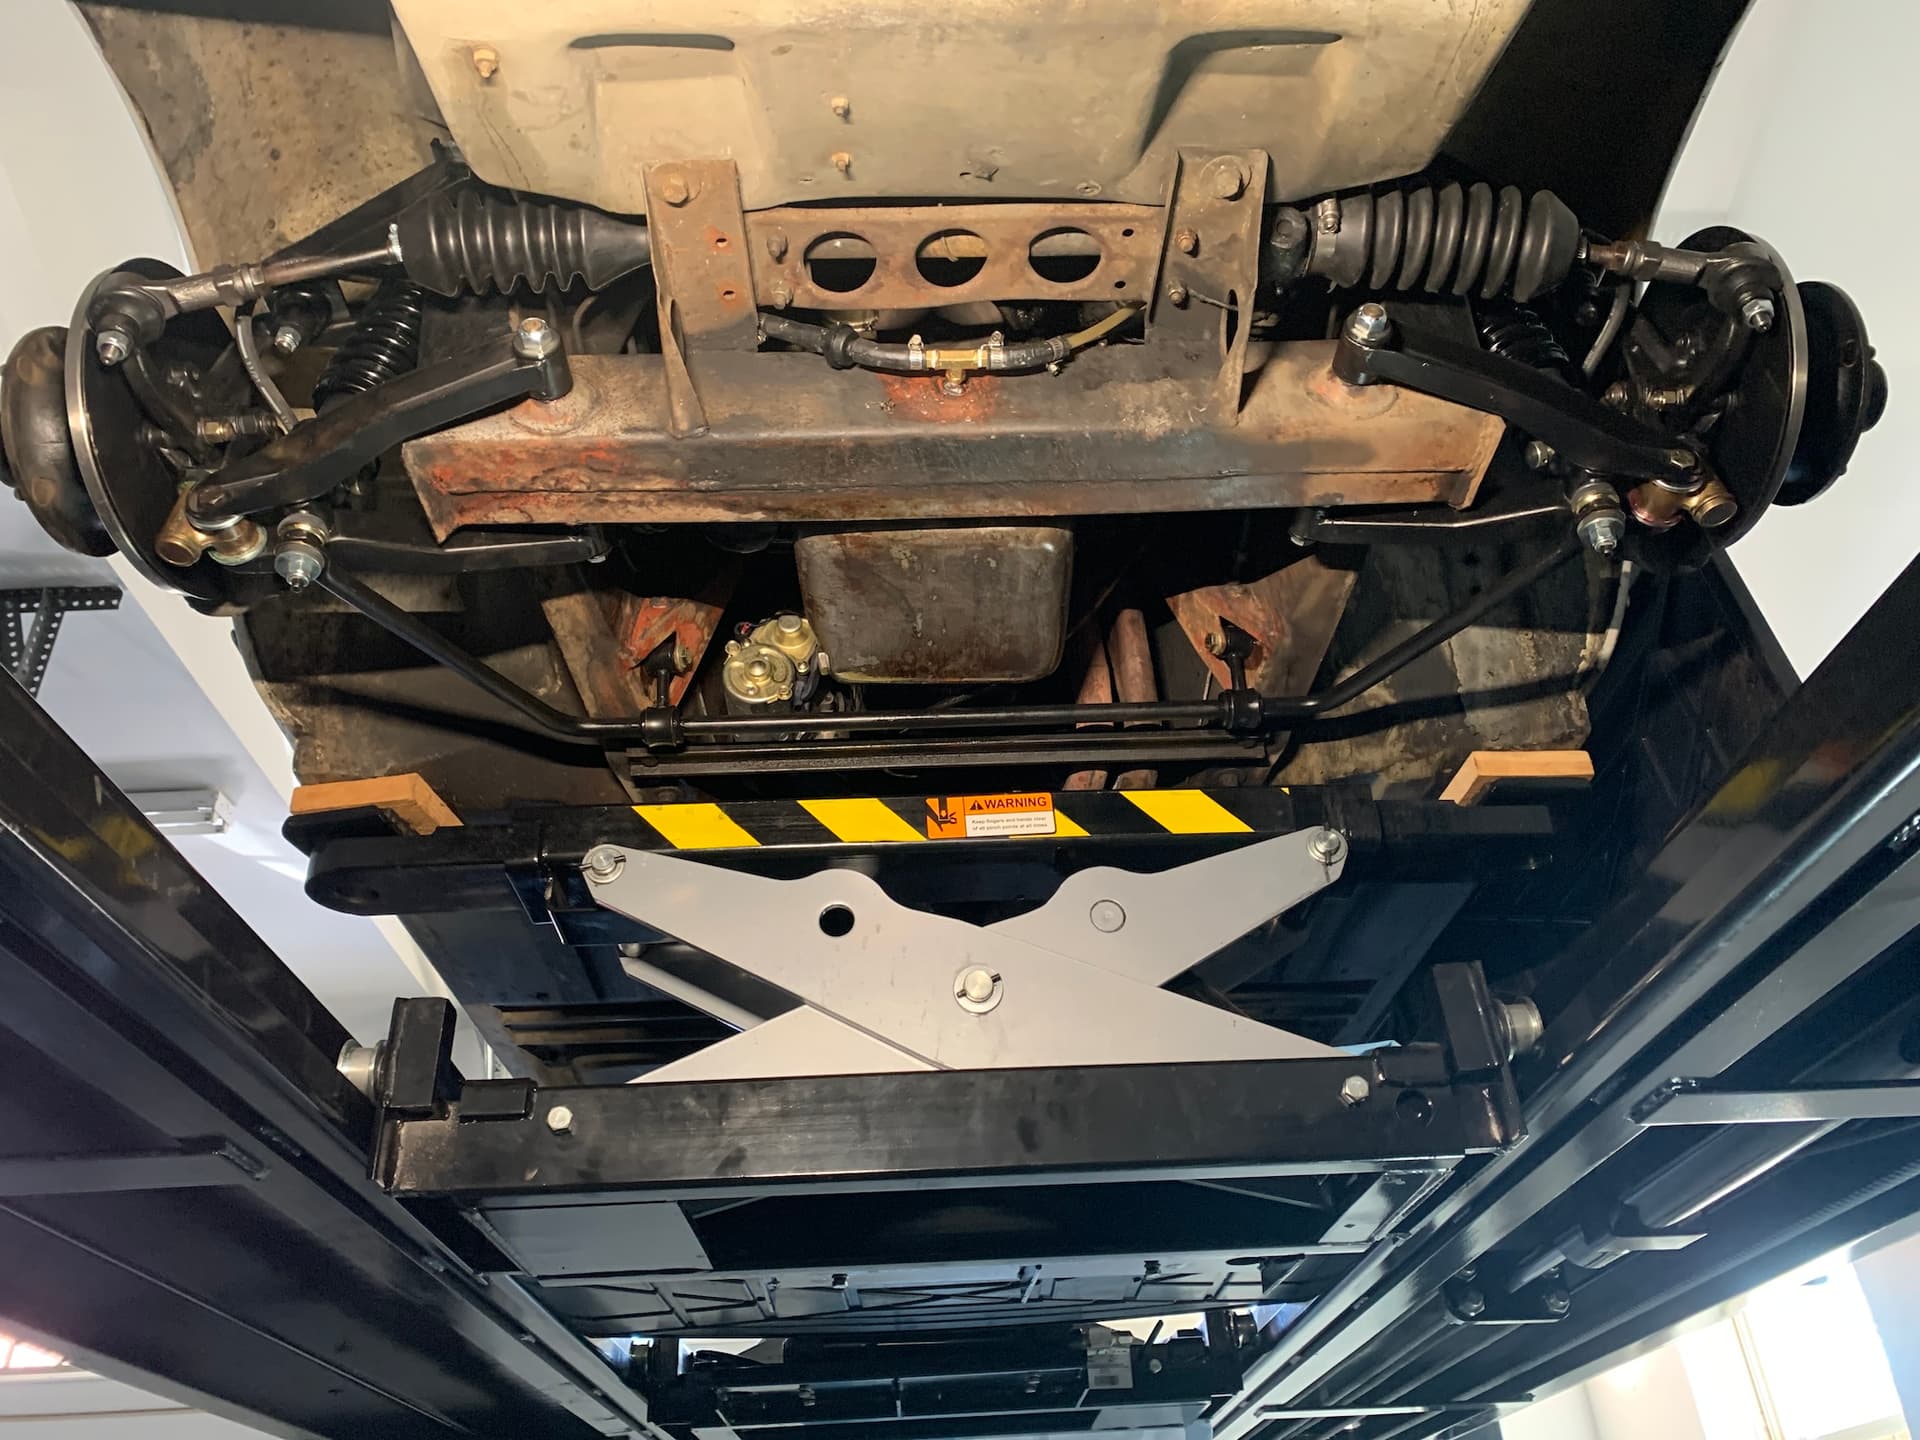
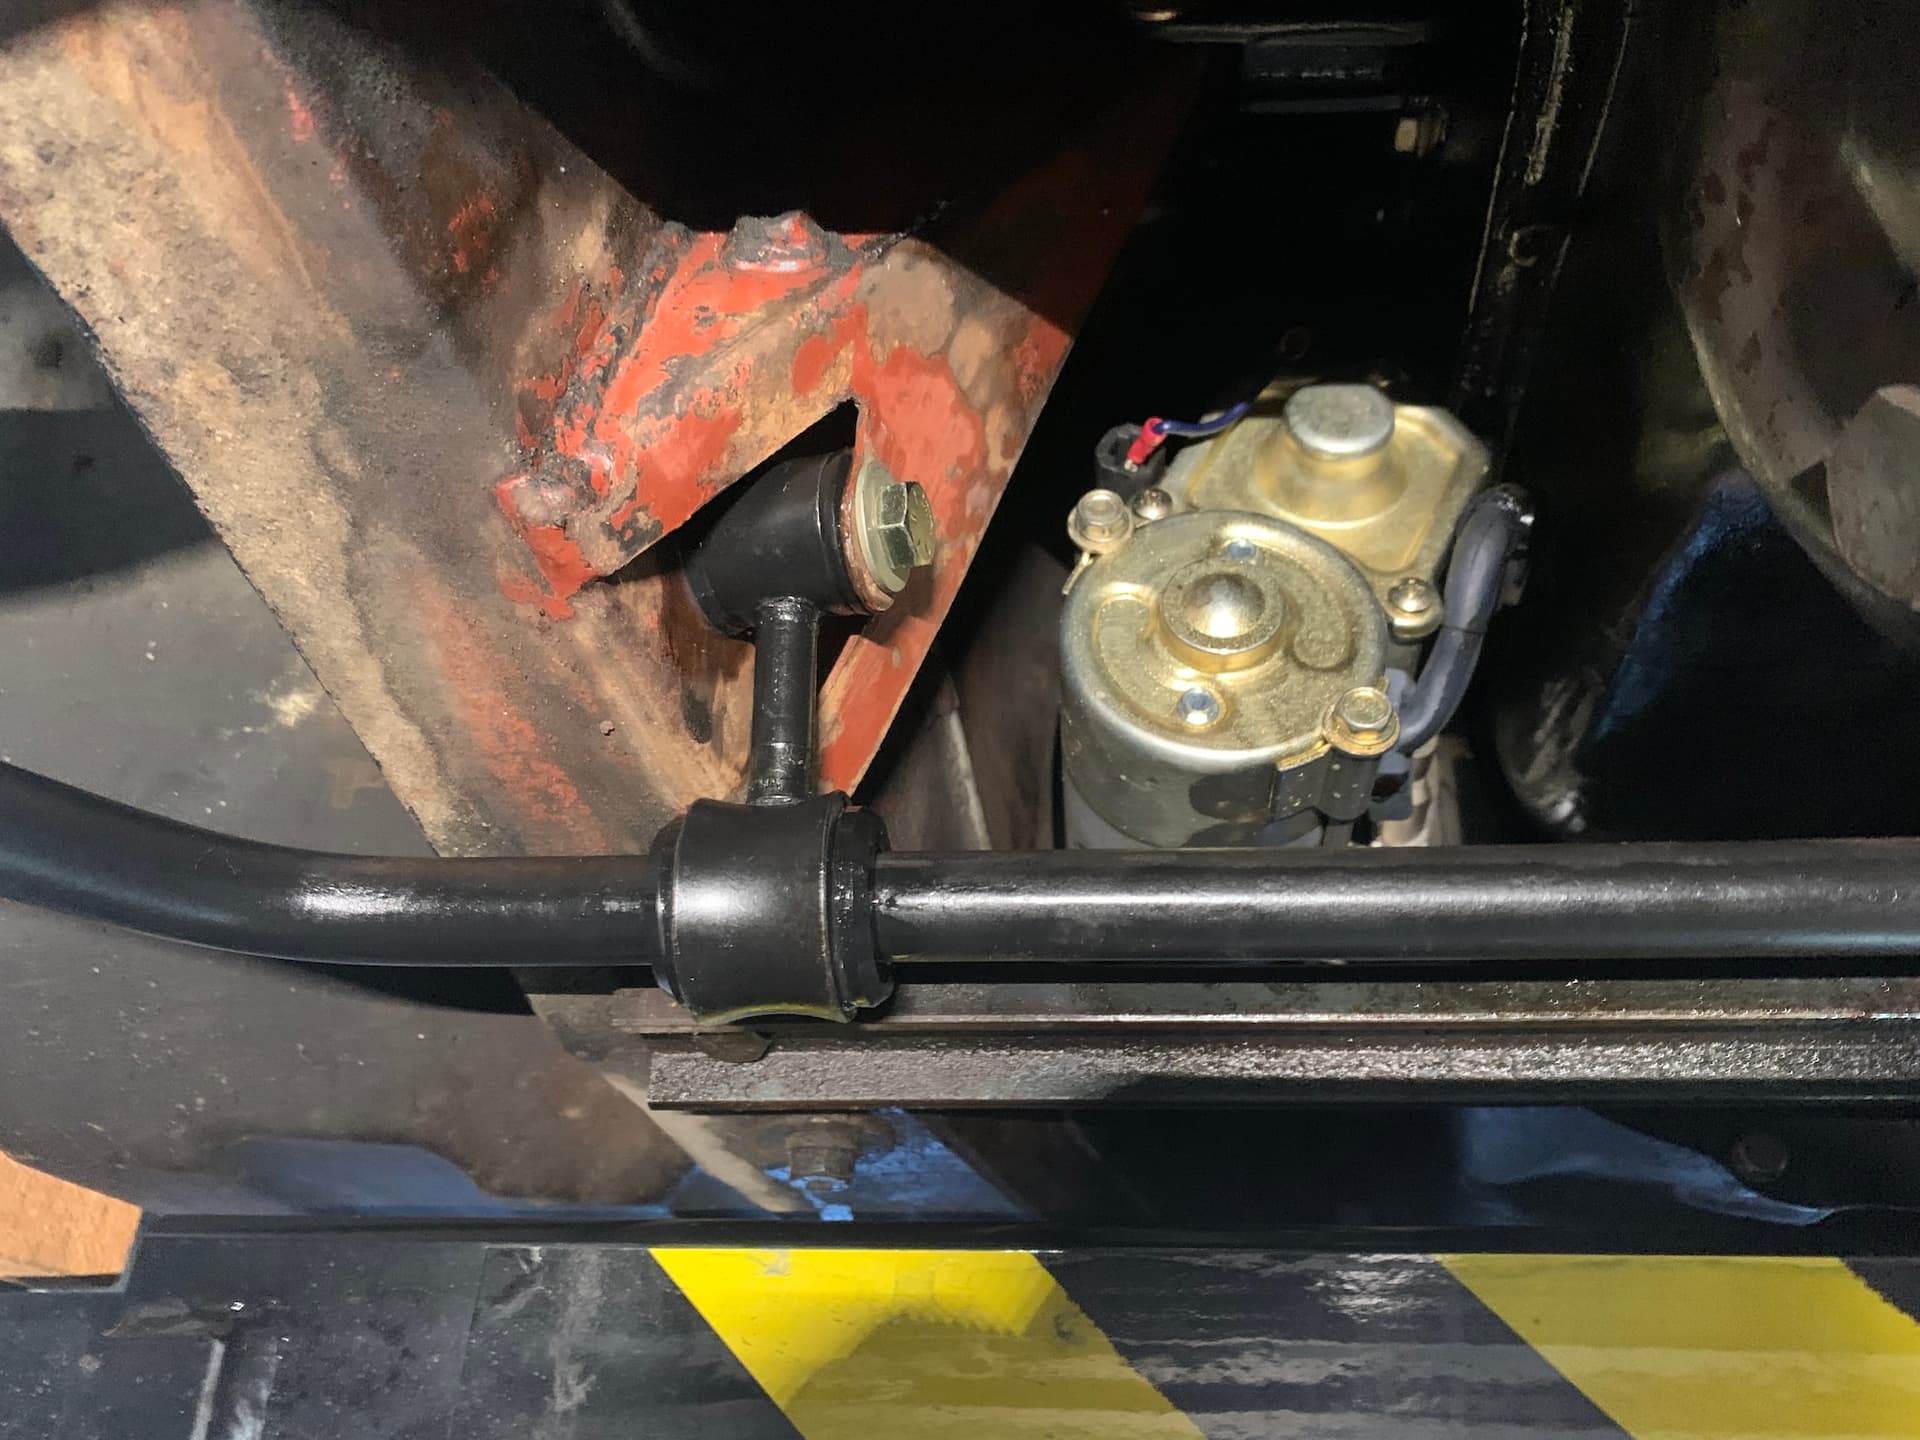
Here is the car in Al’s garage, before it came to reside with us. Yes he has a two post lift! It came in handy as we had to replace the LH motor mount and do some other things before I made the 1-1/2 hour drive back to my place.


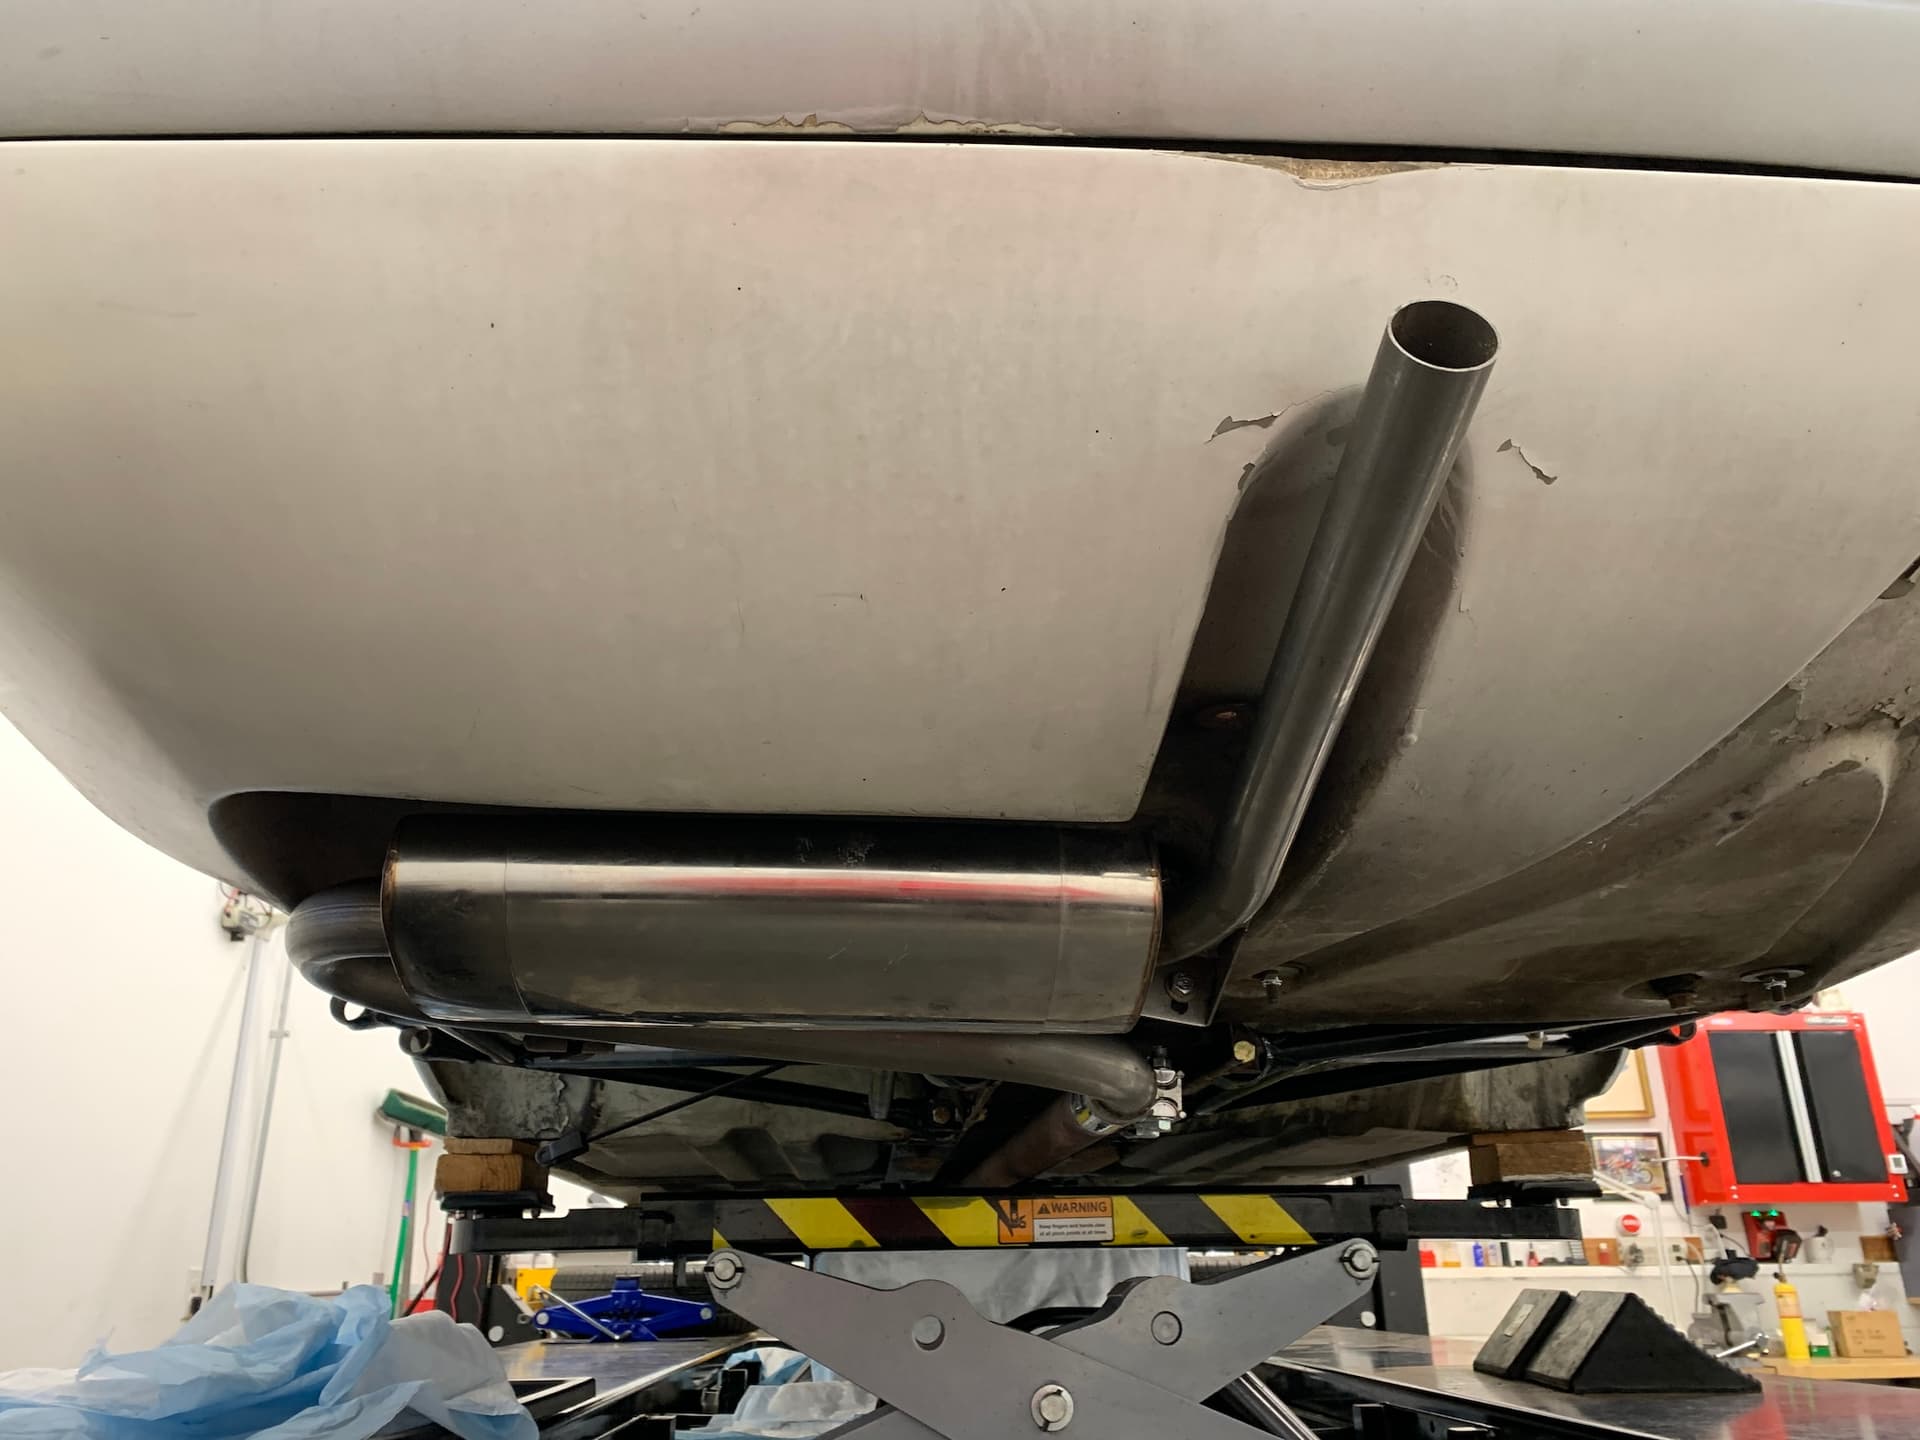
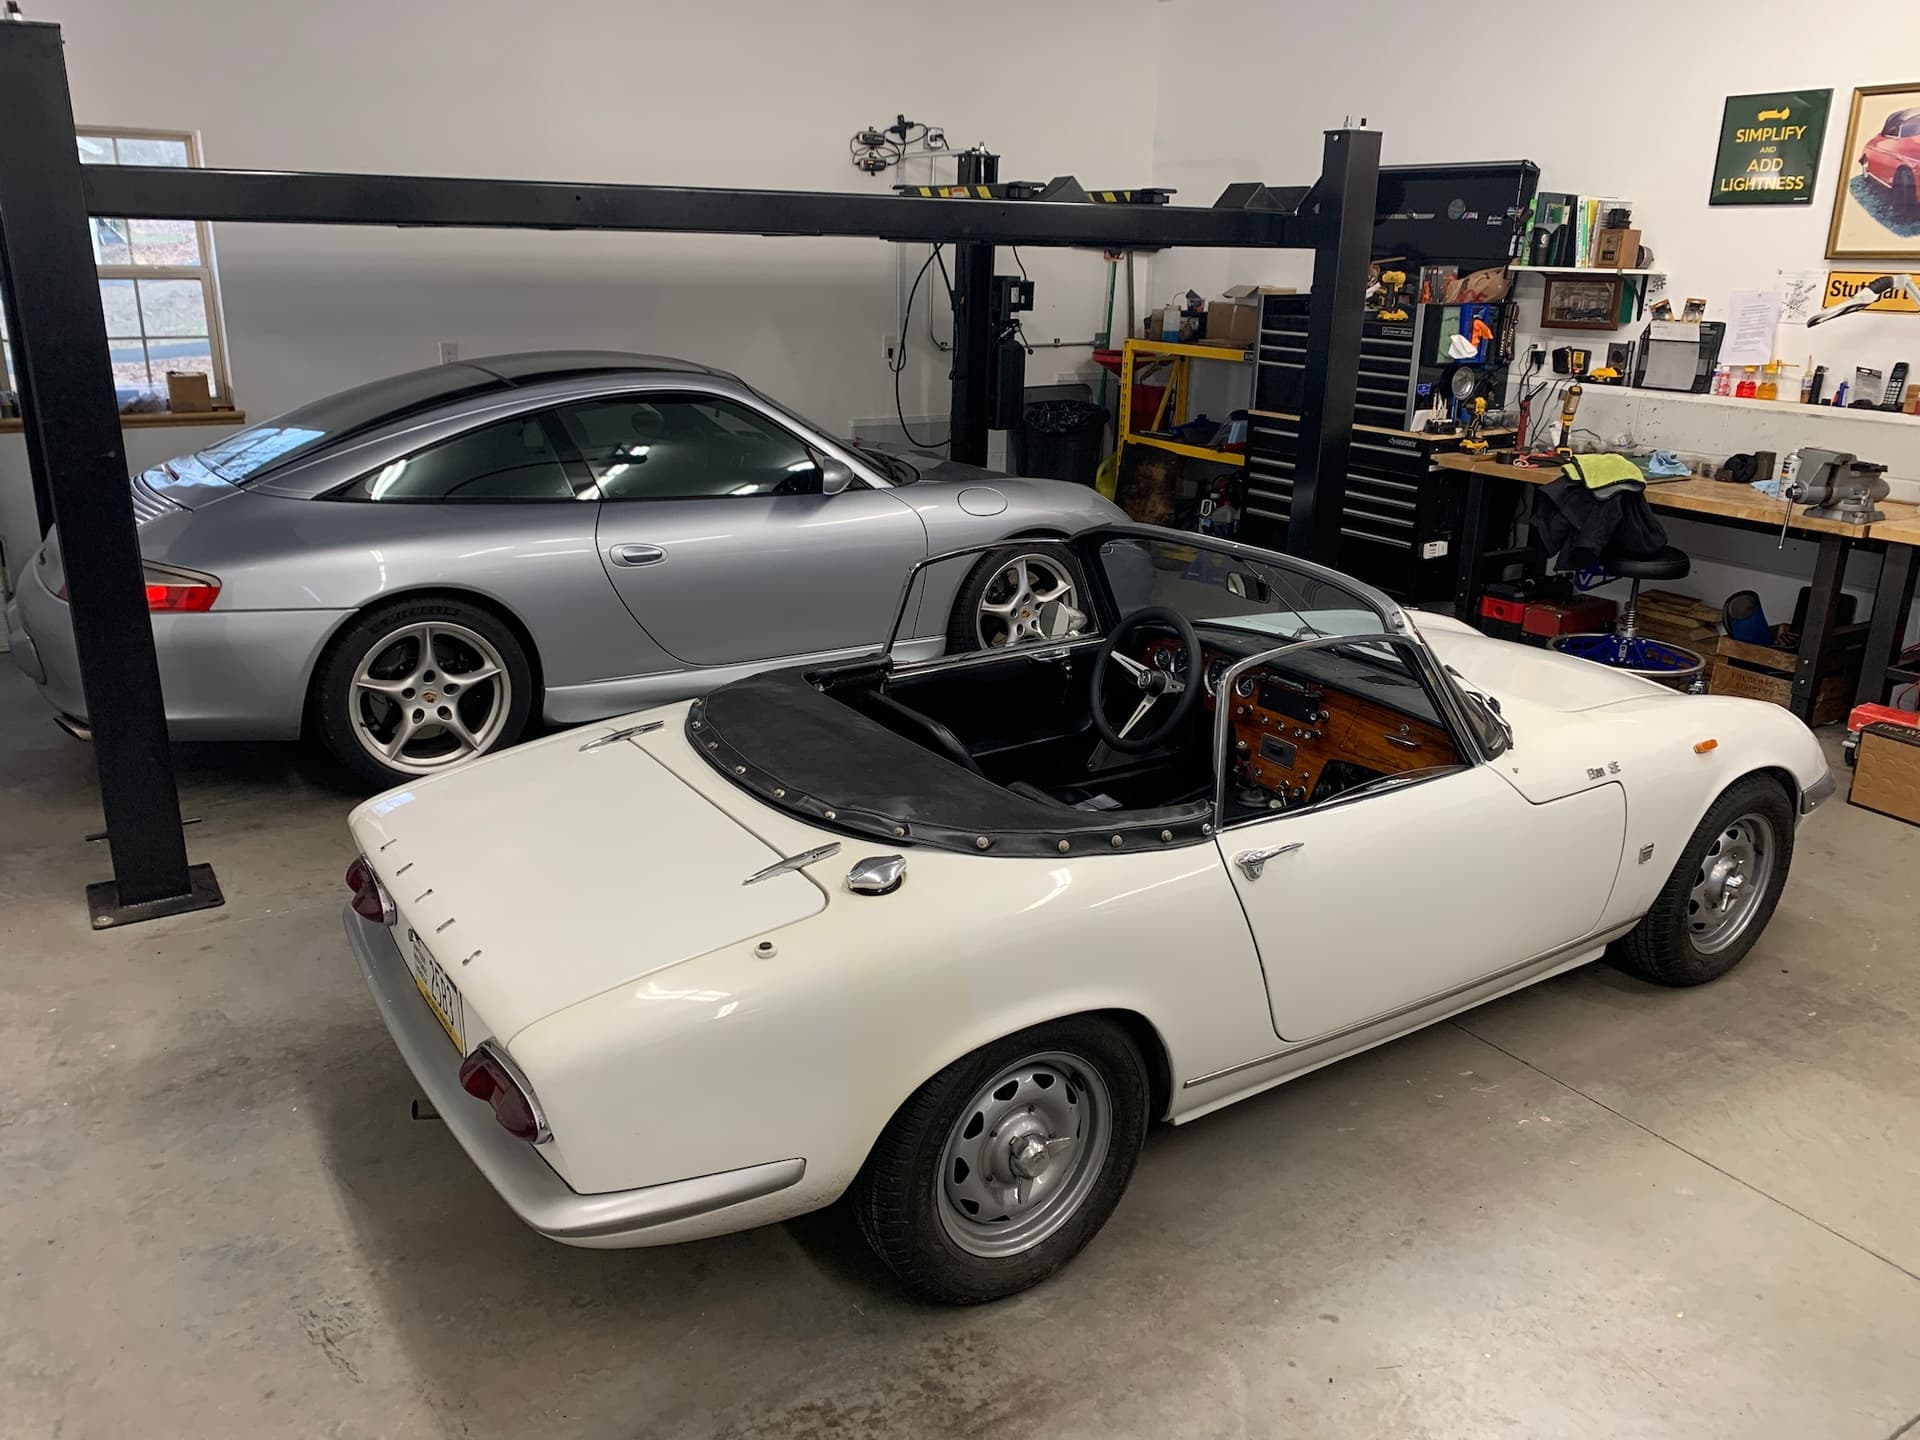
Here it is in front of its current digs.

2 Likes

Very nice! I like your approach to preservation. Looking forward to updates.

Do you plan on going to the Pittsburgh LOG?

Thanks for the kind words. I have no idea what/when that is, I’ll have to do some research. But I have attended events in Pittsburgh in the past so it’s a definite maybe. In this car I think it might be a 2-day trip though.

If you changed the LH mount you might expect to see the RH mount fail soon. My admittedly limited experience shows that they like to fail together (the stiff new one overloading the flabby old one, I suspect).

Nick

lotusltd.com/log44/

Agreed! The RH mount is a much easier job and was done earlier by the previous owner.

Thanks for that.

My first order of business was suspension work. I wanted to replace the Rotoflex donuts with CV joints; yes I know I said “preserve”, but this seems to me to be as much of a reliability issue as anything else, and although I know it will change the way the rear of the car responds I think it is worth doing. Also on the drive home it became quite apparent that at least one of the rear shocks was in bad shape. When I got home I verified that the LR corner was completely undamped. Al (previous owner) thought he had replaced the rears at some point, but he recommended doing the fronts, so I went ahead with plans to replace all four corners.


The first thing I noticed is that it appears as though the rear shocks have been replaced. The lower spring perch is cut off, I assume for wheel clearance; I know that Al had put +2 wheels on the car at one time, this may have been for those. There is also a threaded insert, which I have yet to explore. Also the caliper bolts are safety wired, is that a factory feature?


I thought I may as well disassemble everything so that I can build a complete list of parts needed. Removing the rears first, because that seemed to be the tougher task, I immediately ran into an issue: LOTACONES. Or is it lotocones, or lotucones – I believe I’ve seen all those spellings. Here they are, out of the car. The two-piece unit is the LH item.

And here are the lotacone bolts. They look so innocent sitting there, but they are only sitting there as the result of multiple days in the garage and multiple trips to local parts houses. Left to right: the first two behaved themselves, sort of; none of them came out easily, all of them fought removal right until the end. Bolt #3: the socket is a formerly 1/2" socket that I ground out to 9/16" at the far end, tapering it down gradually; then I heated it up, shoved it onto the rounded-off bolt head, and beat on it mercilessly until the bolt head yielded as seen in front of it. That was a day all by itself. The final bolt ultimately yielded to a reverse drill bit. Highly recommended.

The good news is that the threads survived the ordeal in pretty fine shape. The frame towers are old and somewhat rusty but still feel very solid. I’ve cleaned them up as much as I can and will follow up with rust-stopping paint. I also plan to fit small diameter springs that will allow me to assemble the whole works on the bench, then install. Next up: disassemble the rear struts, then on the front end!

1 Like

Nice car, looks like you have a great project. Yes the rear caliper bolts are wire locked as standard. I found the rear suspension can be one of the more challenging parts of an Elan to work on, the front end is straightforward in comparison

Ray.

Just can’t believe what some people do to modify cars - unbelievable butchery!!!

I have failed to keep this thread informed of progress on the Elan. Suffice it to say that there have been many hours spent and no small amount of treasure.

Having gone at the front and rear suspension at this point, I heartily agree that the rear is the more challenging of the two – especially in the case of this car. That was discussed in some detail in another thread; thanks to all who provided assistance there. At this time I’m still waiting for the struts to come back. In the meantime the front suspension is getting my attention.

It’s a pleasure to meet you too. :japanese_goblin: :slightly_smiling_face: I do see where you are coming from. However I would encourage you to look at it through the eyes of a 20-ish year old person in the late 1960’s, full of vigor and itching to go racing. (The car competed in local hillclimbs in its youth – there were quite a few of them in this area back then.) With input from the Elan guru who’s doing the struts, I’ve come to the conclusion that uprated rear shocks were not available, or not readily available, at the time. There must have been a Koni for another application that folks adapted to the Elan, which is why the bottom of the strut is cut off – the adapted item was just a bit too long and would not fit otherwise. He’s seen other struts similarly cut off. The spring perch was more questionable; I guess the original owner wanted to preserve the ability to go back to the stock springs? I dunno. Again though these were all modifications performed in period and as such they might not have seemed quite so butcher-y as they do 60 years later. Plus, “because racecar.”

Meanwhile, as mentioned earlier, the front suspension is getting my attention. Another pile of parts will be thrown at that end as well.

I have it all torn apart at this point and found no terrible surprises. The removed shocks are Spax adjustables, which I don’t believe came from the factory. The rubber bits at each end of the shock are dry rotted and probably original, as are the rest of the rubber bits. One pair of the upper control arms was modified with slotted holes for the ball joint, which would allow camber to be (crudely!) adjusted. Plus there were washers between the upper arm and ball joint, just on one side. I’m guessing that was to adjust caster. And I swear some of the grease I’ve cleaned off is from the 1960’s! It’s like gooey cement.

2 Likes

Don’t use poly bushes - they are not good!
Use the original metalastic bushes - they work completely in a completly different way and have many disadvantages.

Uneducated People use them because any kid could fit them, but you know what that’s why they don’t work.

1 Like

Okay the front suspension did have a surprise in store for me. One of the brake pads fell apart. The pad material simply fell right off the backing plate. I removed the pads to clean the caliper and presto. So it was back to R.D. for a set of EBC Greenstuff. I’m doing front and rear because Al told me he had replaced the fronts, and if they’re falling apart that gives me no confidence in the rears either.

Also the steering rack boots are a lot of fun to install. They. Just. Don’t. Want. To. Go. Granted, I’m working in a chilly ( ~50F ) garage. So I tried putting the boot in hot water while also using a cut out section of hose clamp as a ‘stretcher’ inside the big end of the boot. Worked a treat!

The front suspension refresh is finished, with the exception of setting ride height. I welcome suggestions and recommendations regarding what works. I definitely don’t want to go too low for several reasons, not the least of which is the horrid roads around here.

Here’s the whole schmeer from underneath. The anti-roll bar was a bit of fun as the ends didn’t want to cleanly line up with the drooped suspension. But it eventually worked out.

Closeup of the refreshed chassis links. The repair manual claims that these are sided but for the life of me I could not tell one from the other.

I’m taking on other tasks while I continue to wait for the rear struts to return. The car had a “cherry bomb” style muffler that might have been the hot setup in the 60’s but looked pretty nasty in the 21st century. There was a new muffler among the pile of parts, so that went on. It took a full day to fiddle around and get it all right. The midpipe on the car doesn’t match anything I found in researching them; It is 1-3/4" OD with a flare to 2" at the rear end. The muffler has 1-3/4" inlet OD as well. It was not a clean fit from one to the other. My solution was to cut off the 2" flare and butt the two pipes together with a sleeve clamp. A healthy dose of exhaust sealing goop should keep it from leaking; I may start the car today now that everything has had a chance to set up. Getting the muffler to sit in the right spot took a good bit of fiddling but I think I came pretty close.


3 Likes

I got the rear struts back last week, woo-hoo! Spent the following few days slaving away in the garage to get the rear suspension reassembled. I meant to take more pictures but kept forgetting until I was so far along that whatever process I meant to document was already completed. My wife forgot what I looked like; “didn’t you have a beard the last time I saw you?”

Setting the ride height was a lot of fun, cough cough. I had the car back on its wheels, rolled it back and forth on the lift a bunch of times to let it settle, then made adjustments. Then I took it out on the road for a short jaunt. The front end settled a huge amount, which meant a correspondingly huge number of turns on the spring perch. Then back out on the road, oops! Now it’s too high. And back. And forth. Ad nauseum. Two lessons came out of that exercise:

  1. The Elan barely fits on my lift width-wise, and unlike the Se7en I can’t just lean over and watch the tire roll onto the ramp. I had a tough time getting it lined up. Solution incoming, hopefully.
  2. Although I was using ride height at the sills as my unit of measure, I also watched the suspension arm angles. Getting them level would have worked almost as well I suspect.
  3. My lift needs attention, which became evident during all of the up/down action.

Oops that’s three things. Here are some pics, such as they are.

Rebuilt struts, locked and loaded.

CV axles going in. I used the lower suspension arm to hold them up during the process. The scissor jack was also useful while refitting the struts, which I totally failed to photograph.

Back on terra firma. It makes the 996 look gigantic.

Our weather cooperated enough for a romp in the Caterham.

2 Likes

Somewhat topical: as the pictures indicate, I have a 4-post lift. The ramps are just far enough apart that I can drive the narrow little Elan on with ~2" to spare on each side. Getting it close to centered is a tricky bit of work. So I came up with a fix. First I bought an inexpensive 2-axis laser level on Amazon. (Here it is in its final resting place after all the fiddling was done – bolted to my toolbox, which never moves.)

Then I aligned the vertical axis with the center of the lift. If you squint you can see a green line running through there and up the door at the other end.

Now when I drive a car onto the lift I can align the green light with the center of the car and, presto!

2 Likes

Some updates on the car. I tested alloy wheel fitment, which was discussed in another thread on the forum. I’m also collecting a few more bits for a carburetor freshening; the car runs poorly, and I discovered loose fixing hardware so the whole works are going onto the bench.

While collecting fuel system items I decided to look into the speedometer woes. It was making an awful howling noise back when I first drove it, and the needle was bouncing wildly. It quit working completely shortly thereafter. I suspected a cable in need of lubrication as the source of the howl, but the previous owner was convinced that the speedo itself was bad. I pulled the cable out of the sheath and it was dry but in one piece. Then I removed the angle drive and found two pieces where there should have been one. I looked into a replacement and, after picking myself up from the floor from passing out over the price, decided to attempt a repair. After all it’s already broken. I was quite proud to have gotten it all apart without undue violence, and I even got the new cable piece installed neatly and securely. Then I discovered that the square section of the speedo drive cable ends come in two different sizes – and I had used the wrong one. An attempt to shave/squeeze it down ended poorly. I finally used an old solid cable end I had laying around from my days as a mechanic, pressing into the end of the large gear a sufficient distance to give me the length needed. It all works but I wonder for how long; there must have been a reason they used a flexible cable in that spot and my unit no longer flexes. Anyway, here’s proof that I actually did get it apart:

In other news, I decided to order a seat reupholstery kit from England a few weeks ago in the hopes of getting ahead of the tariffs. Once the order was placed I was informed that it could be 9 weeks until it was filled! So much for beating the tariffs! However as we know, tariffs are hard to keep up with. They came, they went. Meanwhile my order was filled. The box was a bit worse for wear but the kit appears to be complete and intact.

This seems to be “the year of the seat” here at wdb’s garage. I stumbled across a wonderful pair of seats for the targa, I’m working on getting a pair for the Caterham, and now the Elan. One could say I’ll be ‘sitting pretty’…

3 Likes

Hi WBD,

My Speedo angle drive broke the quill exactly the same as yours. Even the events leading up to the failure were similar with the speedo needle bouncing wildly and then the speedo stopped working completely.

I replaced the complete angle drive unit as I could not find just the quill of the correct dimensions. Someone recommended Caterham as supplying the quills, and I ordered one, but when it arrived it was a couple of cm too short. I could have extended one of the square ends at that time but decided to replace the whole unit as I didn’t want to go through the process of removing it again if it failed. The angle drive was expensive (~GBP 100). I have now modified the quill from Caterham so have a spare angle drive with the modified quill if it is ever needed.

I would recommend you check the speedo to make sure it isn’t jammed. The quill is a weak link designed to fail when something in the speedo system locks up. The quill is supposed to be cheap compared with a destroyed speedo or a sheared speedo gear (although the gear is probably cheaper than an angle drive). In my case, the magnetic rotor wheel in the speedo had seized, and this caused the quill in the angle drive to shear. It was a fiddly job to dismantle the speedo to repair it but I managed to do it and it is all working well and actually bouncing a lot less than it used to.

1 Like

“Quill”, I will remember that. Makes sense.

I drove the speedometer with a drill and a piece of cable and it moved smoothly and quietly. I will keep an eye on it though. It is still possible that it was the original failure point. I think my angle drive will fail at the same relative point if the speedometer does seize; the solid quill I used was a swaged fit and will likely loosen and spin if put under too much load.

As for the angle drive, I was quoted $275.00 here in the US! I saw them for less on UK websites, but still pricey, plus shipping is hefty these days. If you have an economical alternative I’d love to know more details. I see angle drives for 1/6 the price I was quoted, $55.00 or so, and they fit virtually every British car BUT the Elan or so it seems. It would be nice to find a way to adapt one of those for Elan use. A different cable, from one of those other cars, with a similar length perhaps? Might be worth pursuing.

Love build threads, it is a fun journey for the readers and a good historical ‘notebook’ for you… Im guessing Im younger than you (no offense) and I have a hard time remembering everything I’ve done, so thats why I always create threads like this.

Get off my lawn! :upside_down_face:

I always start with the good news: the car finally, finally, feels like a car and not a broken, needy old thing. The carburetor situation was as bad as I thought; new fixing hardware, rebuilt Webers, and a proper fuel pressure regulator appear have slain that gremlin but good. I only took a short drive – the sun is setting and I have no idea if the lights work! – but it ran smoothly and accelerated well.

Along with the suspension work the car now drives in what I believe is some semblance of what it did when new. I bought this car to see what driving a Lotus Elan is like, after having read about them and heard about them and wondered about them for most of my adult life. I think I finally can do that. I hope it’s okay to call that a milestone.

Oops! I forgot the bad news. The speedometer quit working. I even put the rear wheels in the air after I was done fixing it, and ran through the gears, and everything was fine. Once on the ground it didn’t even make it to the end of the driveway.

3 Likes