Sports Car Super Service — Check & Fix: Lotus Elan
Sports Car Mechanics, January and February 1984
Owner’s Handbooks can be put aside when it comes to maintaining that much-loved but much-used sporting car! It covers the basic bones of regular servicing maybe — but there’s lots more you should be looking at, and for — and extra work you should be doing. This series takes a close look at your car — and tells you what and how.
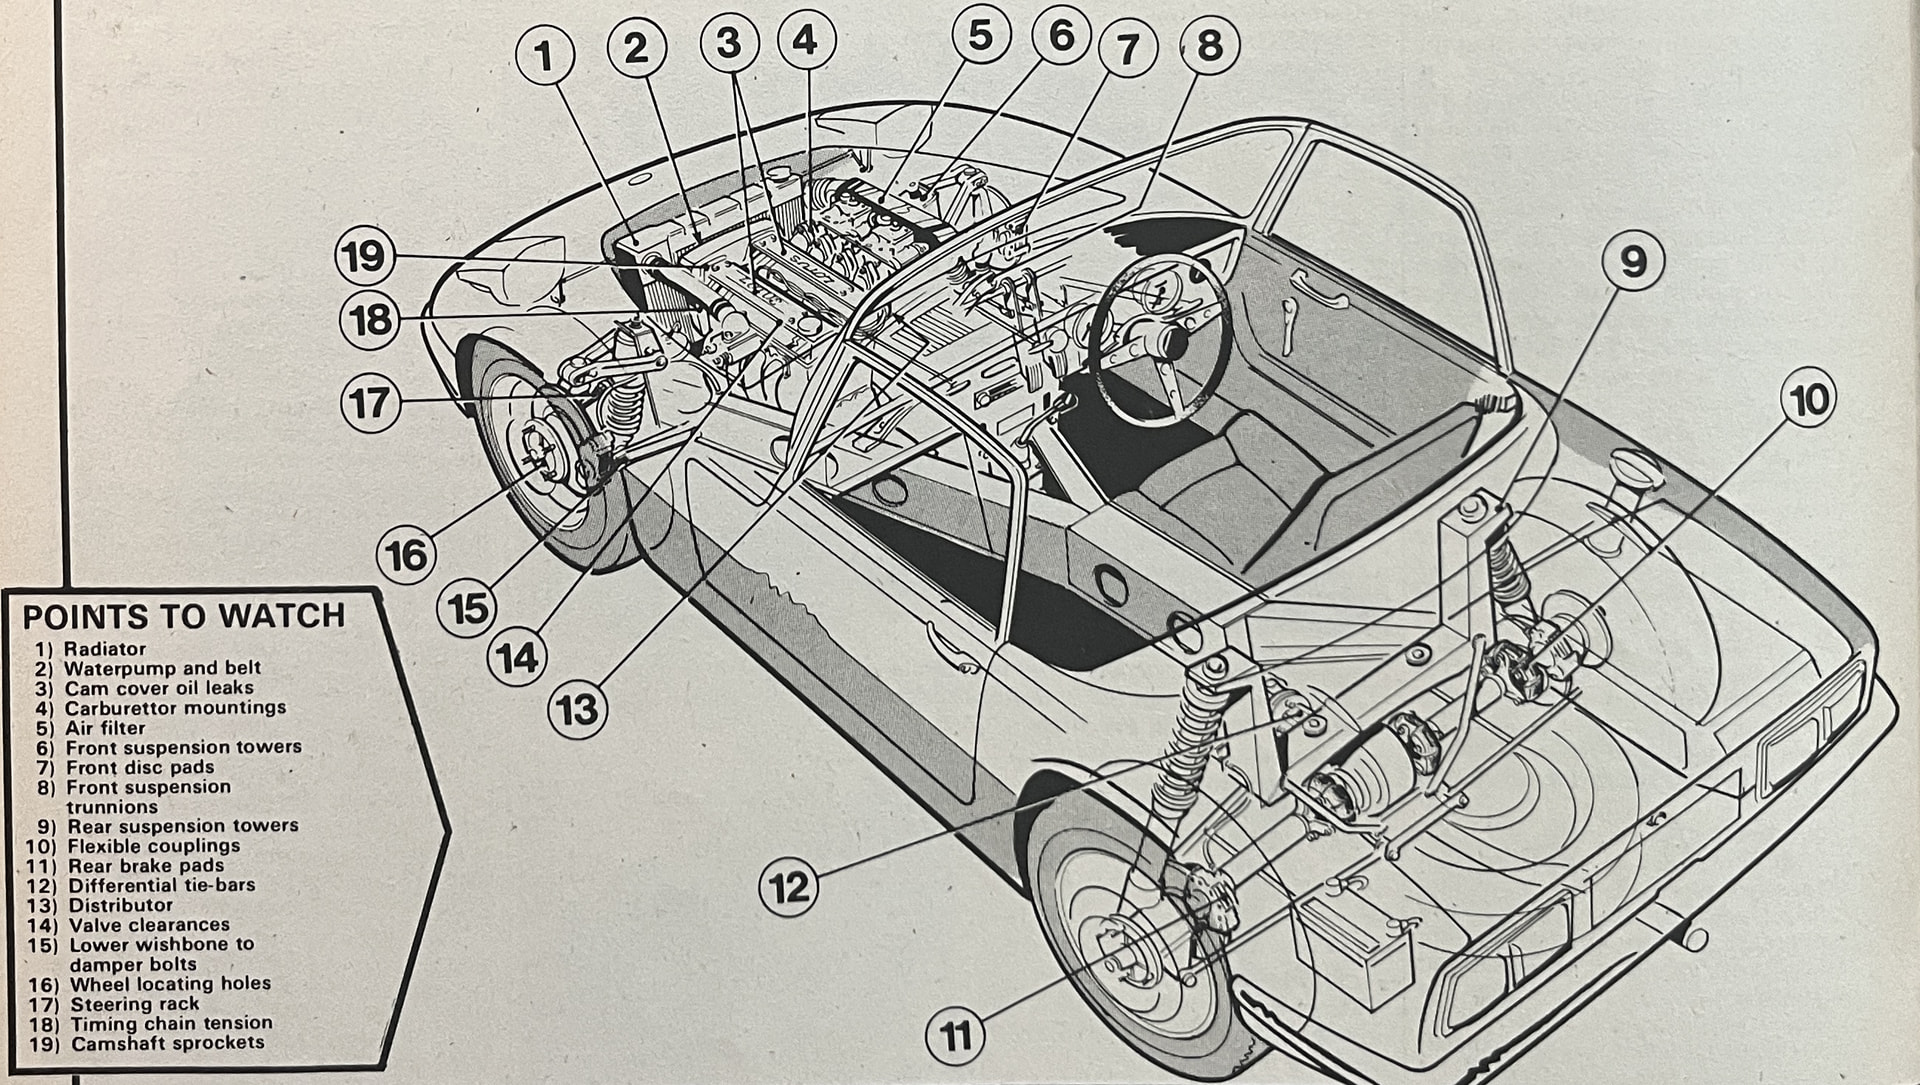
Points to Watch
- Radiator
- Waterpump and belt
- Cam cover oil leaks
- Carburettor mountings
- Air filter
- Front suspension towers
- Front disc pads
- Front suspension trunnions
- Rear suspension towers
- Flexible couplings
- Rear brake pads
- Differential tie-bars
- Distributor
- Valve clearances
- Lower wishbone to damper bolts
- Wheel locating holes
- Steering rack
- Timing chain tension
- Camshaft sprockets
Fear of the unknown would be a good way of summing up most peoples’ attitude to looking after a Lotus, and while we wouldn’t pretend that an Elan is quite as easy as a Cortina to maintain, it isn’t difficult either, provided you work logically and methodically, take the trouble to buy the right parts, and you have a reasonable toolkit.
Preliminaries
The first thing to remember is that like a racing car the Elan responds to constant, regular inspection and precision, and by that I mean following the maker’s recommendations to the letter. One of your first acquisitions, if you don’t already have one, should be a torque wrench, and you should make a point of using it on anything from the wheelnuts to the suspension bolts; a good manual will provide the relevant figures.
Make sure too that you have a good range of AF sockets and ring spanners, only using open-enders where you have to, and where necessary use the right sized crosshead screwdrivers. Nothing makes a car look butchered quicker than mangled crosshead screws and they betray a total lack of care for a precision machine.
Use the right parts for the job too. While researching this feature I got a lot of assistance from John Loynton of Yardley Wood Service Station in Birmingham and he made the point strongly that you should only use genuine Lotus parts. The cynics will argue that as one of the country’s main Lotus specialists and parts stockists he has a vested interest in selling Lotus spares, but as John himself said, by using Lotus parts you can be pretty sure that they are up to the specification demanded by the car, and that you will have some comeback in the unlikely event of a failure.
Having said all that, you can obviously save money by shopping around for common service items like plugs, points, fanbelts etc. and provided you can be sure you are not being sold some spurious product, good branded brake components are just as good as something in a Lotus box and the chances are that the Lotus item will have been made by the same people.
On the subject of parts, it is worth recording the fact that you can still get just about any engine or chassis spares you may need. Certainly many agents don’t have a large stock of older Lotus parts (unlike Yardley Wood Service Station) but even then most things can be ordered from the factory.
Admittedly some trim parts are hard to get which will be annoying if you are trying to restore a car, but as far as maintenance goes, everything is available to keep the car in first class condition, so you can’t use that as an excuse!
- Twin Webers must always have an air box and filter to minimise fire risk, and don’t overtighten the flange fixing nuts.
- Don’t overtighten the fanbelt in an attempt to stop it slipping, fit a new one. Check all hoses and clips, also antifreeze solution.
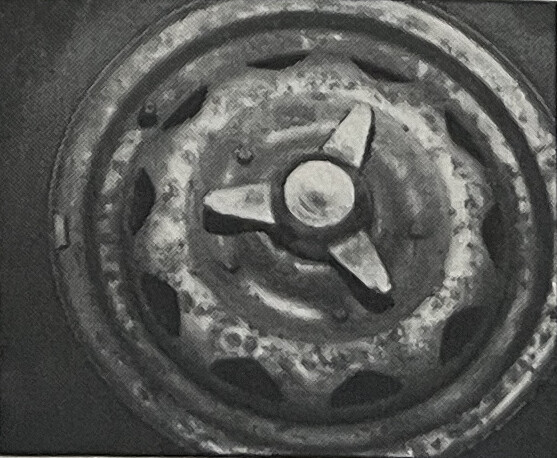
- Knock-on wheel spinners are handed, so hit them the right way! Always use a soft hammer or they’ll end as battered as this.
- When you’ve got the wheels off check them for cracks on this conical face. Repairable, but perhaps best to buy secondhand?
Under the Bonnet
Despite its reputation, the Elan isn’t a complicated car. OK, it has a twin cam engine, disc brakes all round and a few well known peculiarities, but having had a good look round an Elan I reckon it’s probably easier to work on than my Rover 2000!
Start by taking the car for a fast run to get the engine, gearbox and final drive oil hot, then as soon as you stop the car get it up on stands and drain off the engine oil, and if necessary the gearbox and final drive oil too, otherwise just check these two for the correct level.
Replace any drain plug as soon as all the oil has drained out so you don’t forget, and top up with fresh oil immediately, again so that you don’t forget. Obviously you should change the filter before refilling the engine; this is the paper element type in a metal canister down on the right hand side of the engine (looking from inside the car). Take all the usual precautions to ensure that the rubber seal is located properly, then tighten the centre fixing bolt.
Check the air filters next, and whatever you do don’t be tempted to run the car with open carburettor intakes; quite apart from the accelerated wear to the engine from all the dust and grit it will be inhaling, there is the very real risk of setting the car alight as a result of a spitback when cold starting or at high revs.
Next have a look at the distributor, although theoretically you will have to remove one of the carbs, where Weber units are fitted to get at it, but it’s probably just as easy to take the distributor itself out to replace the points, rotor arm and condensor.
Mark the position of the distributor body relative to its housing so that you can refit it in exactly the right position and while it’s removed remember not to turn the engine. That way you’ll at least be able to get the engine running again, then you can time it accurately with a stroboscope; the timing marks are situated on the crankshaft pulley and there’s a pointer on the engine front cover. Timing figures are given in our service data panel overleaf.
Carburettor Checks
Carburation next, and particularly on the Weber and Dellorto systems. If it works leave it alone. I would go so far as to say that it’s worth having suspect carbs. set up by a specialist as a matter of course. Certainly you can have a go yourself with carburettor balancers (or the old method of a piece of tube so you can listen to the intake hiss from each one) and something like a Colortune, but if you don’t know exactly what you are doing you are far better off taking the car to somebody who does.
If you get it wrong you will need assistance to return to the steady tickover and instant pick-up that every Elan should have, and without which it can undoubtedly be a misery to drive. An expert with a rolling road should be able to set up any Elan (provided the rest of the engine isn’t totally clapped) in about two hours, and it should then stay in tune for up to 10,000 miles.
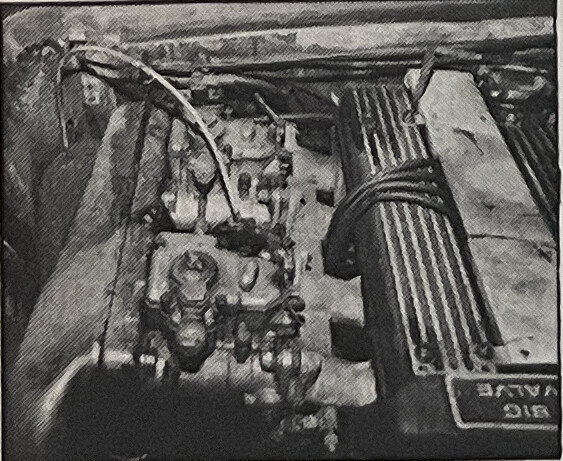
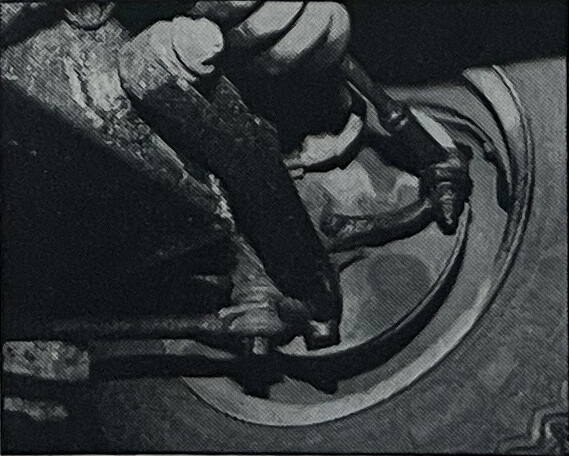
One thing you can do though, or rather one thing you shouldn’t do, is overtighten the flexible carburettor mountings. This system was used to prevent fuel frothing, but some owners seem to think that this is a fault and screw them up so tight that the rubber ‘O’ rings are completely mangled or even ingested into the engine!
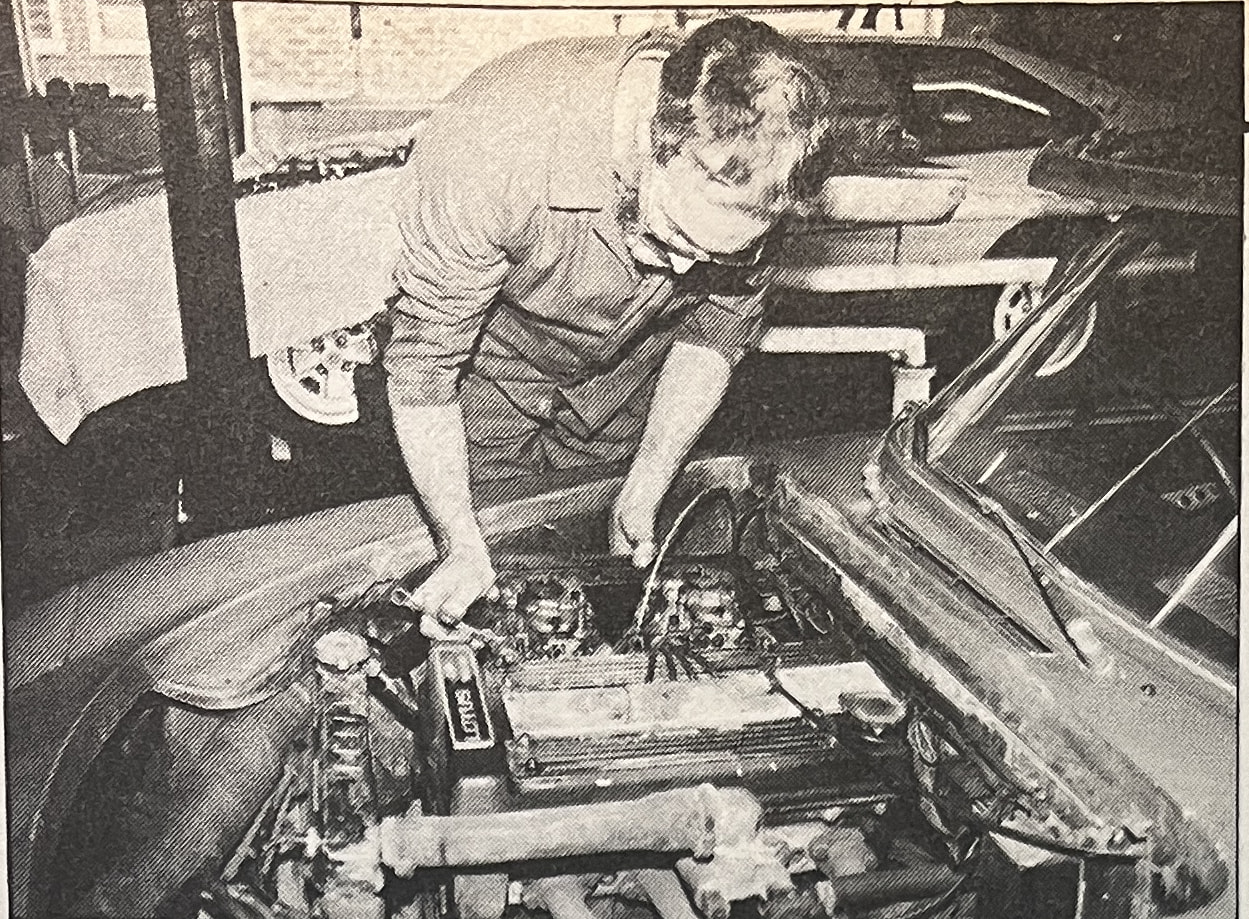
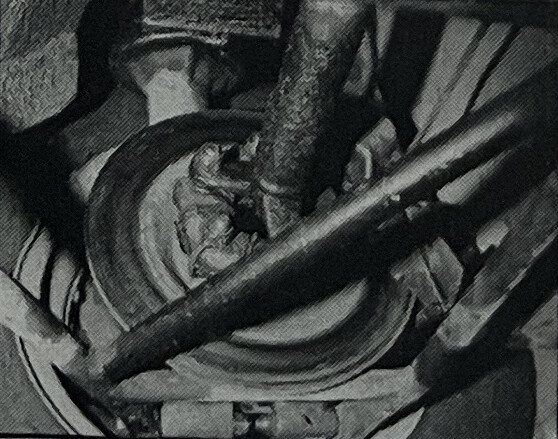
- One of Yardley Wood Service Station’s mechanics checks the carburettor mountings on a well used but still sound Big Valve engine
Achilles Heel?
Move to the front of the engine now and check the tension of the water pump and generator belt; there should be about half an inch of free play on the longest run of the belt between pulleys and it is vitally important not to overtighten it. If it still slips when the tension is right it could be worn out and should be replaced. Over-tightening the belt will wreck the water pump even more quickly than it usually falls apart, and renewing the pump is a long job involving the removal of the cylinder head. Incidentally, don’t let anybody tell you that it’s easier to take the sump off…well, it is easier, but if you don’t remove the head too you can’t seal the upper cork gasket properly and you will get oil leaks; again contrary to popular opinion, there is such a thing as an oil-tight Lotus engine, it just needs to be screwed together properly.
John Loynton reckoned that far too much fuss is made of the water pump problem, and that if it was properly fitted in the first place it should last for years. Still, despite his earlier warnings about using non-Lotus parts you might consider a Vulcan Engineering toothed drive belt conversion kit (enabling you to run the belt much looser and thus minimise the strain on the water pump bearings) and/or a modified front cover which apparently enables you to renew the pump in minutes rather than hours. One such kit is available for arund £90 including VAT from AKS of Church Street, Trawden, near Colne, Lancs., tel: 0282 867087, and Vulcan Engineering’s drive belt kit (which sells for around £60 plus VAT) is available from them at 185 Uxbridge Road, London W7, tel: 01 579 3202/2988.
Incidentally, while we are on the subject of the waterpump, remember that the cooling system must have anti-freeze in it all year round as a corrosion preventive, and ideally the anti-freeze should be renewed once a year. While you are doing this check all the hoses carefully for splits and signs of perishing, and renew any that are suspect before they let you down. Hose clips should be of the flat band type rather than the thin wire type which tend to cut into the rubber.
Prevention
So what else can you check under the bonnet to ensure long and trouble-free service?
Tappet adjustment is by shims in the inverted bucket tappets, and while it is easy enough to check the valve clearances it is rather more difficult actually to adjust them.
To check simply turn the engine so that each cam lobe in turn points upwards away from its tappet and slide the appropriate feeler gauge into place.
To adjust you’ll have to remove each camshaft, remove the old shim and measure its thickness with a micrometer, and then fit a new shim of a calculated thickness to restore the gap. If you do this yourself incidentally, make sure you don’t mix up the two camshaft sprockets.
Fortunately, once set the tappets tend to stay within limits for many thousands of miles, and like carburettor adjustment this is perhaps the sort of job worth having done by a professional unless you are fully confident to tackle it yourself.
Timing chains next, and the one important thing to remember is that only genuine endless Lotus chains should be used. John told me that he has seen an increasing number of split chains recently, and while these are certainly easier to fit than the endless variety — you simply split the old chain at some convenient point, attach the end of the new one and wind it round the sprockets without having to take the engine apart — you would regret it if the chain ever broke!
The engine does have provision for timing chain adjustment by means of a screw with a locknut on the front cover, so if when you come on the scene there is no adjustment left and the chain is still rattling you will have to budget for a new one pretty soon. Beware too of a whining noise from the front of the engine as this will indicate an excessively tight chain, which again could break disastrously at any moment.
Finally, check the brake and clutch fluid levels in the master cylinders; the brake cylinder in particular is a real pain and in fact if you ever have to bleed the system you may well elect to remove the carburettor again, or rig up a suitable funnel and pipe.
Underneath the Car
Time now to get under the car again, ideally supporting it with four axle stands so that it is level, although you can do front and then back if you wish. With a heavy lead or copper hammer loosen the eared centrelock wheelnuts very slightly while the weight of the car is still on them, then jack it up, take the nuts right off and pull off the wheels, checking them carefully for cracks round their locating stud holes. New wheels are no longer available, but unless the cracks are very bad they will usually be repairable, alternatively you might be able to find some good secondhand ones.
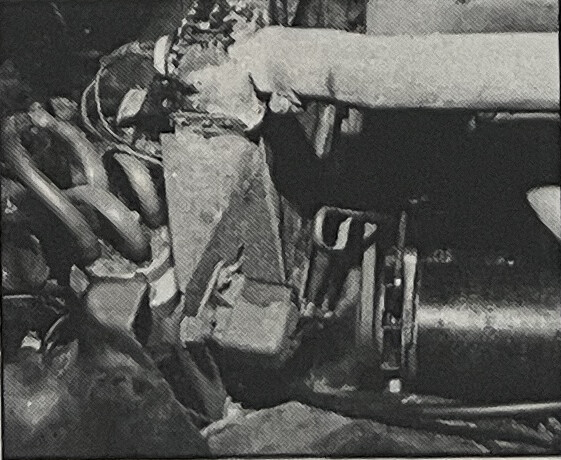
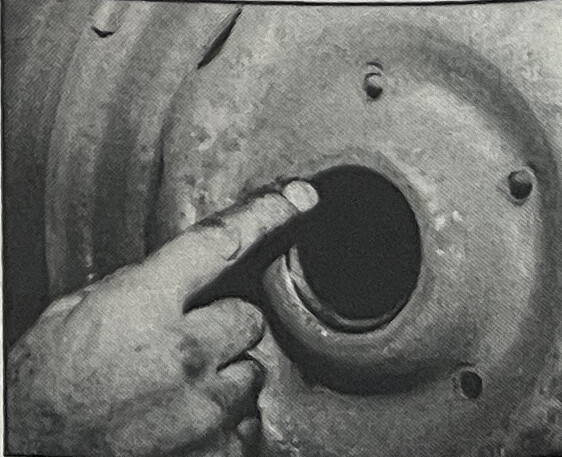
Renew the brake pads if the lining material has worn down to about ¼" thickness, check both the steel and flexible brake hoses for deterioration, have a look at the discs for signs of scoring and ensure at the rear that the handbrake linkage is free to move. The front suspension is the familiar Triumph Herald/Vitesse/Spitfire/GT6 system and basic maintenance is confined to lubricating the bottom trunnion with engine oil rather than grease; remove the blanking plug which you’ll find on the trunnion casting itself, fit a suitable grease nipple and pump in oil until it begins to emerge from round the rubber seals. Oil must be used incidentally because grease has a tendency to solidify and stiffen up the steering which then causes premature wear.
- All that oil does a good job of rustproofing, but check for rusting from the inside on the suspension towers; keep drain holes clear.
- This is what happens if you don’t. This damage is repairable, but on a reasonable car it’s probably better to change the chassis.
- Front suspension is basically Triumph-derived. Make sure bolts are tight with a torque wrench, and check rubber parts too.
- This is a brand new front suspension upright, but it shows where you’ll have to fit a grease nipple; use engine oil though, not grease.
Torqued Up?
Thoroughly check the whole system for looseness with that torque wrench, and pay particular attention to the wishbone to shock absorber bolts; these tend to loosen off and elongate their holes, and the only cure then is to fit a new wishbone.
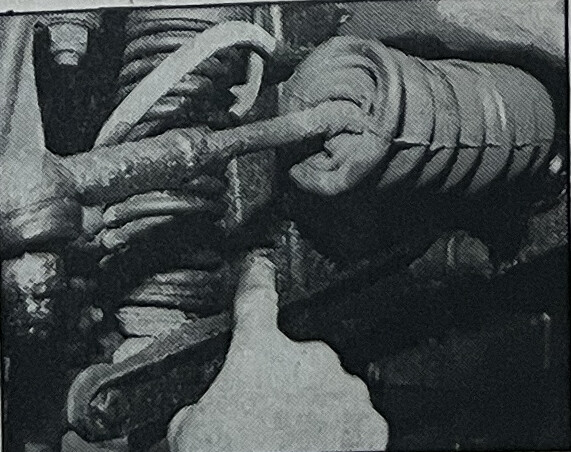
A coil-over spring and damper assembly is used at the front, and although these last well, if the damper is worn out you might as well fit a new spring too for what they cost.
Check the steering for play in the lower joint at the bottom of the shaft, and have a good look at the rubber gaiters on the track rods; any splits here could mean that the rack is irreparably damaged, especially if it has been allowed to run out of oil. The rack is very similar to the Triumph unit, but you can’t unfortunately do a straight swap as Lotus made some small but important modifications.
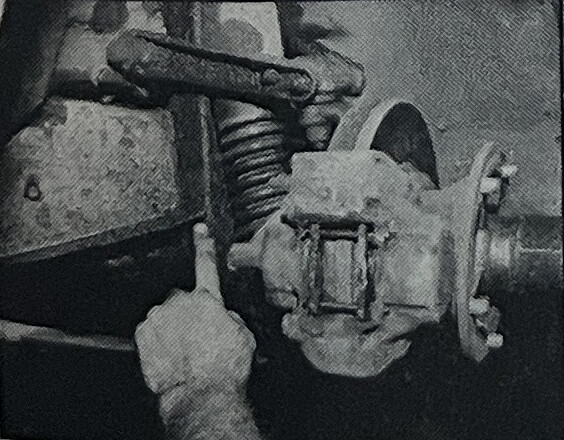
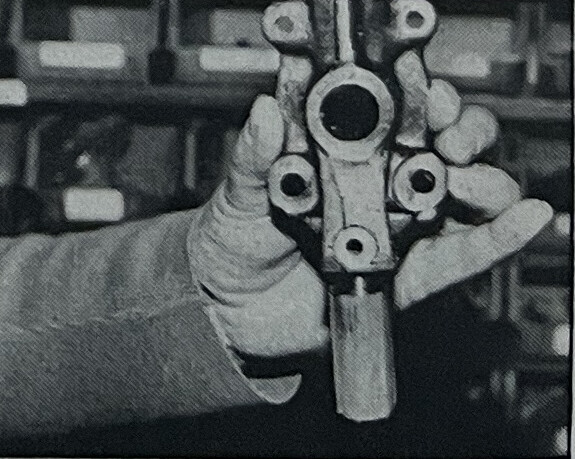
- This shows one of the differential tie-bars. Check rubber bushes for security, along with wishbone bushes; use a torque wrench.
New Chassis?
With the front wheels off you can also check the chassis for what is probably its one weak point, rust in the front suspension towers. This is caused by a failure to keep the drain holes clear, and although it is possible to weld in new metal this is very difficult without separating body and chassis, and if you get that far then you might just as well fit a new chassis if the car means anything to you.
Replacement chassis are available quite readily so this isn’t as drastic a measure as it sounds, but John Loynton was emphatic about the value of using a genuine Lotus unit; if nothing else this will save you the trouble of setting up the steering rack by already having marked on it what shims are required, and of course it will preserve the value of the car too. A genuine Lotus replacement chassis will have the letter ‘LR’ prefixing its number.

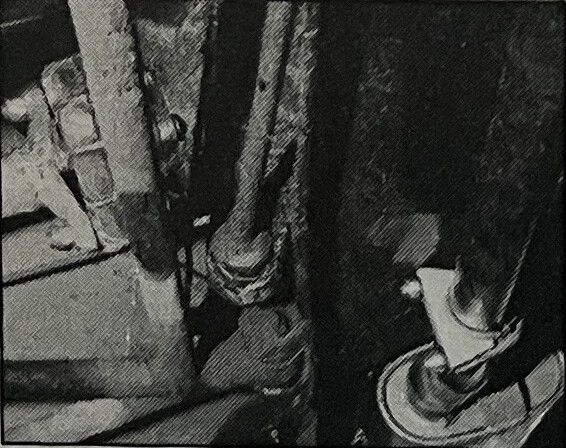
- There’s only one silencer box to worry about on the Elan, simply make sure it is firmly attached to the car…
- …and not as badly corroded as this one! Note the rubber mounting on this one, and that important heatshield on top.
The rear suspension towers may be afflicted so check here too, and then go over the whole system again, just like you did at the front.
If the dampers have gone you can fit inserts rather than a complete unit, and take a look at the rubber Lotacones at the top end of the spring. Worn rear wishbone bushes will allow the whole system to move and seriously affect the roadholding and ride and you should check the security of the differential tie bars with the torque wrench. The diff. mountings don’t often go, but it has been known for the diff. casing ear pieces to fracture.
Next we come to that Lotus bête noir, the driveshafts and couplings, and again John stressed that there is nothing wrong with the standard system provided the Rotoflex couplings are installed correctly; several companies offer heavy duty driveshafts which are said to minimise the surging so characteristic of an Elan and which need much less attention, but properly fitted Rotoflex couplings have a good life too. They must be fitted the right way round though and they must be fitted with the right S-rated bolts and special locknuts — you ignore this advice at your peril!

- You’ll be unlucky to find an Elan with a rotted petrol tank, but it can happen. Note the surface rust, and drain plug at top left.
- Properly fitted Rotoflex couplings are less problem than people imagine. Always use the right length bolts and special locknuts.

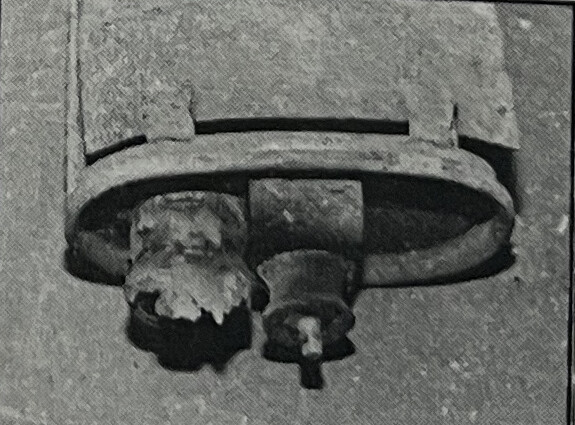
- Handbrake adjustment is dead easy; while you are at it ensure that moving brake parts are adequately but not over-lubricated.
Service Data
LOTUS ELAN
| Item | Specification |
|---|---|
| Capacity | 1558cc |
| Compression ratio | 9.5 to 1 |
| Firing order | 1-3-4-2 |
| Power output | 118 or 126 bhp |
| Distributor | Lucas 23D4/41189A |
| Contact breaker gap | 0.015 in. |
| Dwell angle | 57–63 degrees |
| Condensor capacity | 0.18–0.23 microfarads |
| Static ignition timing | 10 degrees BTDC |
| Centrifugal advance | 5 degrees at 1500 rpm |
| 9 degrees at 2000 rpm | |
| 14 degrees at 2500 rpm | |
| (all figures without vacuum and without basic ignition timing) | |
| Spark plugs | Autolite AG22 |
| Plug gap | 0.025 in. |
| Valve clearances | inlet 13 to 18 thou cold |
| exhaust 23 to 28 thou cold | |
| Thermostat opens | at 78 degrees C. |
| Fan belt tension | 13mm |
| Capacities: engine and filter | 7 pints |
| gearbox | 1.75 pints |
| differential | 2 pints |
| cooling system | 14 pints |
| Tyre pressures | 22 psi front and rear, tyres 165 × 13 |
Which One?
Now let’s look at some significant differences between the various models and their production dates so that you know what you are dealing with.
Introduced in 1962 the first Elan was known logically enough as the Series 1, then this was followed in Autumn 1964 by the Series 2. The Series 3 arrived in May 1968; this last car was superseded by the S4 Sprint in 1971, and this was current until the Elan went out of production in 1974.
The Plus 2 was introduced in 1967, and while you couldn’t really expect to accommodate four adults in the car it was significantly larger than the basic Elan. Mechanically the two cars are very similar, although the Plus 2 has different suspension wishbones and a different steering rack.
1969 saw the introduction of the S Type, then in 1971 the S130 with a five speed gearbox was announced. All Sprints incidentally have the Big Valve (i.e. larger inlet valve) engine and can generally be identified by the cam cover with raised ribs and the legend ‘Lotus Big Valve’ on the front of the cover, but don’t use this as an infallible guide if you happen to be buying such a car as the covers can be changed from engine to engine. Of these Big Valve cars, most had Weber carburettors, some had Strombergs (which necessitated a different cylinder head) and a few very late cars had Dellortos.
The earlier Elite incidentally, despite its apparently similar parentage is a very different car from the Elan and few parts are interchangeable. Most of the Elite’s parts were made by or for Lotus themselves, whereas the Elan came to have more and more proprietary components over the years.
Finally, we must express our thanks to John Loynton of Yardley Wood Service Station, Yardley Wood, Birmingham, and suggest that if you need any work doing on your Elan, or if you need any parts, give him a ring — the number is 021 474 4972.
Notes
- AKS toothed drive belt conversion kit: available for around £90 including VAT from AKS of Church Street, Trawden, near Colne, Lancs., tel: 0282 867087.
- Vulcan Engineering drive belt kit: approximately £60 plus VAT, available from 185 Uxbridge Road, London W7, tel: 01 579 3202/2988.
- Yardley Wood Service Station: John Loynton, Yardley Wood, Birmingham. Tel: 021 474 4972.