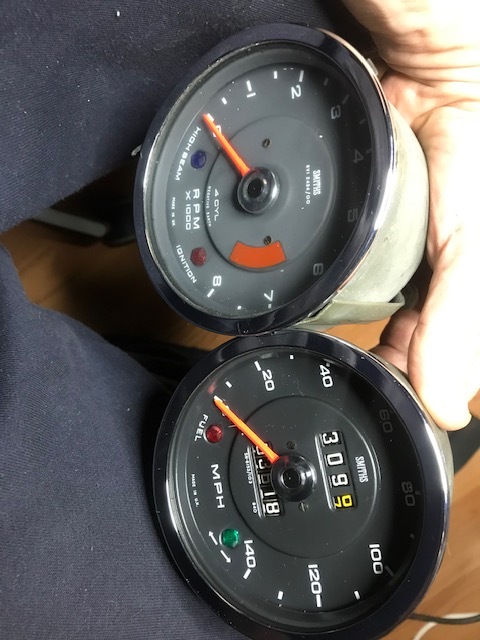
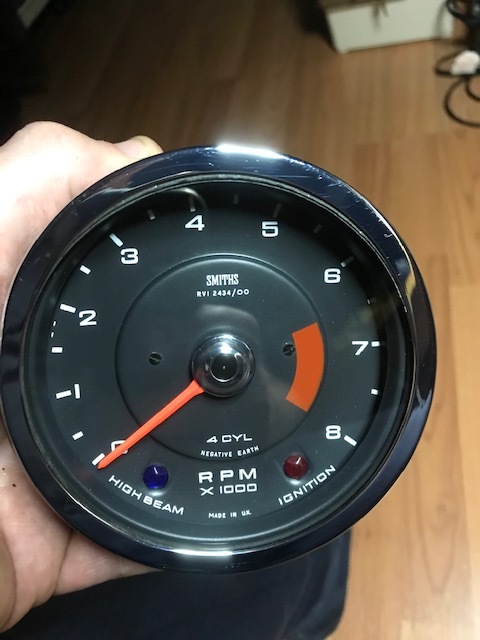
Bit bored tonight so thought I’d do an experiment with my gauges.
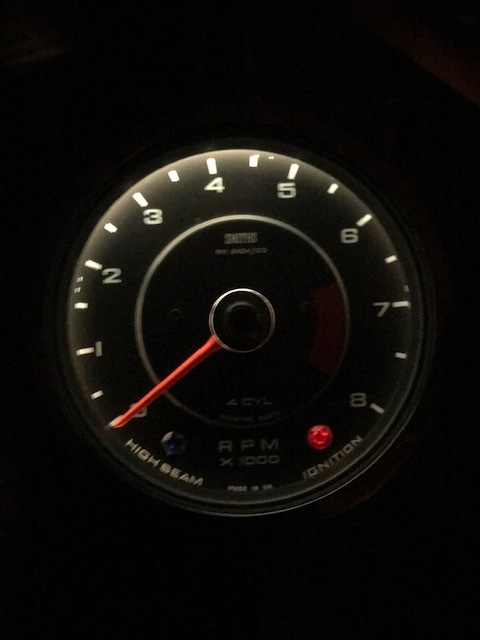
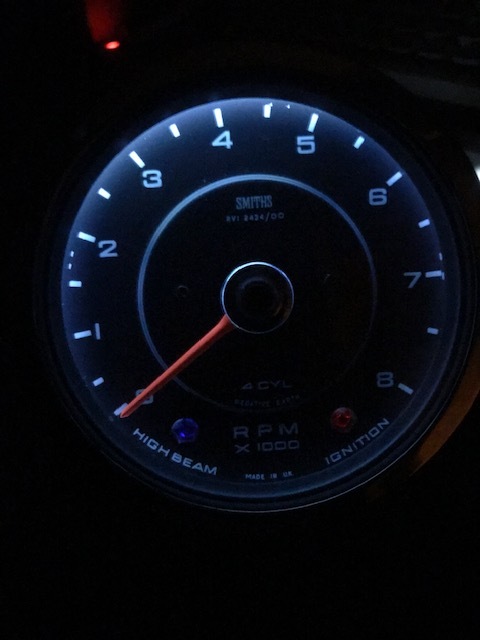
If you’ve been reading my posts you’ll know that I have the dashboard out with a new one ready to fit. The gauges look a bit tired, because they are 47 years old and there is dust behind the glass that causes a sort of “white out” appearance in the dark. The faces are supposed to be a dark grey but sun damage has turned mine light grey, which also doesn’t help in the dark (reduced contrast). So, I am looking for a way to rejuvenate the appearance.
You may recall that I had success restoring the rocker switches using baby oil. But would it work on the gauge faces? See for yourself!
I won’t bore you too much with technique other than to say apply the oil sparingly and polish the excess off with a lint free cloth. Use a cotton bud (Q-Tip) to get into the corners. Clean the glass inside and out. To remove the top bit of the smaller dials (where the measurement type is printed: FUEL, TEMP and so on), push from behind the locking tab with a needle, it should pop out. Now you have access to the back face of the dial (where the scale is printed). Be careful with the pointers. You have to move them to one side to get underneath, but be very gentle.
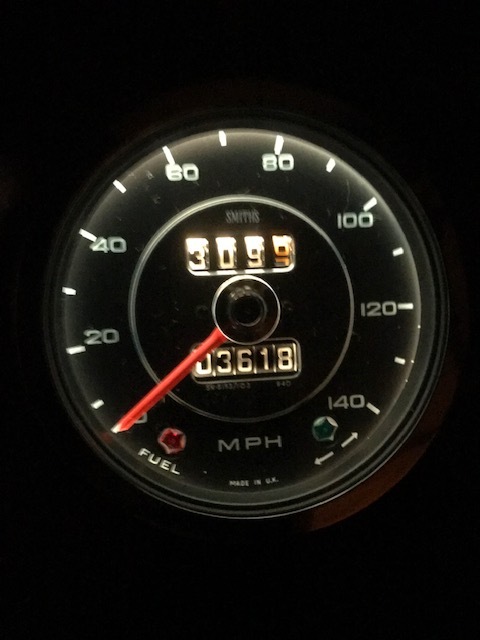
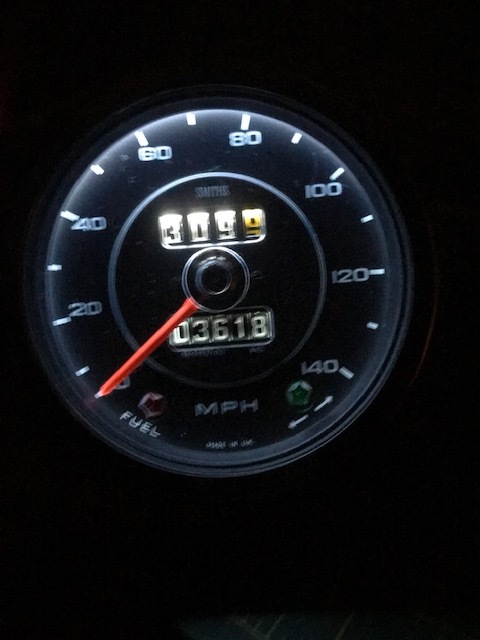
Now, we know why this works. The oil is filling micro cracks in the paint surface preventing stray reflections. I do not know how long the effect will last, but for the time being it looks pretty good to me. I like the idea of being able to see how fast I’m going at night…
Note to our US chums: The active ingredient is sold as “Mineral Oil” in the US. But you can use baby oil especially if you want your gauges to smell like a baby’s (clean) bum.
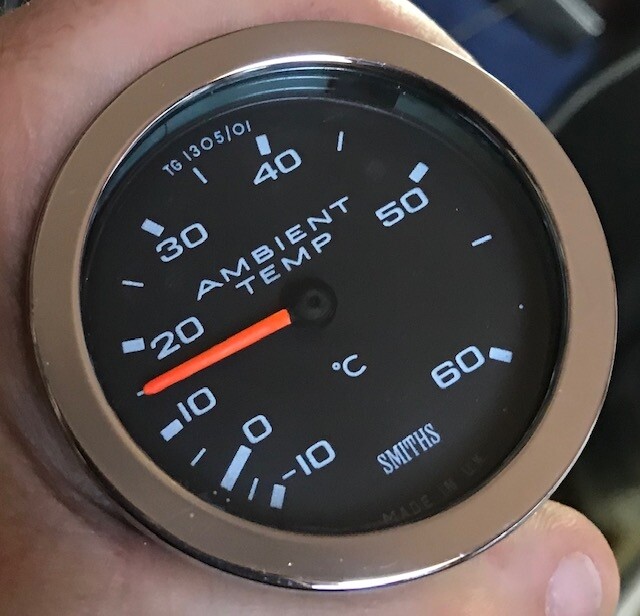
I’ve sort of calibrated it by rotating the scale plate so that it reads properly at 2 degrees C. The temperature it is showing in the picture is correct (within a degree or so - better than before when it was reading 10 degrees over).
Veg, the rocker switches are still black so I have a bit of confidence that the gauge faces will last. I’m searching for some information on mineral oil’s evaporative properties - so far nothing found (obviously asking the wrong questions!)
My car is an S4 FHC, a previous owner had cut a hole in the dash for a clock. I have replaced the dash and have no need for the clock, which is 60mm diameter and made by Kenzle. I don’t know if this is correct for a plus 2 or if it works. You are welcome to it if you would like it.
I used to have a Mark 1 Capri with a sun faded dash pad - a wipe with Castrol GTX on a rag did much the same thing. The oil eventually evaporated and I had to repeat it every few months or so, although it might last longer under glass on a gauge.
You could try “Back to Black” silicone spray - it might stay on the surface longer then oils.
I’ve used silicone products like that but they evaporate too quickly. Armor-all and Meguiars both failed to have any lasting effect on the rocker switches, for example.
Jon,
Nice work on the gauges. Can I ask how you removed the chrome surround and glass - any special tools needed etc.
Incidentally, when I was looking to restore the rocker switches Sue Miller recommended silicon brake fluid and even supplied a small amount. That was probably 8 years ago and they still look good.
Steve
I wouldn’t use brake fluid on the gauges as it is known to attack paint. Well, DOT4 does anyway… maybe silicon based fluid (DOT5) doesn’t. I’m not chancing it either way.
Removing the bezels depends on the gauge.
The Smiths 2" gauges have six tabs and the case flange has three gaps. You need to turn the bezel so three of the tabs are over the gaps, then use a small screwdriver to lever two of the other tabs up. Take your time doing this as it is easy to damage the bezel. You can then lift the bezel, hinging on the third tab that you didn’t bend up.
Speedo and rev counter have the same number of gaps as tabs, so you just need to turn the bezel until they line up.
The Kienzle clock is swaged all round, no tabs, so you have to go at it with a screwdriver and it will be damaged. Most of the damage will be hidden. But as you can’t actually get at the painted face without dismantling it, don’t bother. You only need to take it apart if you’re repairing the mechanism.
Use of washing up gloves (rubber, grippy) helps when turning the bezel.
Don’t forget to clean the glass especially the underside where 45 years of fine dust will have accumulated. This dust catches the panel light leading to reduced visibility of the instrument in the dark. And finally, change the bulbs even if they are still working as they appear to go dim with age.