As discussed in another thread, I have got past some of the things holding the dashboard in place…brackets, bonnet release, tach cable, etc., oh and it took quite a bit of trying to finally figure out how the ‘face level’ vent outlets come loose from the ducts! Got the dashboard loose-ish but I’m still having some stumbling blocks in terms of getting it to be able to pull away from the body.
Is there any way to disconnect the choke cable from the knob, or do I need to disconnect the other end from the carb and feed some cable back?
Is the dashboard supposed to be stuck to the crash pad? I keep thinking not, but reality is of course different. One end is a little loose but the rest seems as if one piece.
The choke cable is generally soldered or crimped into the knob so better to release the other end from the carbs and just pull the cable through into the cockpit.
Crash pad should be separate from the dash but who knows what a previous owner may have done. Maybe try running something between the two (spatula?) to try and free the dash.
I assume you’ve dropped the column down a bit, the only other things that come to mind are the ambient temp gauge if fitted and the oil pipe if you have a mechanical pressure gauge but being a 1970 model I think it would be an electronic one.
When you do get the dash loose you’ll obviously have to disconnect the heater control cables and speedo cable if not already done.
Just about to do the same job. Post lots of photos if you can!
My biggest concern is preserving the working ambient temperature gauge. Even thought the tube and coiled sheath is rusty as hell, the gauge reads perfectly…
Ned
My metal coil had rusted away on many sections . So before I removed it I wrapped the whole length in fabric electrical tape for protection. Basic rule of thumb… dont bend it (expensive lesson learnt)…leave all the kinks and curves as they are. When you come to refit it will be useful and you won’t risk the pipe through manipulating it. …
Good plan! Did you leave the tape on for good? Wondered about spraying with de-rust and then some Hammerite to try and stop further rot. Too delicate to try and remove the existing rust - better I think to stabilize what’s already there.
Ned
I do indeed have the electric oil gauge so no worries about that either.
Column is dropped a few inches; finally figured out that there were more bolts under the bonnet to remove than what I’d originally removed…Duh!
Haven’t found any sign of screws on the back, but I also can’t reach most of the top edge of the back of the dash just yet. I wonder if somebody glued it at some point, and why? Getting the defogger ducts out of the crash pad was interesting, but managed to do it without damaging the crash pad which appears to be original and healthy. On reflection, I think the choke is the main stumble so sometime in the next few days I’ll get that loose and see what happens.
Haven’t taken pics of the actual removal-process yet, but here’s one from recently of the dash in general:
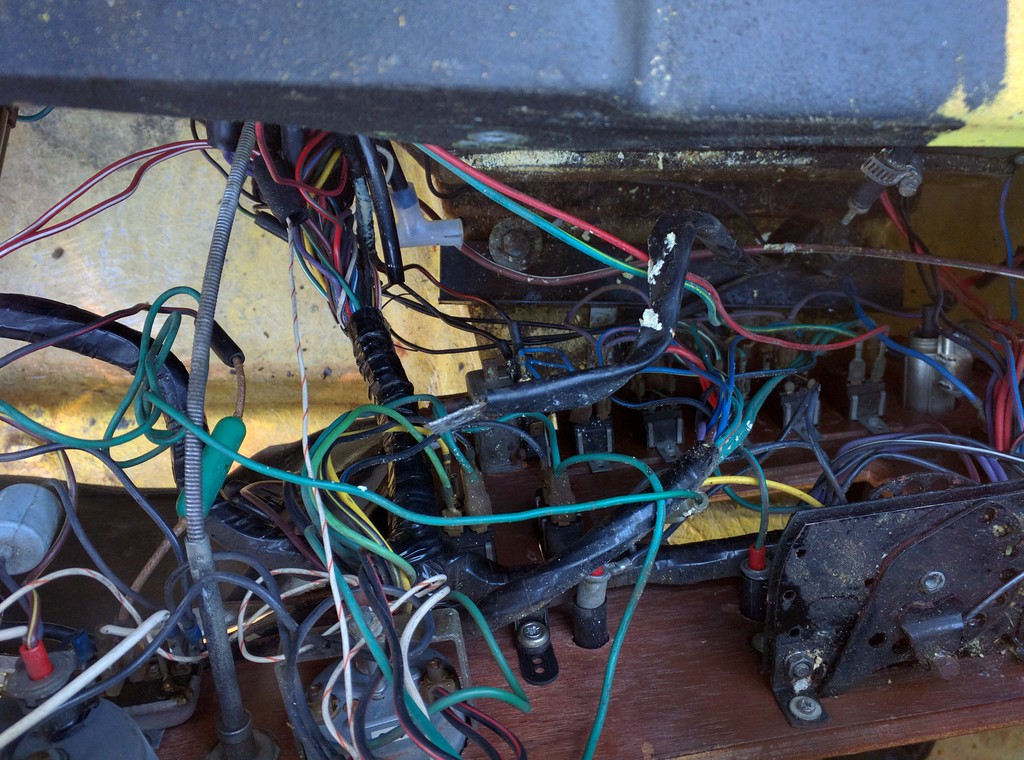
Removing the choke cable helped a great deal as suggested, and allowed enough motion to get a screwdriver inside and get the heater controls loose. So now that I’ve got myself in there, here’s what I’ve found:
-The Earth strap for the dashboard was not connected. That would explain a few things not working, yes? Bigger question: where it connects isn’t obvious. Where should it connect?
Both of the elbows that connect the headlight switch to the vacuum plumbing have split/come loose.
-A few wires are not connected. With any luck and the help of a decent wiring diagram I should be able to figure them out.
-All of the ‘bullet’ connectors that connect the dashboard to the rest of the car are stuck connected, perhaps by internal corrosion? I gave them each a tiny squirt of penetrating oil and will check again later- or not, as I’m also REALLY tempted to lop them off and replace them with more modern connectors that can consolidate all those connections into one or two multi-pin joints. Anybody who has done this have a suggestion for what type to use? And yes, I am labeling the wires so I can figure out how to re-connect them later.
-The crash pad is indeed glued to the dashboard (WHY OH WHY???). As it is the original type and in quite good condition, I’m hoping to somehow get it loose without damaging it.
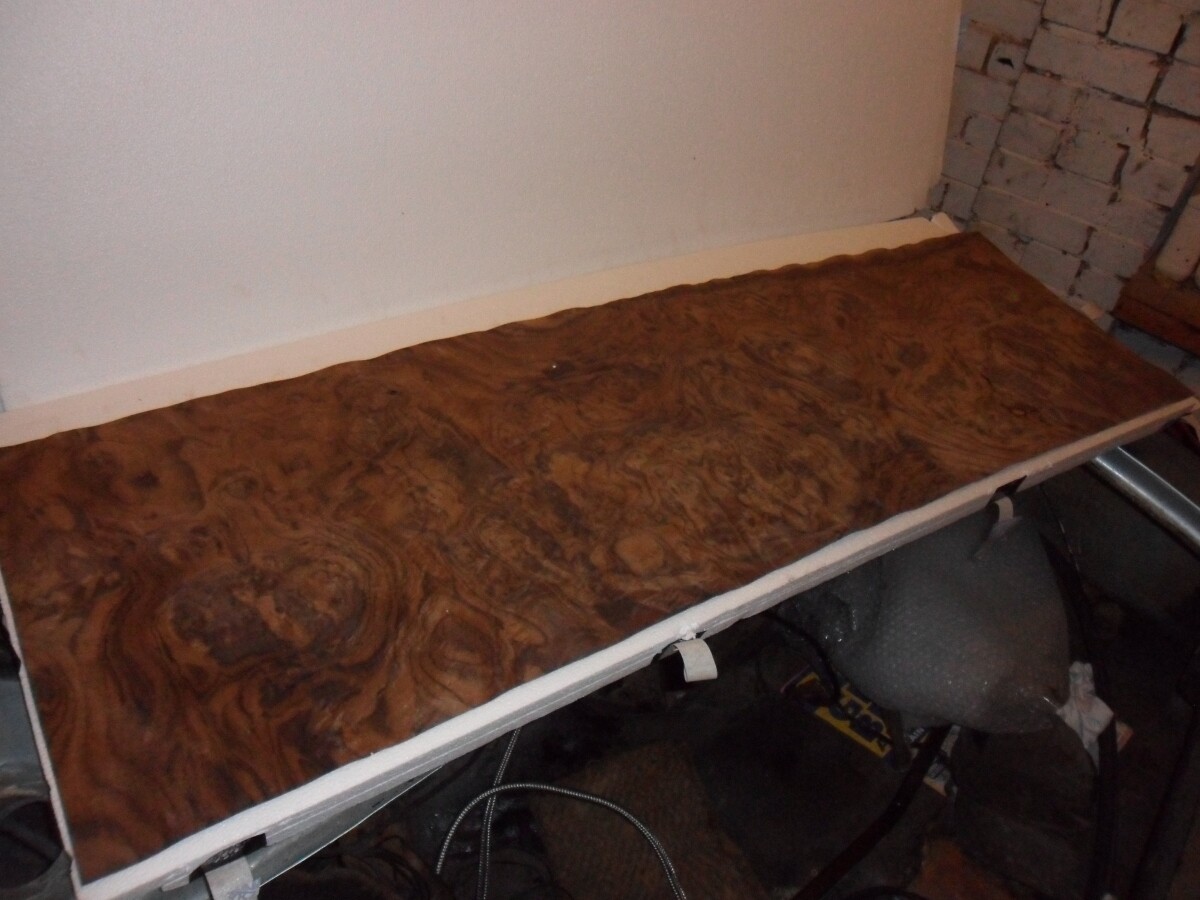
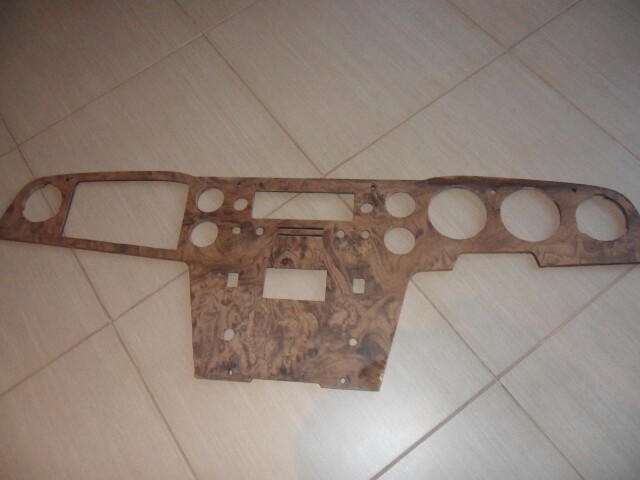
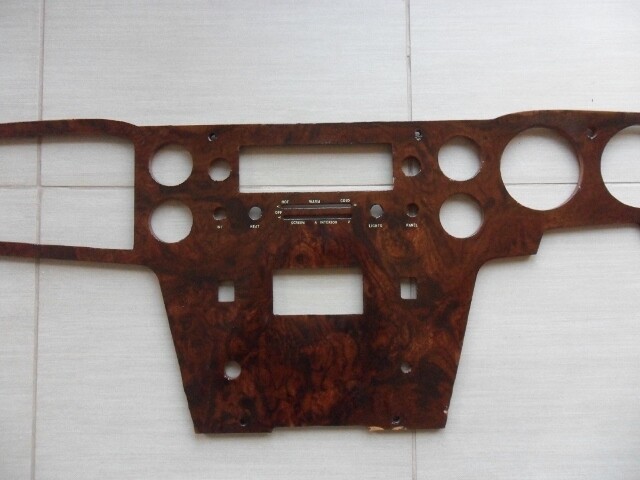
-The dashboard’s veneer comes off in large chunks if I so much as think about it the wrong way. I hope I can find a new veneer large enough to renew it. Have a lead on a local source for that, and I’m eager to see what’s available.
Afaik the crash pad is glued to the dash from the factory, mine was and I am pretty sure it had not been off before! When i rebuilt it i glued the crash pad to the body in order to stop it curling up as they do with age and heat etc then, I used hook and loop tape at the join of crash pad and dashboard so that it is secure but easily removable.
Yes, I also found that the dashboard was glued to the crashpad which made removal very difficult. I left it that way fearing damage to one or other if I tried to seperate them. I wonder if this was only done to later cars since not much mention of the problem?
Dougal.
Very impressive!
Looks like one big sheet of veneer too - I’m finding it hard to source. I want to bookmatch with a join up the middle of the dash (like my original one is). Where did you get the veneer?
Did you put the letraset under the final coats of varnish/Rustins? It feels like they shouldn’t be sitting on the surface, where they could easily get scratched off.
Ned
Thanks Ned, Yes I got it in one piece. The chap at the company sent me some photos of two or three to chose from after I gave him my size requirements and they sent it sandwiched between two slabs of polystyrene, simple but clever. I think it was about ?40
I did put the letters on underneath the varnish so they are well protected.
Kev.
For the earth strap, it should attach to the bottom right dash mounting bolt - the one that goes through to the bracket on the centre tunnel/chassis spine. The wires may have just dropped off when you undid the bolt but yes, if not attached it would stop things working.
The other end of the strap is attached to the bolt that fixes that same bracket to the tunnel. Is that correct? Seems a little pointless to connect from the bracket to the bolt that connects to the bracket.
EDIT: I was half-asleep when I read your reply Robbie. I think you’re saying that other wires should meet the strap at the bolt, right?
The strap definitely wasn’t fixed at eh bolt, as when I’d only got the dashboard loose enough to get a few inches of motion is when I saw the strap extended to the upper left, up in the wiring for the switches.
Correct - Basically the lower dash mounting bracket is the earth point for all the earths behind the dash, as this bracket is attached to the chassis backbone this is your earth return. So if you find any black wires with ring terminals floating around they will most likely have come from there…
Sorry to take so long with an update, things have been really busy lately with moving my office and other crazyness.
Anyway, tonight I finally got the dashboard loose from the car! Another stumbling-point in the process was all those old bullet connectors, which seemed to be stuck shut by by internal corrosion or something. A few days ago I gave them all a small shot of penetrating oil and tonight they came unstuck, though some required a good hard tug and I’m even more convinced now that I should upgrade to some sort of modern multi-pin connectors. Of course I labeled all the wires before disconnecting them. Not everything made sense though. There were a small few that were loose already from the flat connectors on switches and other things; with any luck those should be easy to sort during re-assembly. I noticed too that one of the thick wires connected to the ammeter shows some signs of heat- the insulation is OK, but the translucent cover on the connector is a bit melted. Anything to be concerned about regarding the load on this wire?
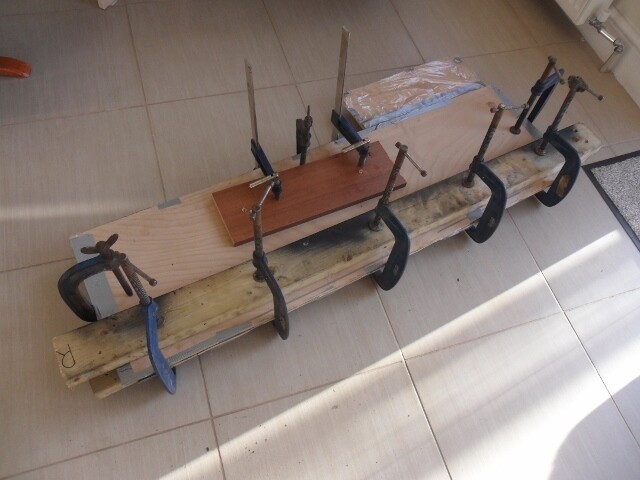
The veneer is in terrible shape, and on Monday I’m going to drag the thing down to a shop in the city where they may have or can get a nice piece that I can glue on.
This one shows what I saw at first glance inside- the earth strap hanging free. Note however that the earth-wires that are supposed to meet it at the bolt are connected to the bolt into the bobbin on the tunnel:
Now I see what you mean by Earth Strap, I’ve not seen one like that inside the cabin before. Could be a previous owner mod, my experience is with the S-130 model which could be different but I doubt it. I can’t see why it is needed as the dash bracket is (or should be) bolted directly to the chassis through the fibreglass so that is all you need for an earth point. The strap has obviously been added to extend the earth attachment but for why I couldn’t say.
The relay on the RHS of the heater is a previous owner mod by the looks of it but no idea what it was supposed to do…