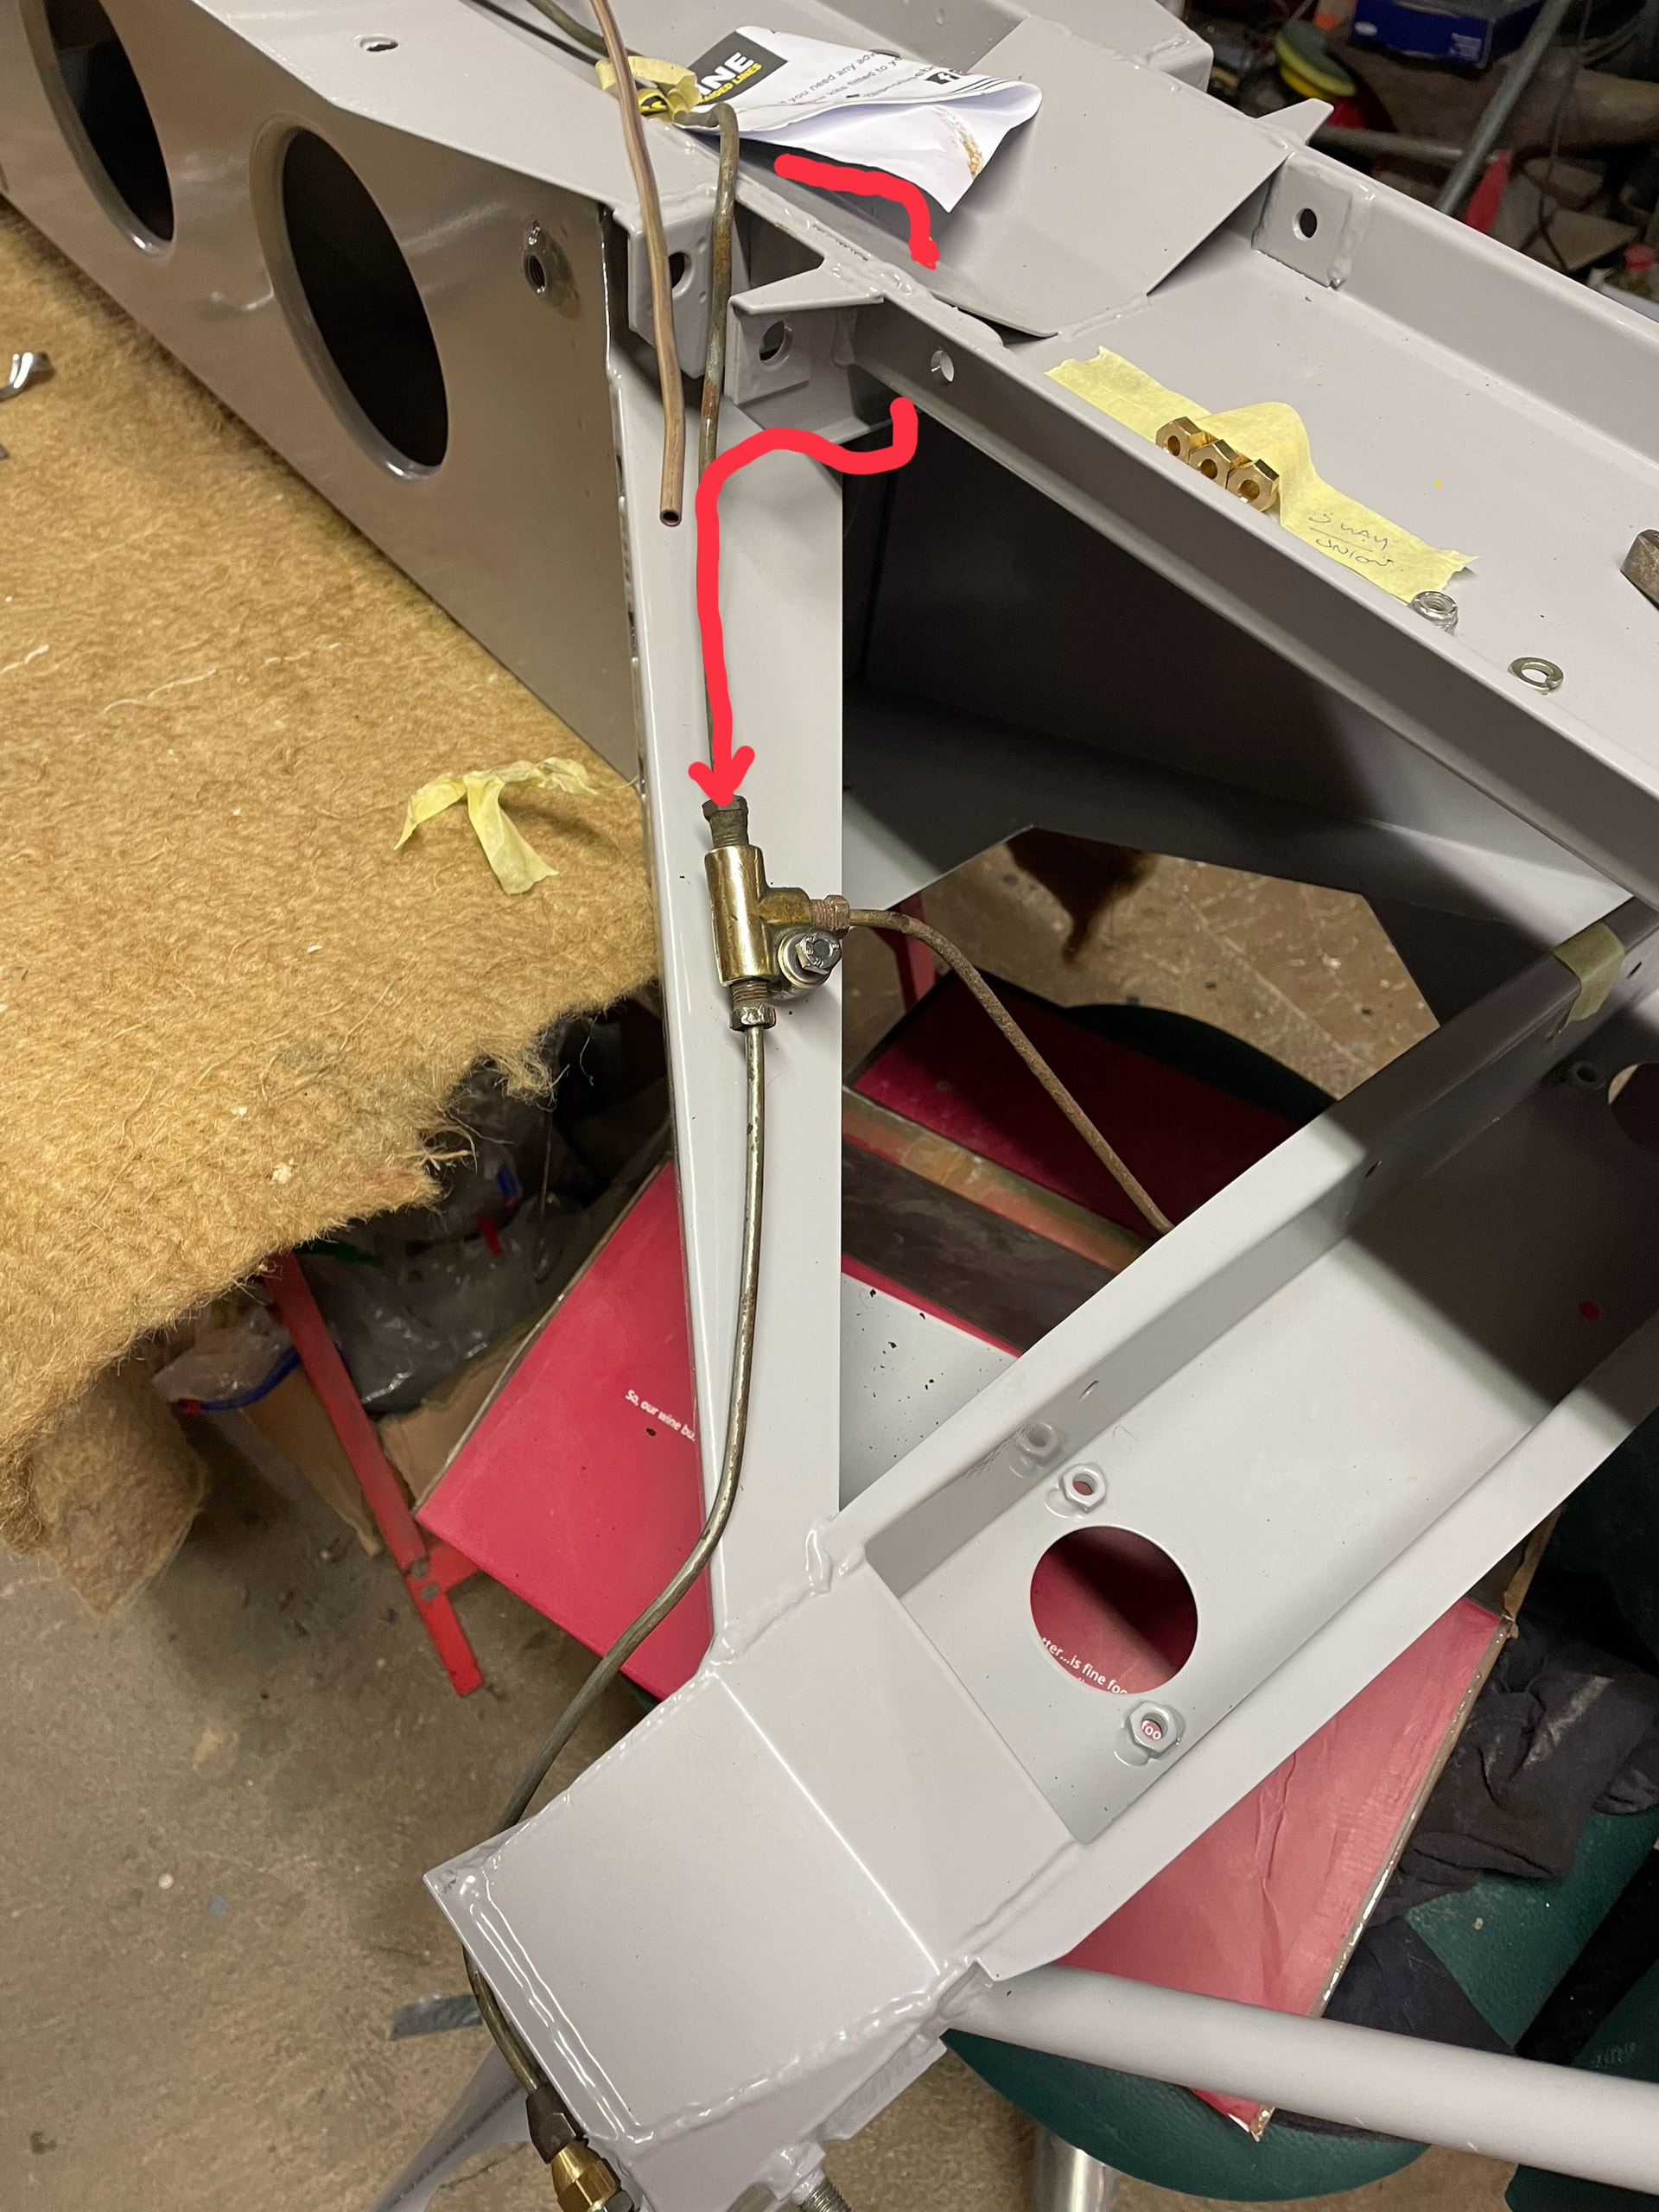
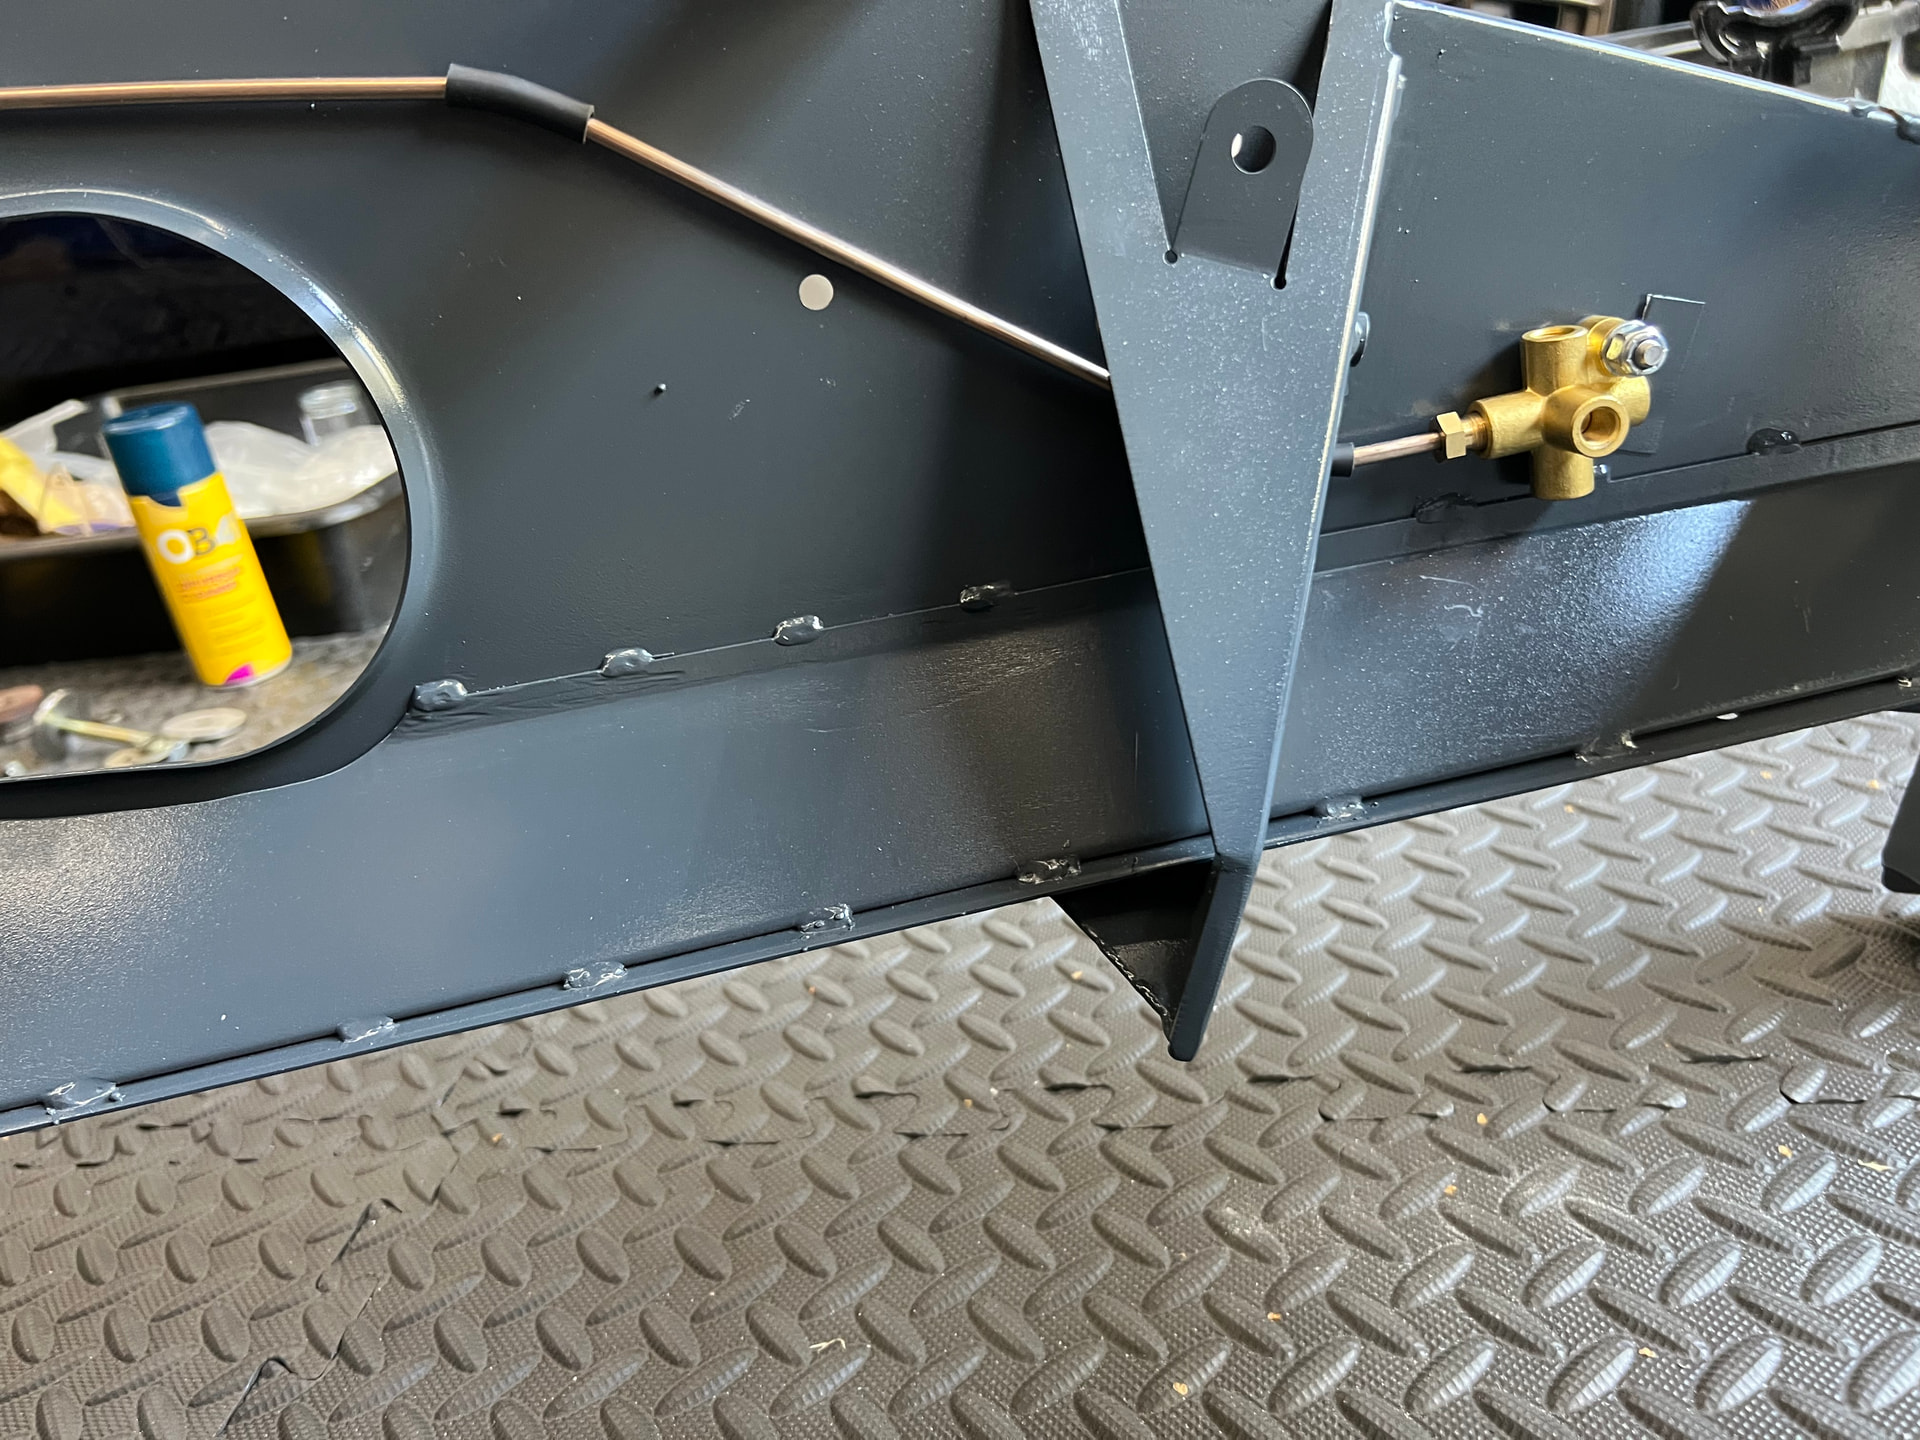
Hoping someone can point me in the right direction please. I’m struggling to see how to get the brake line along the spine of the chassis, down through the hole ( which is covered by a strengthening plate for the rear wishbone ) to the brass 3 way connector . I was hoping to pre bend and flare it before fitting it but the strengthening piece stops all of that

Hi, had this problem on my elan, I thought a 26r chassis would be the best and I’m sure it will prove the case once on the road but it did cause some issues during the build.
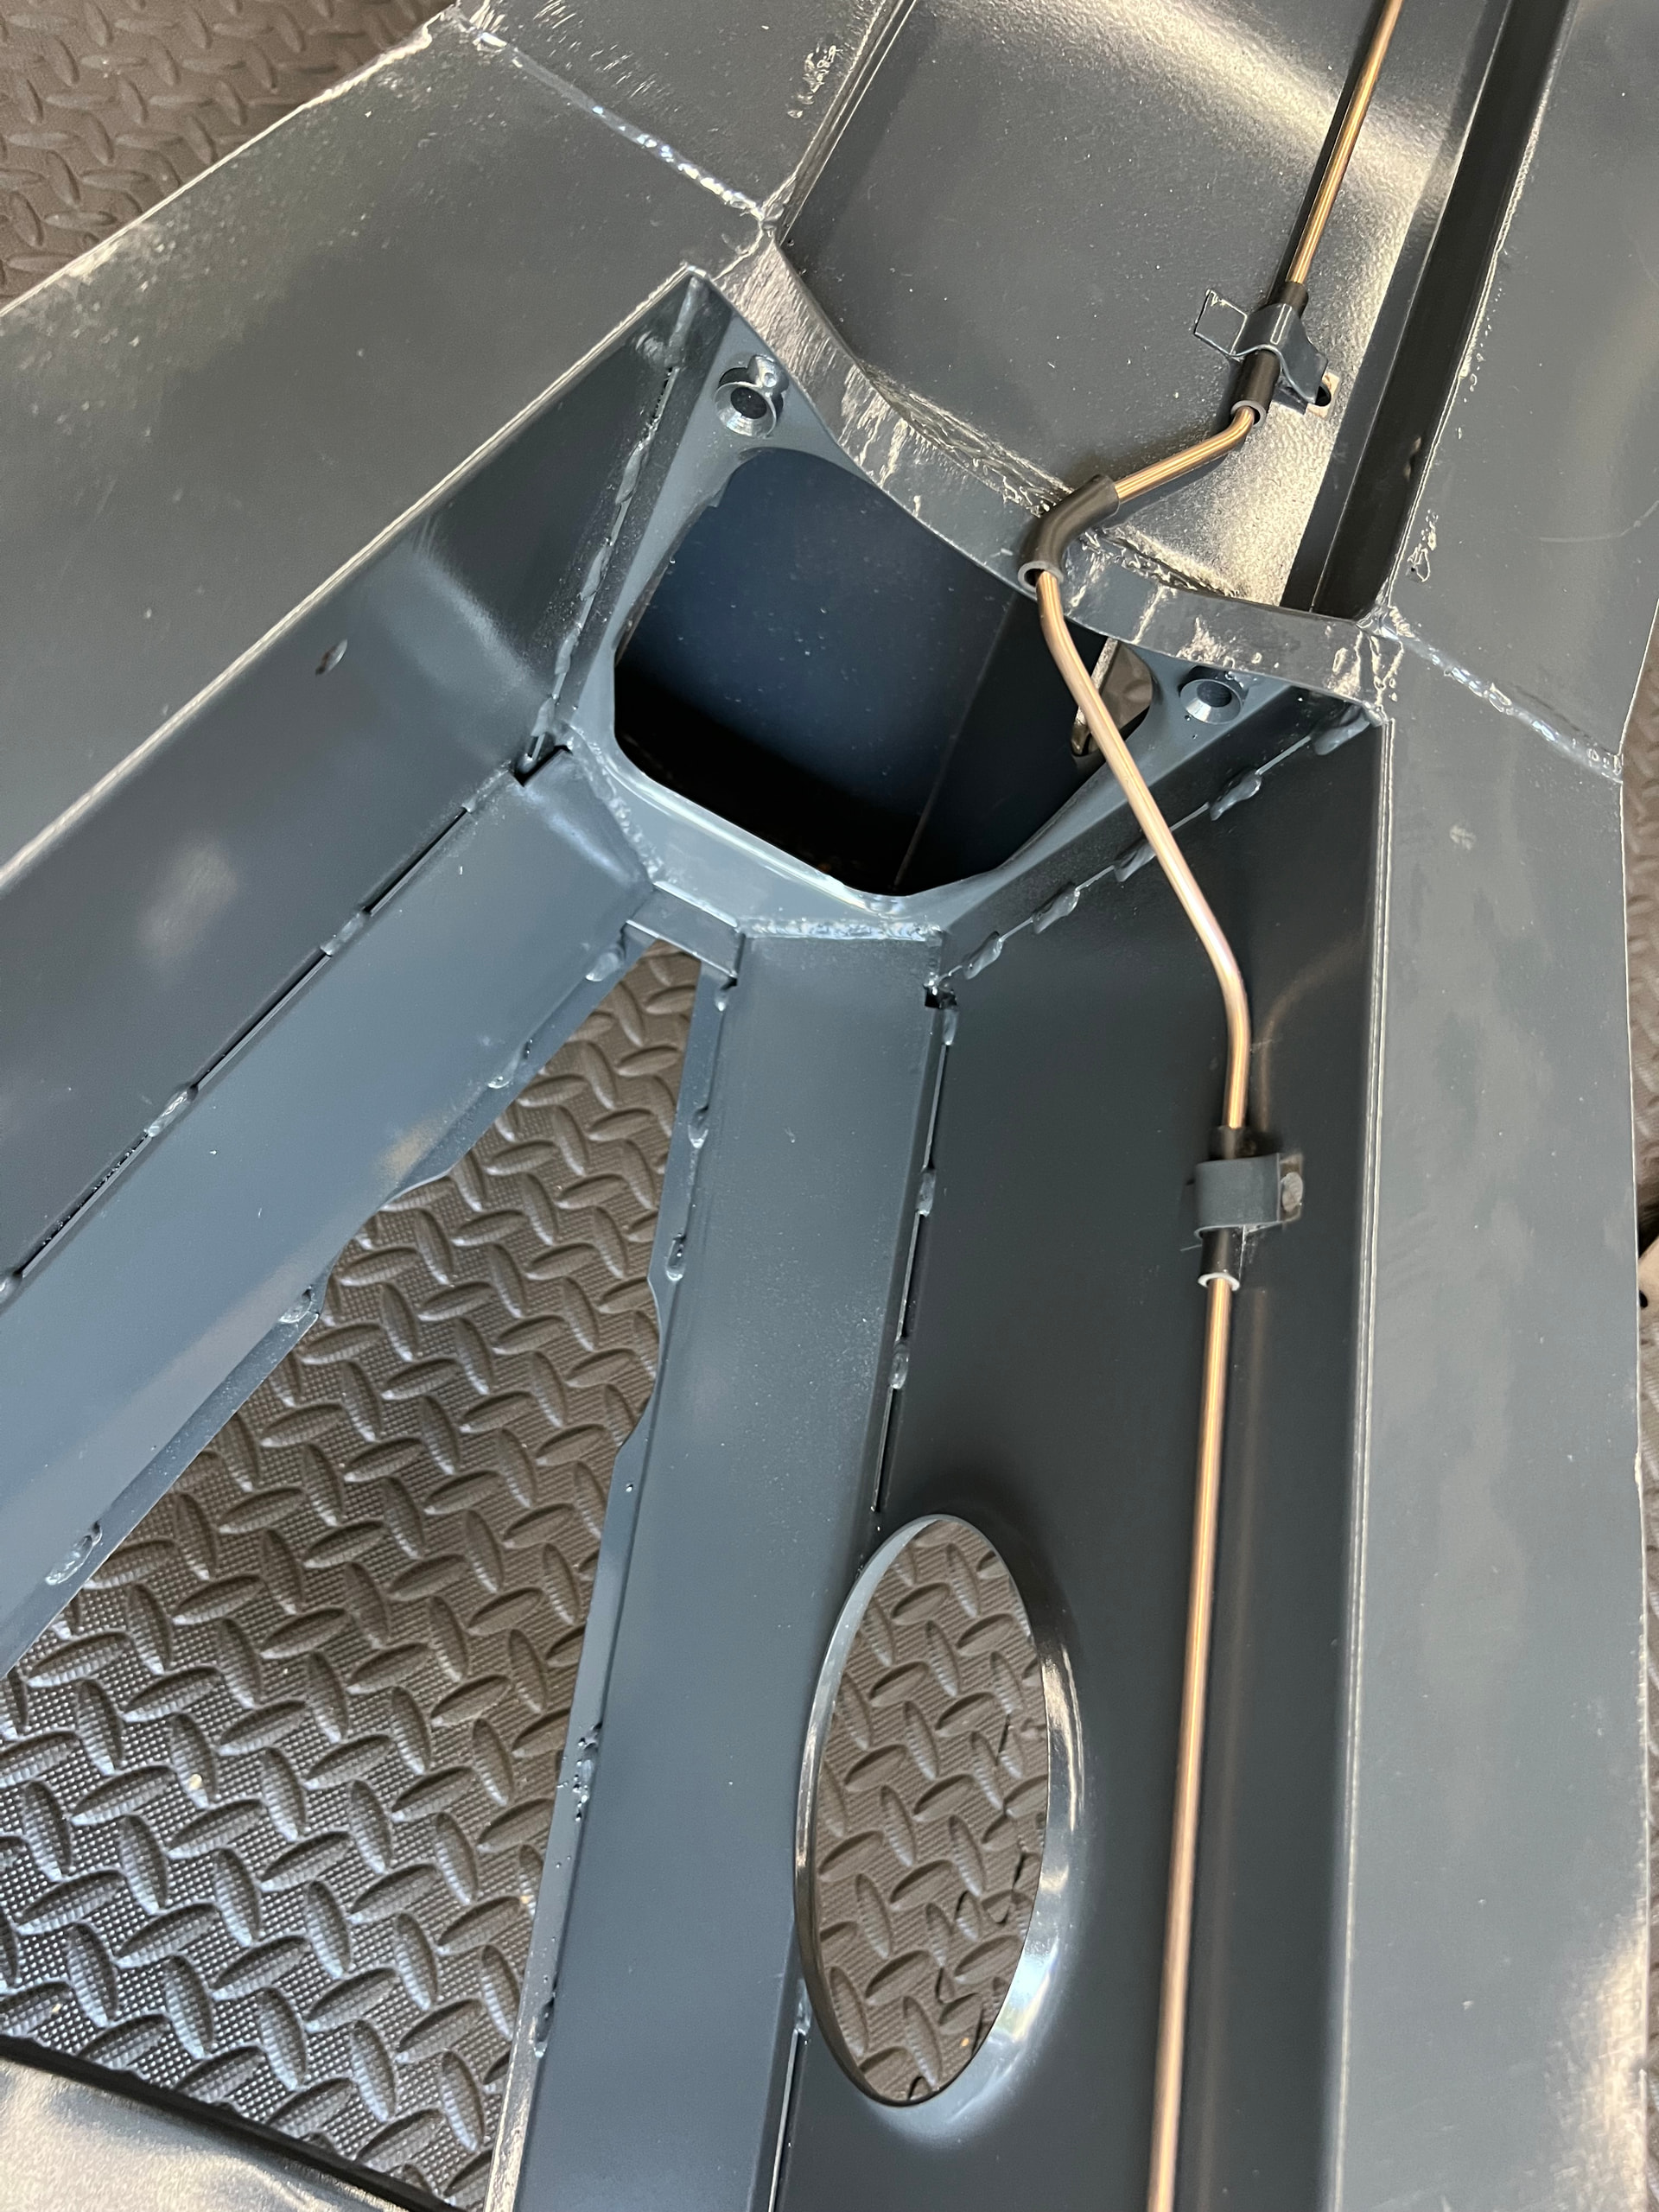
On mine, under the strengthening plate was the original hole for the pipe as routed on the standard chassis. I drilled a hole in the strengthening plate, painted the now bare metal, fitted it with grommets to prevent any chaffing and was then able to route the pipe more or less as standard. I was using old pipes etc in the photo as a mock up and discovered the problem the same as you have.
I think you might run into some more issues along the way……..
The boxed in parts do throw up other problems, routing of fuel line, some earth points And especially so where the body/ mounts are where the bottom of the dash fits.
Thank you very much for the pictures and information, just what I was looking for!
I’d already bought heat shrink ( military grade , never knew there was such a thing) , and grey touch up paint albeit the wrong shade of grey.
I just couldn’t see a nice way of getting the 3/16 under the plate and through the hole without forcing it through!
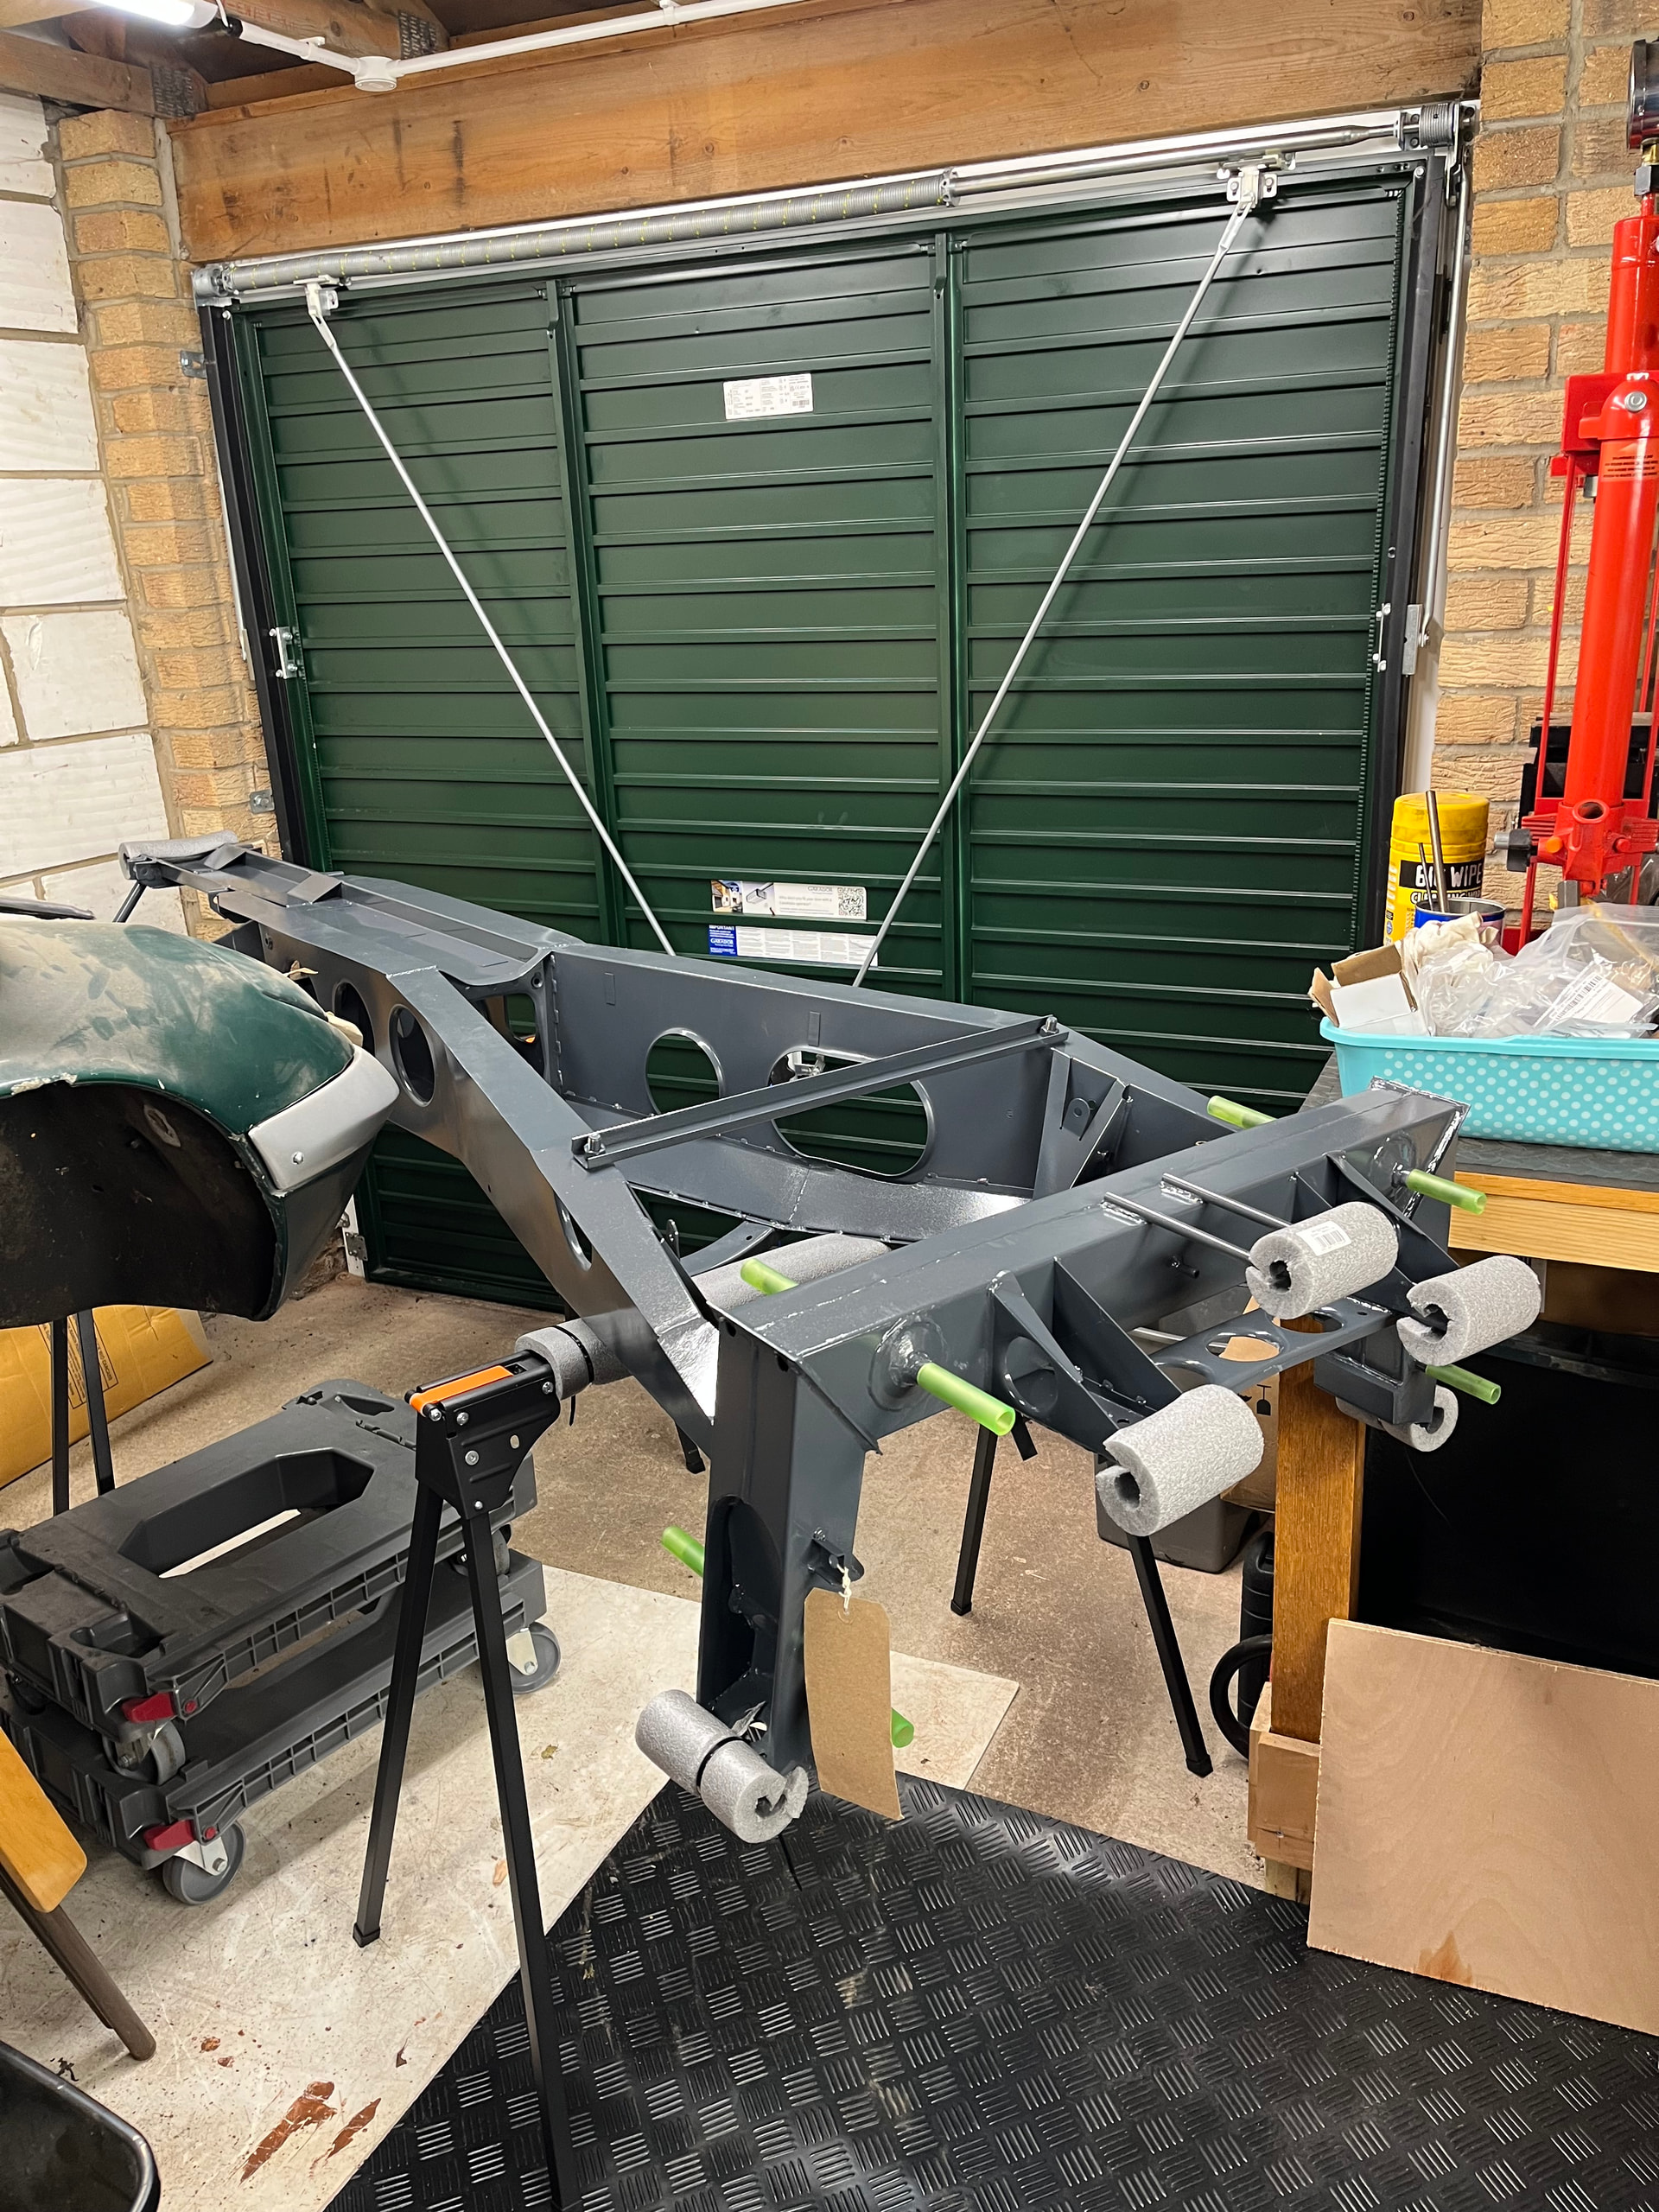
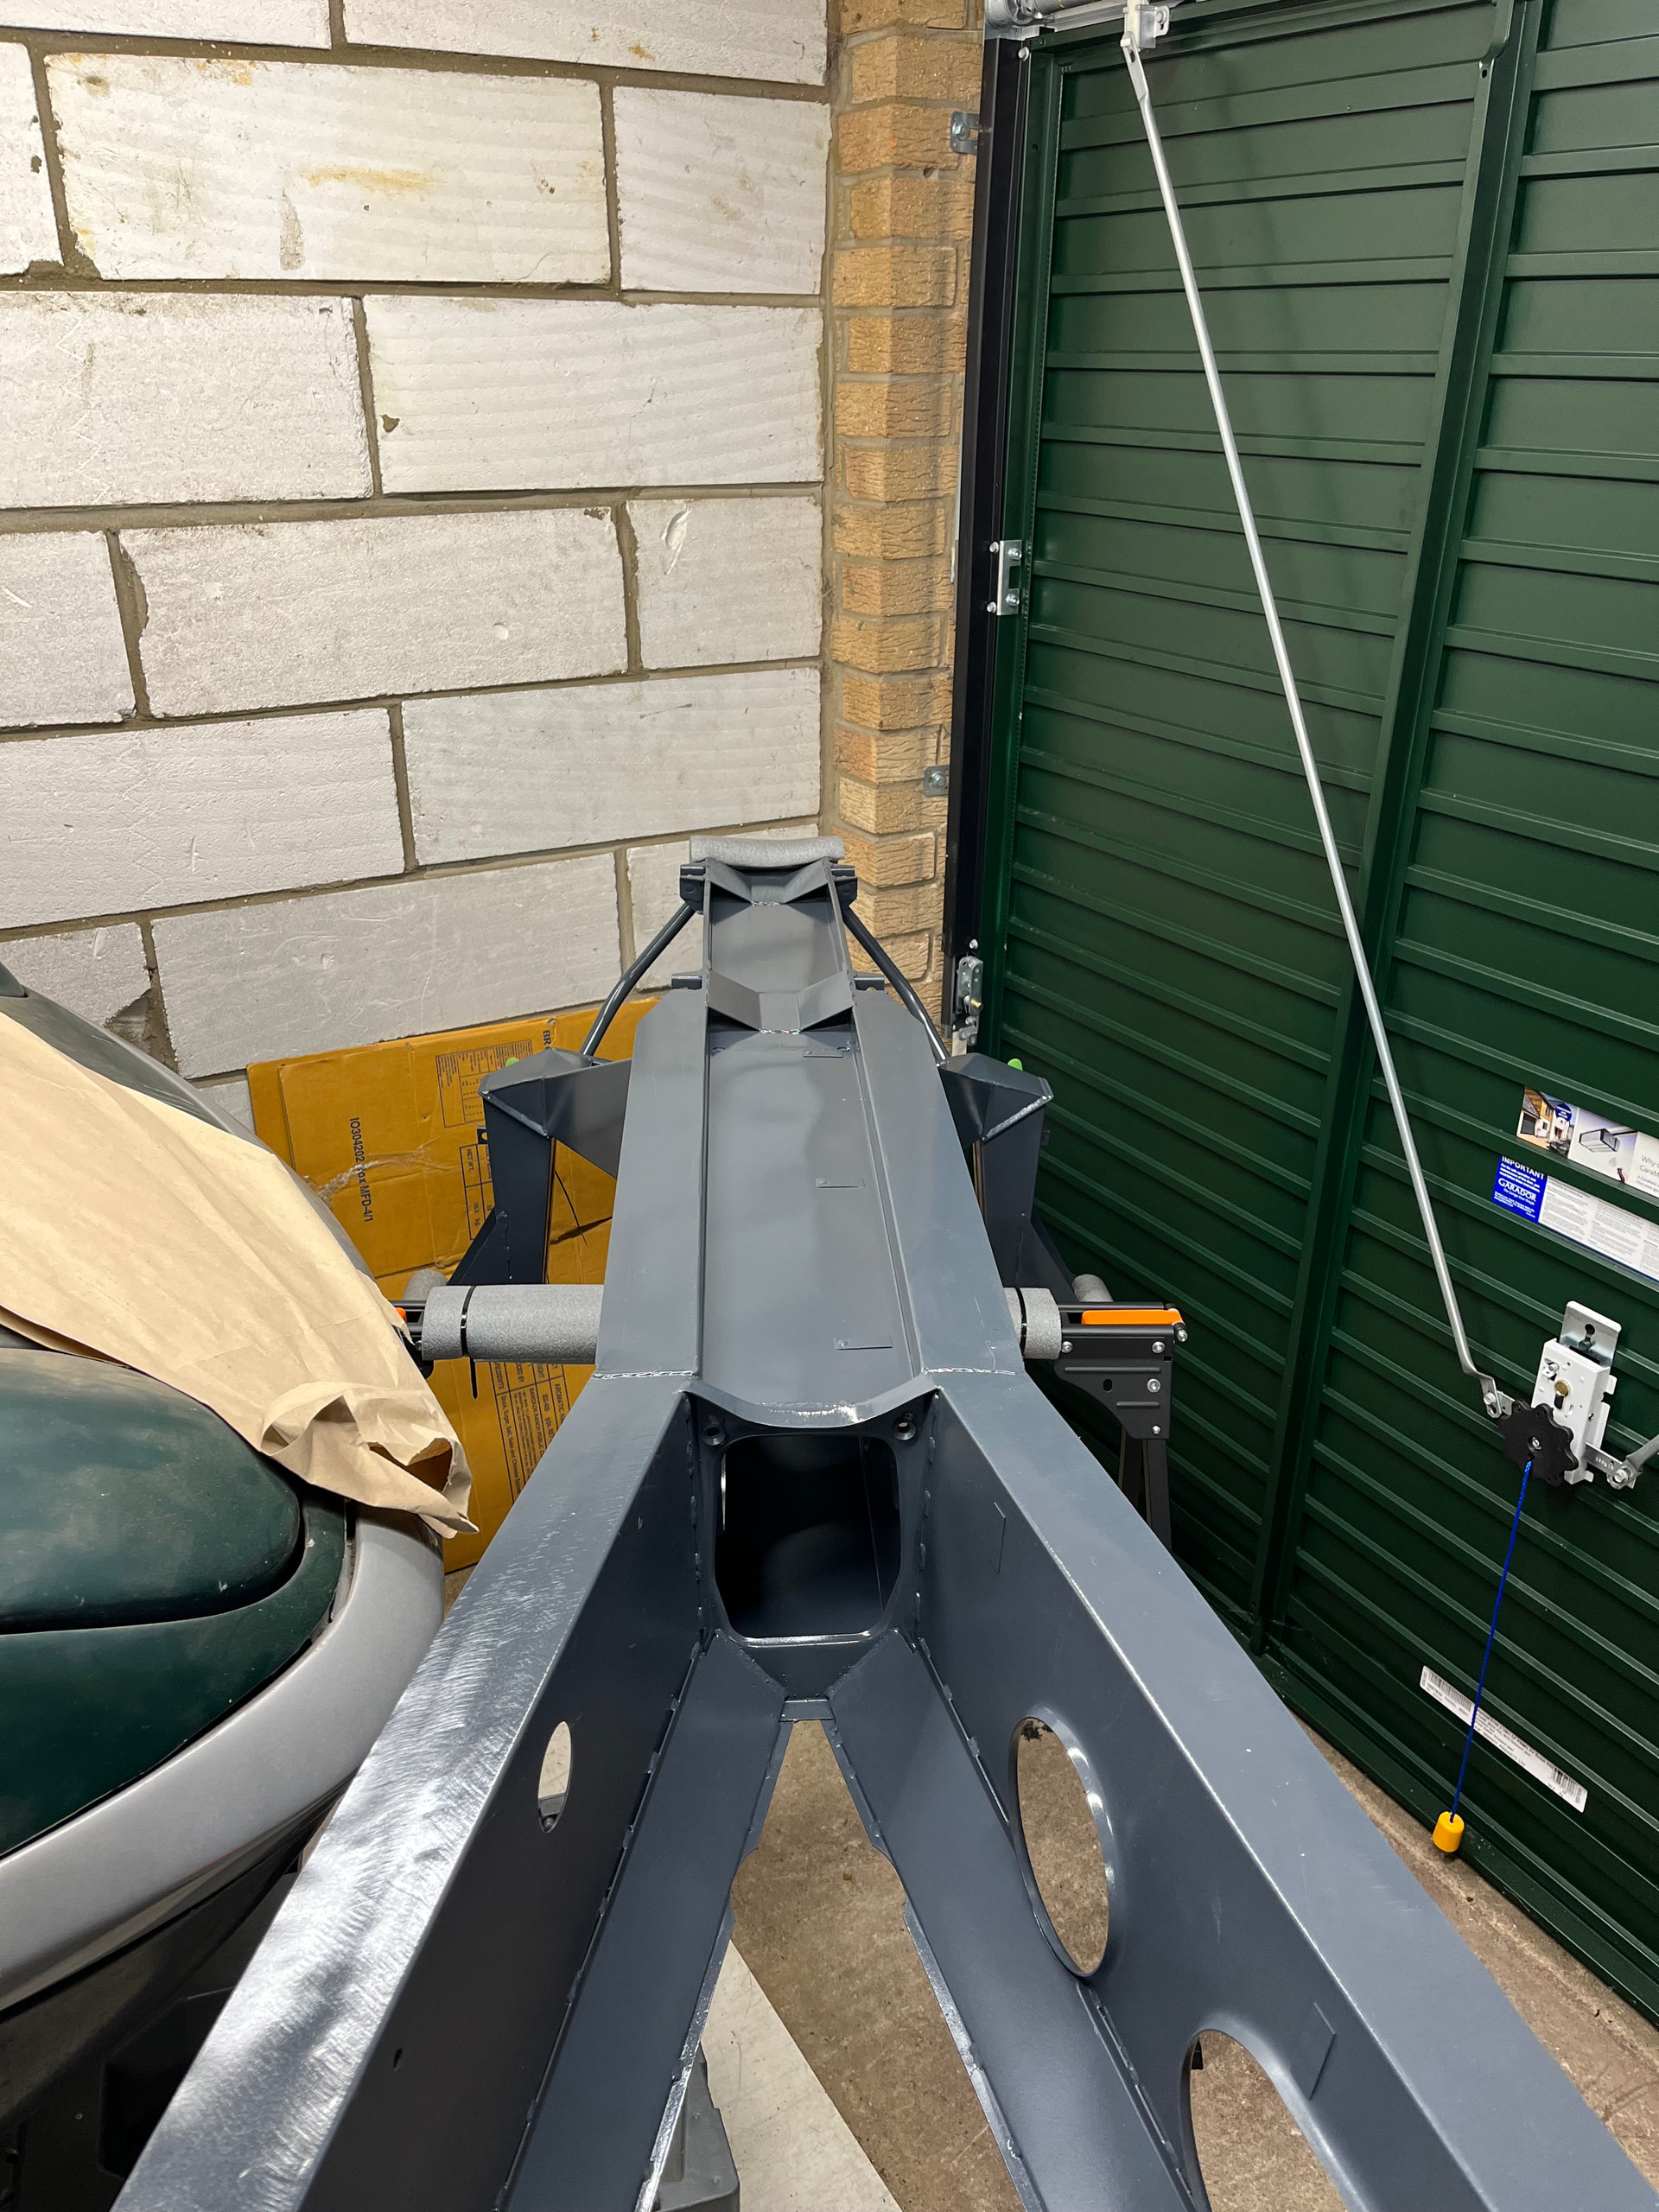
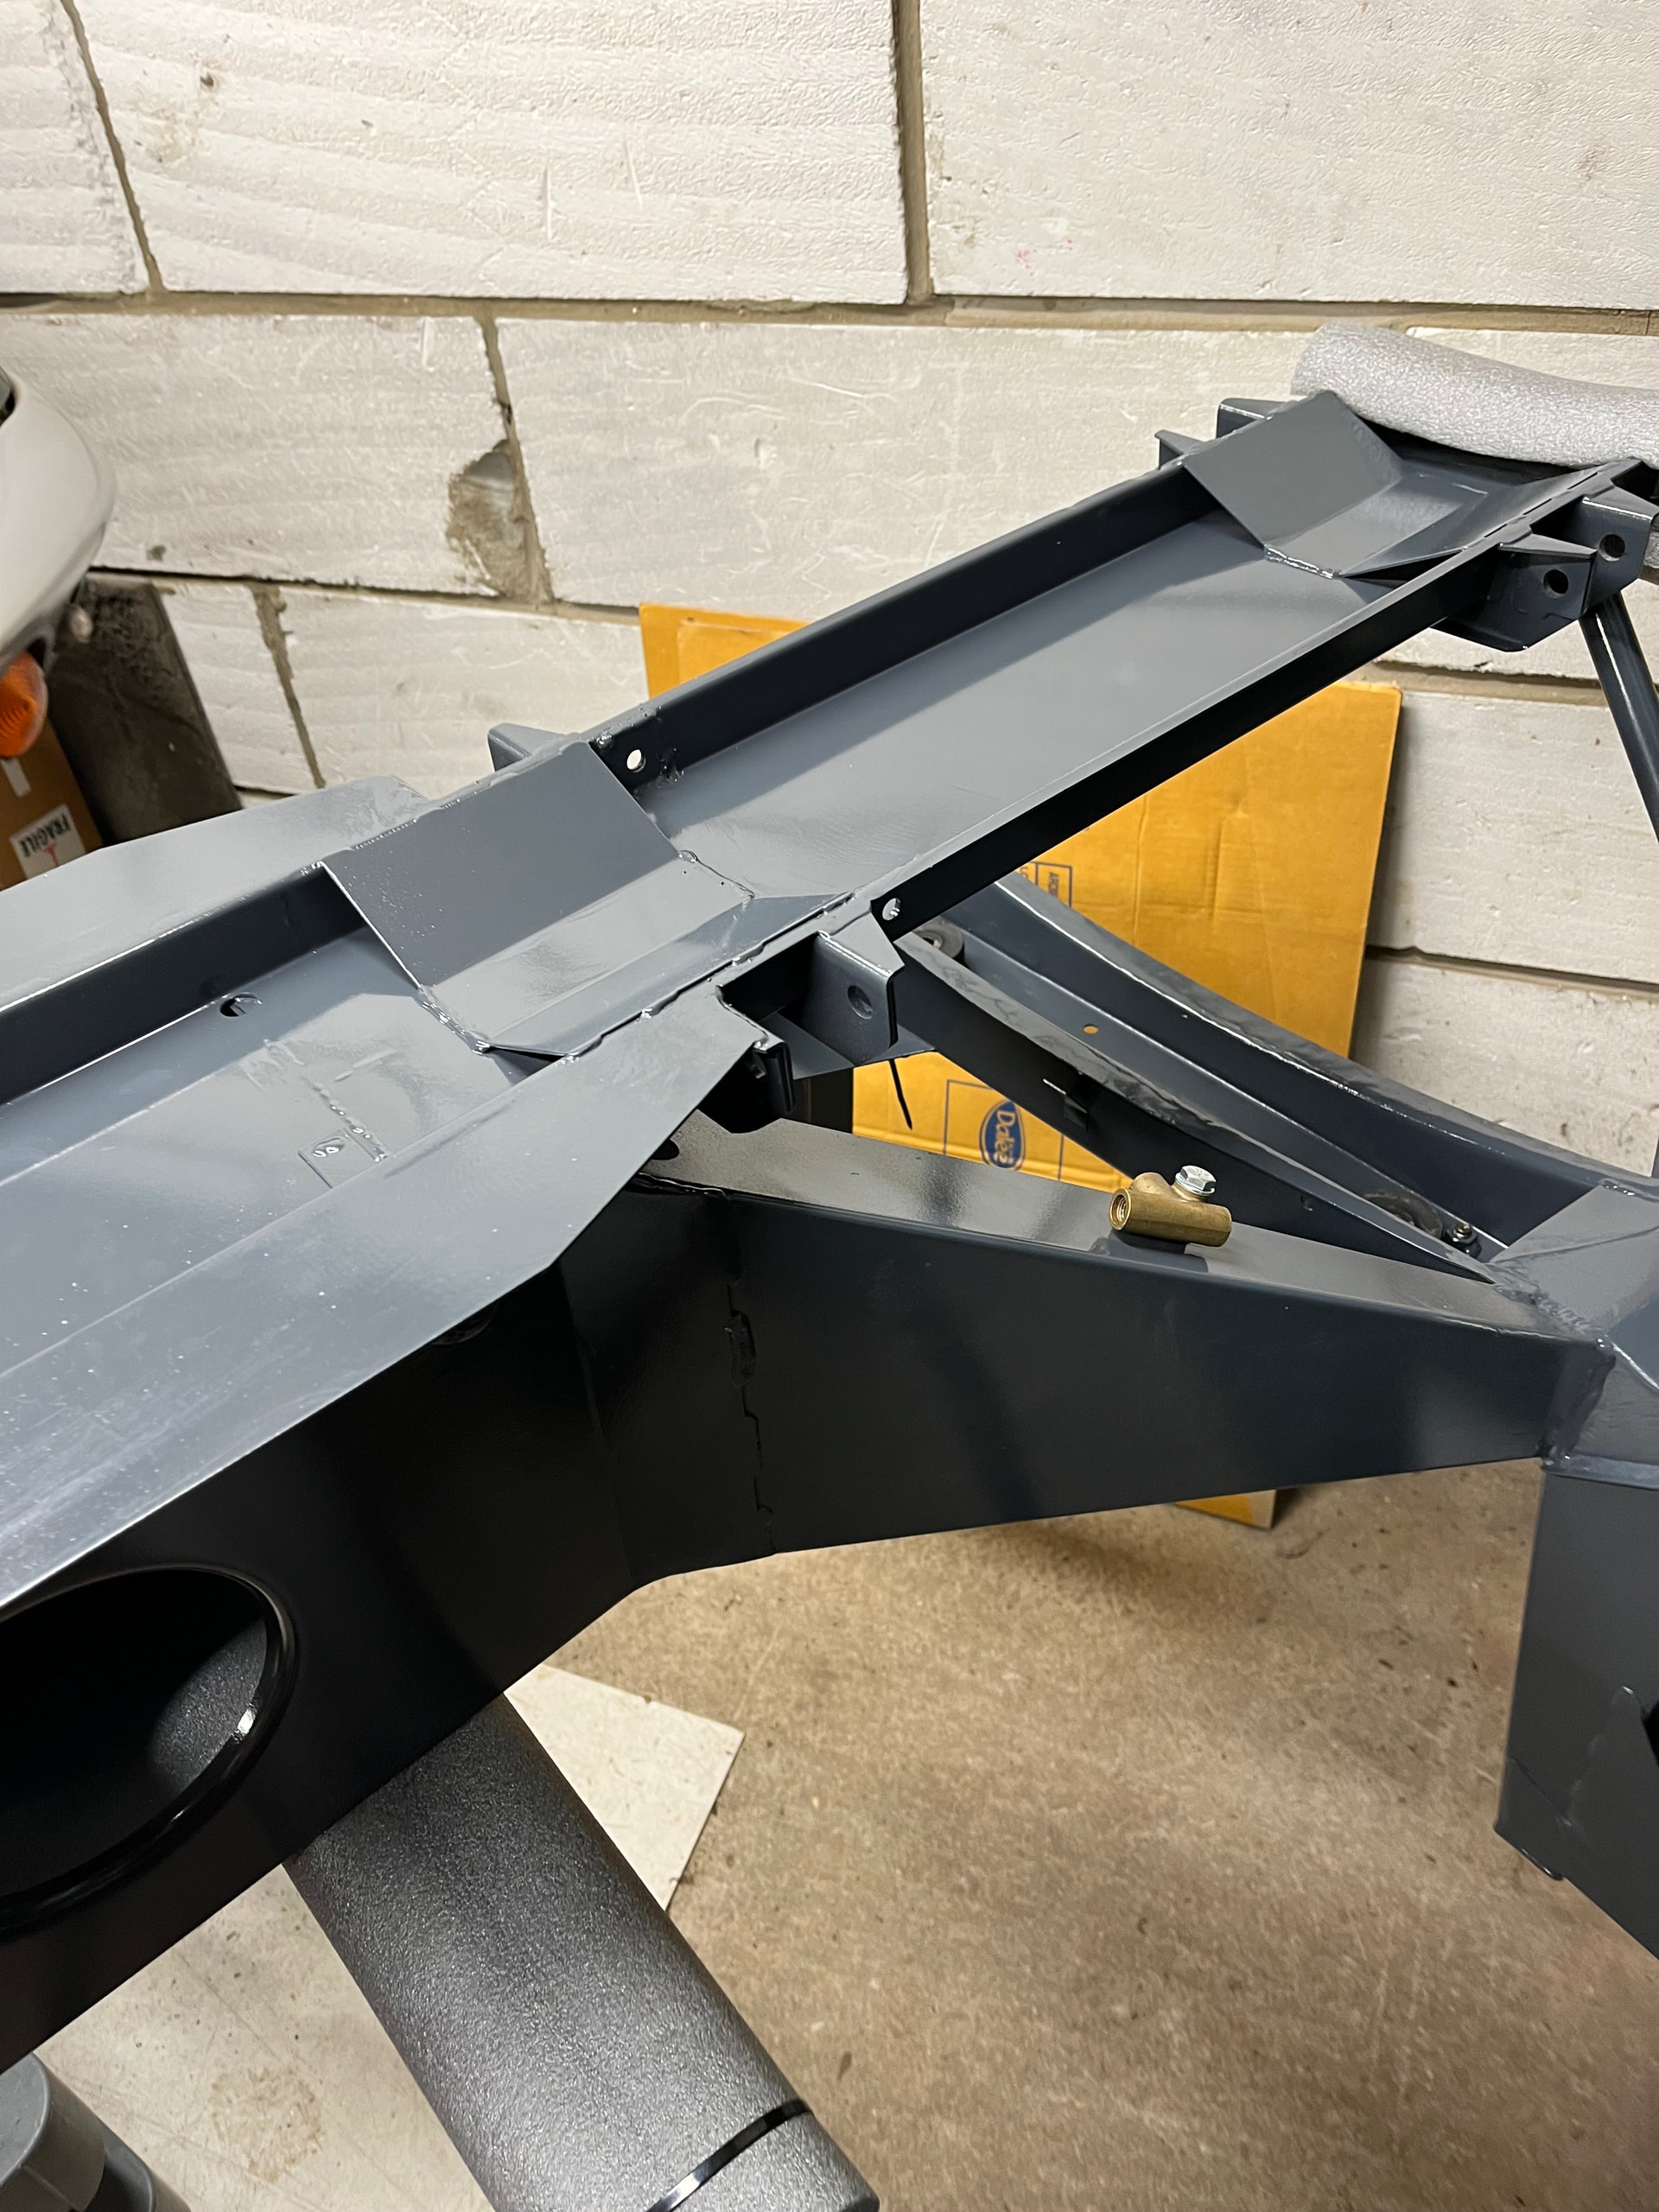
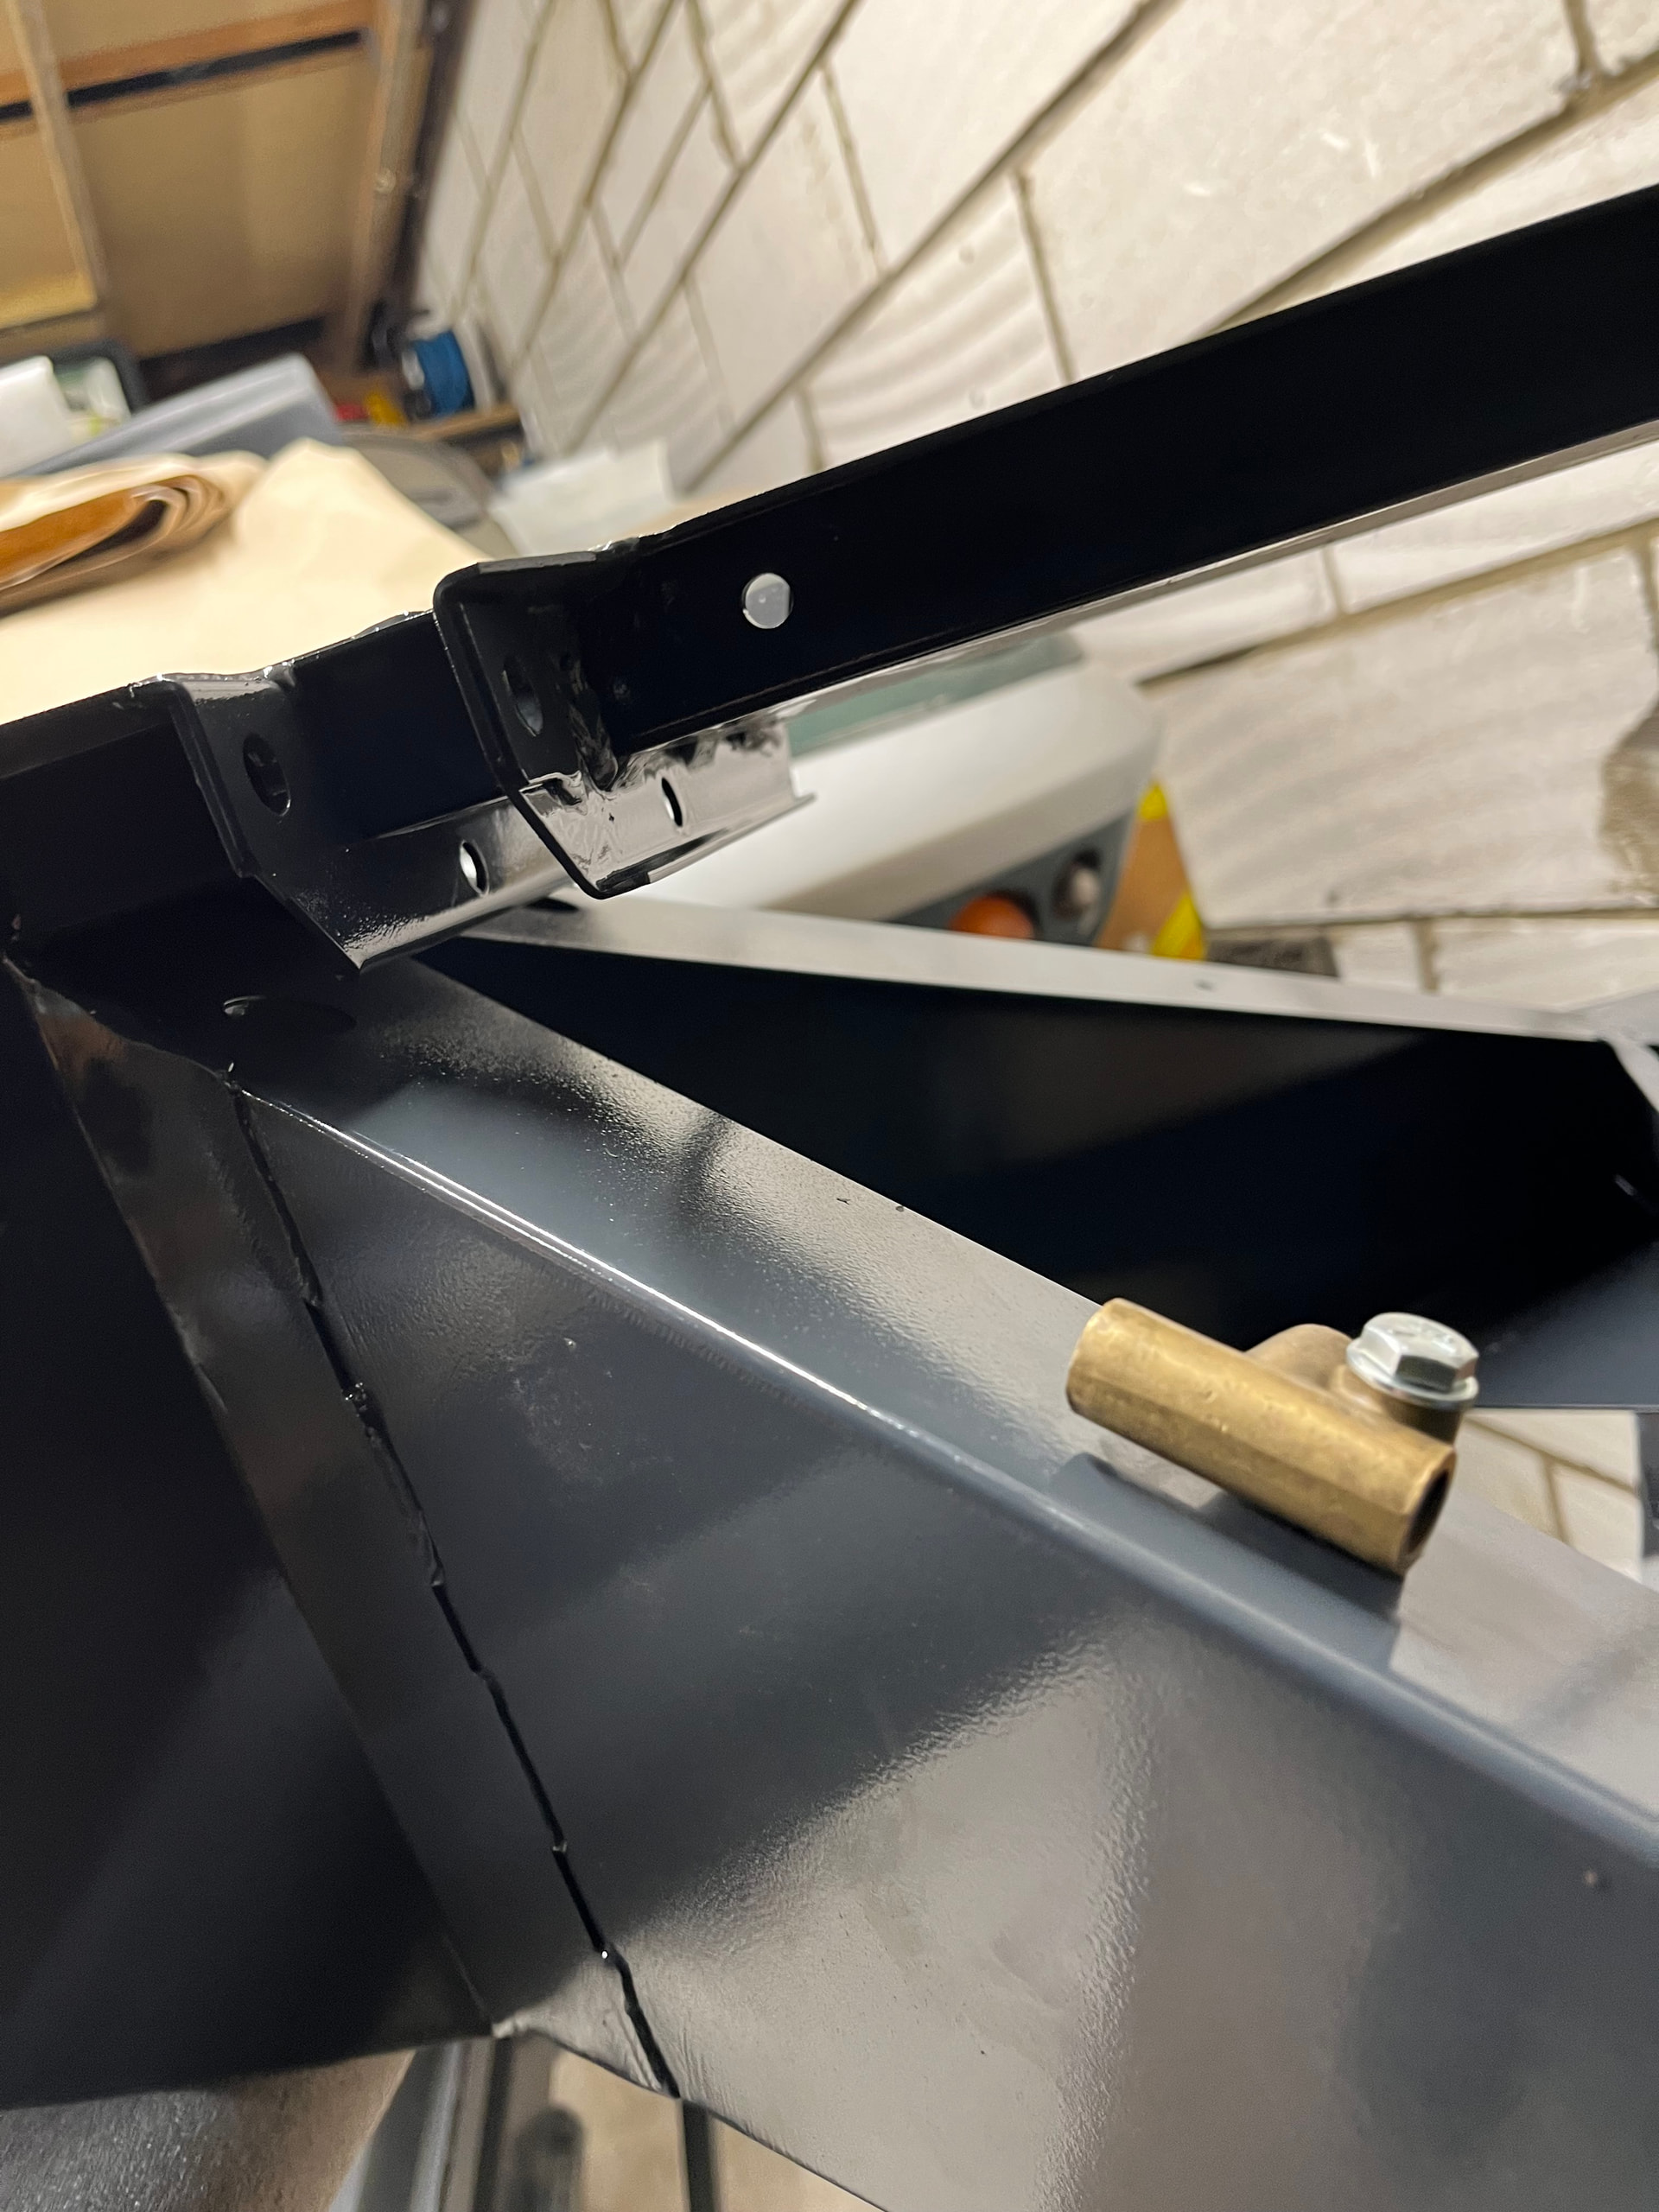
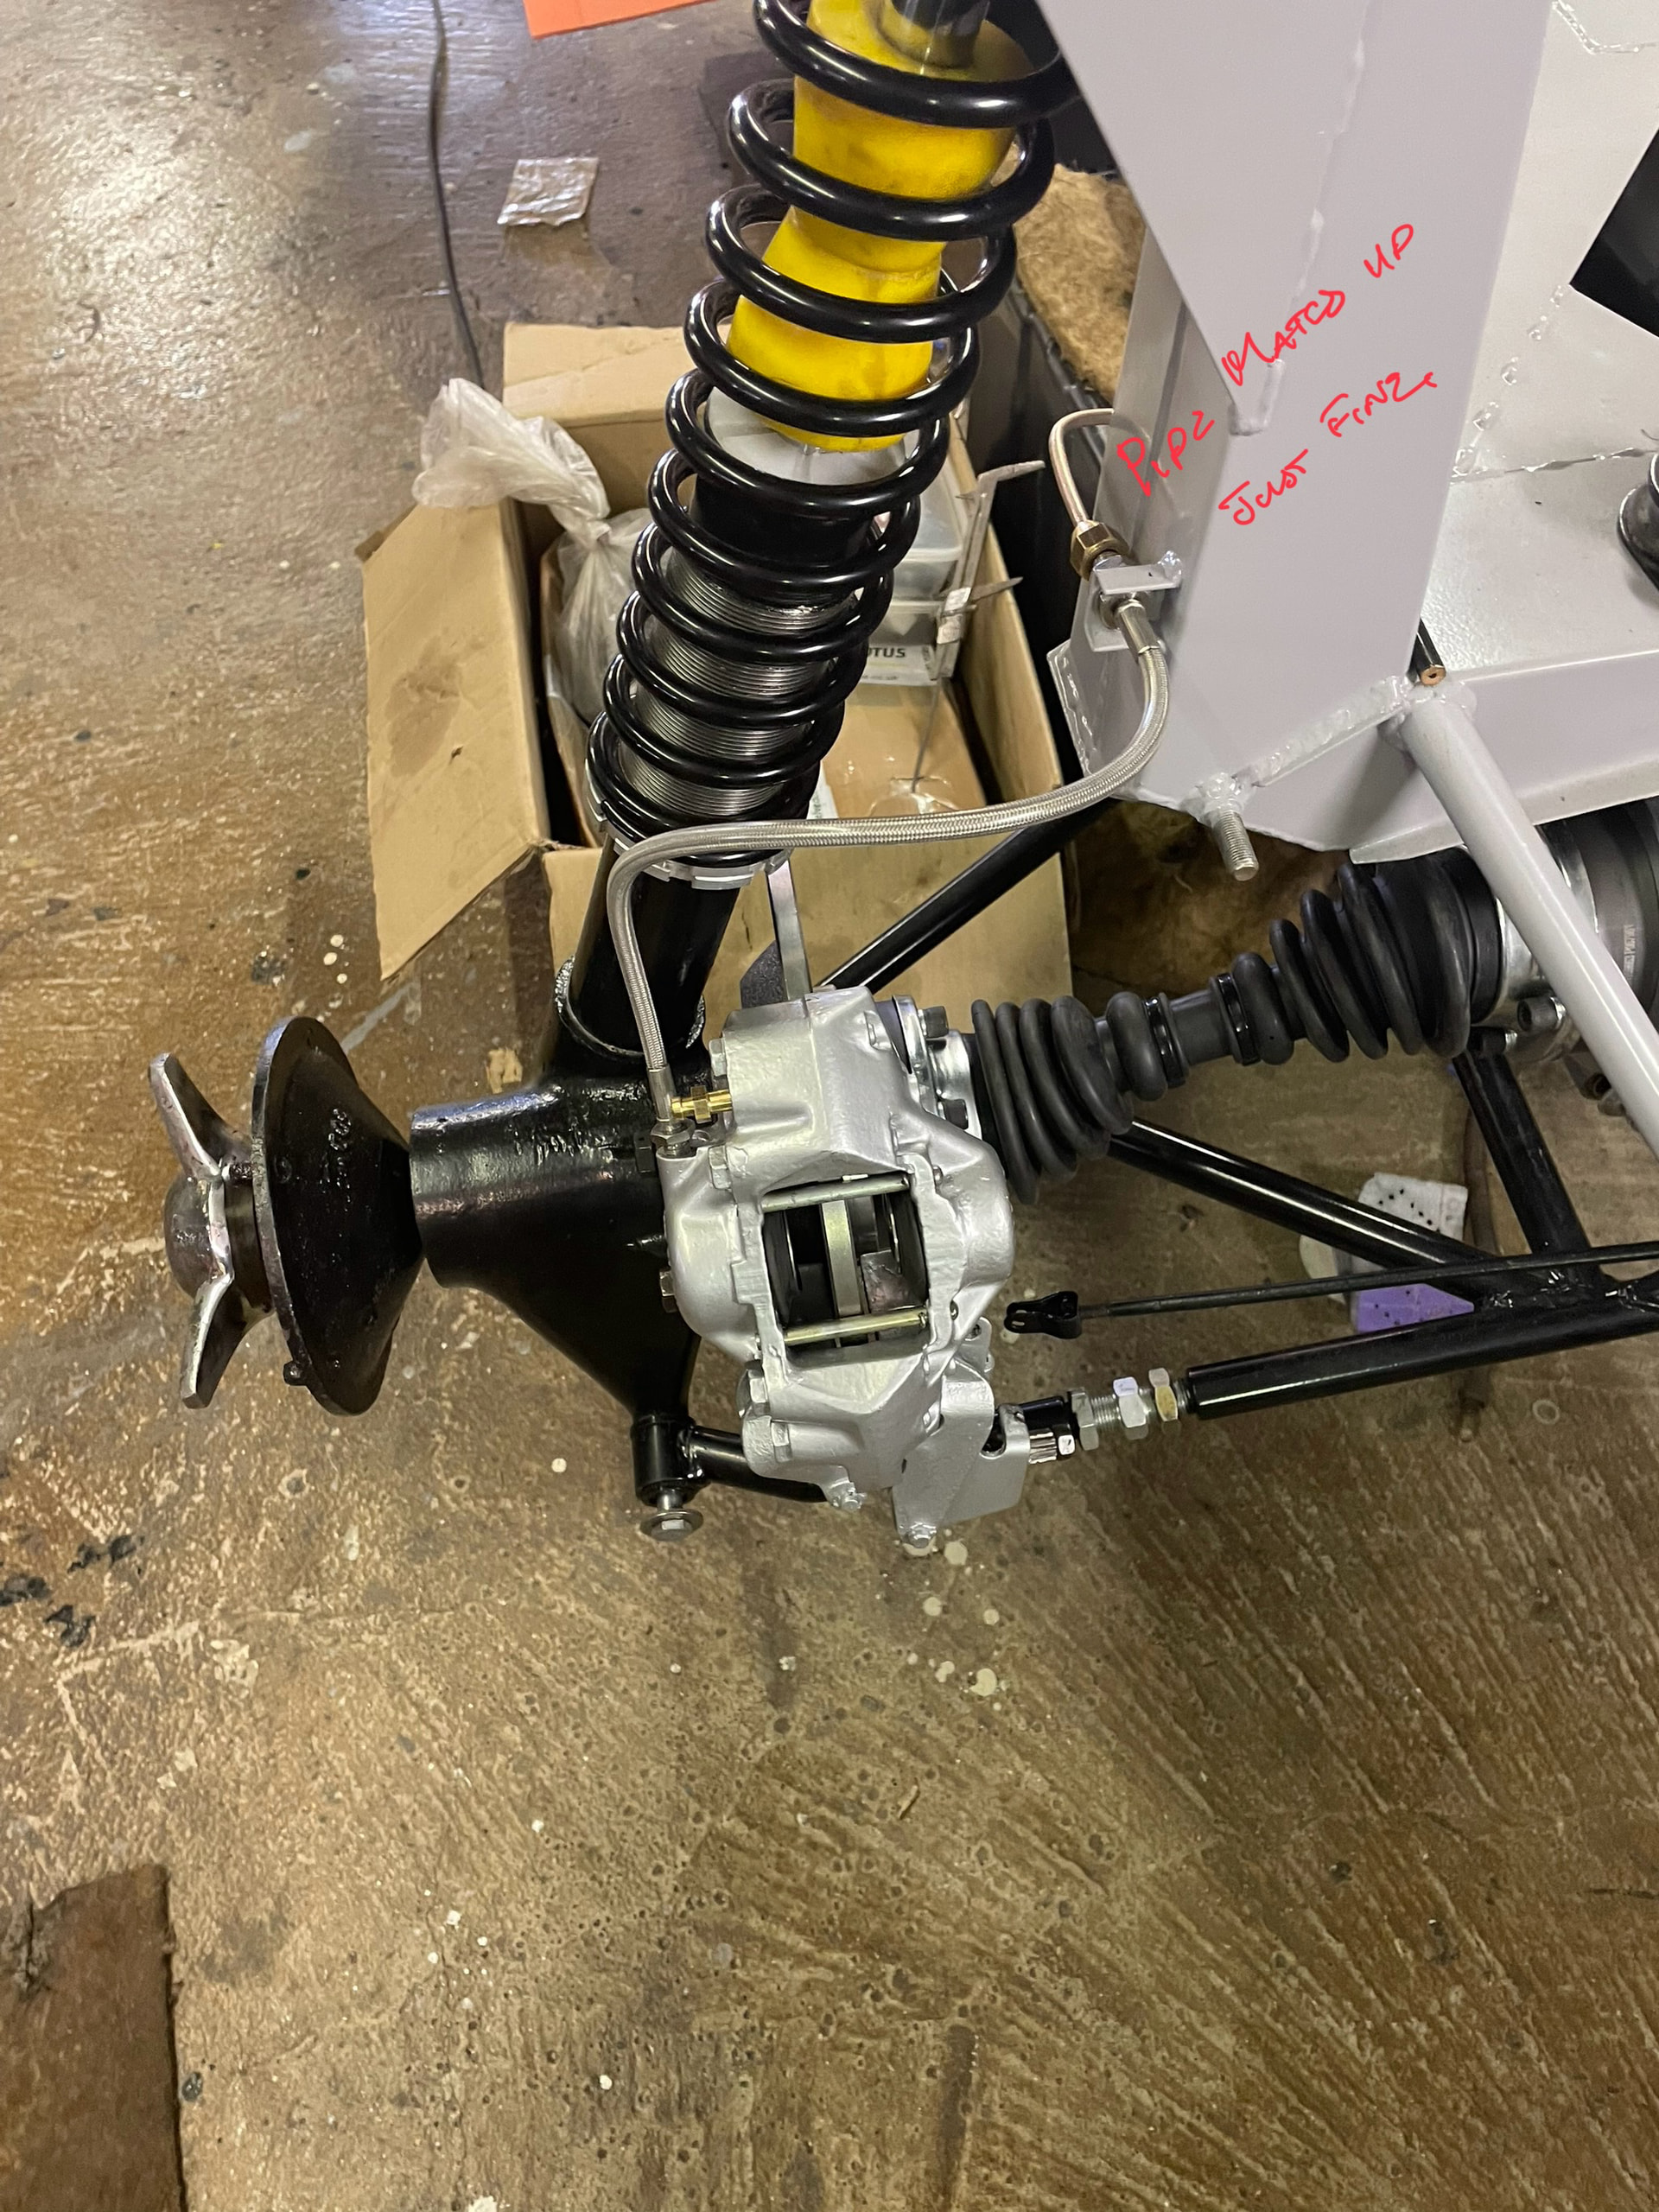
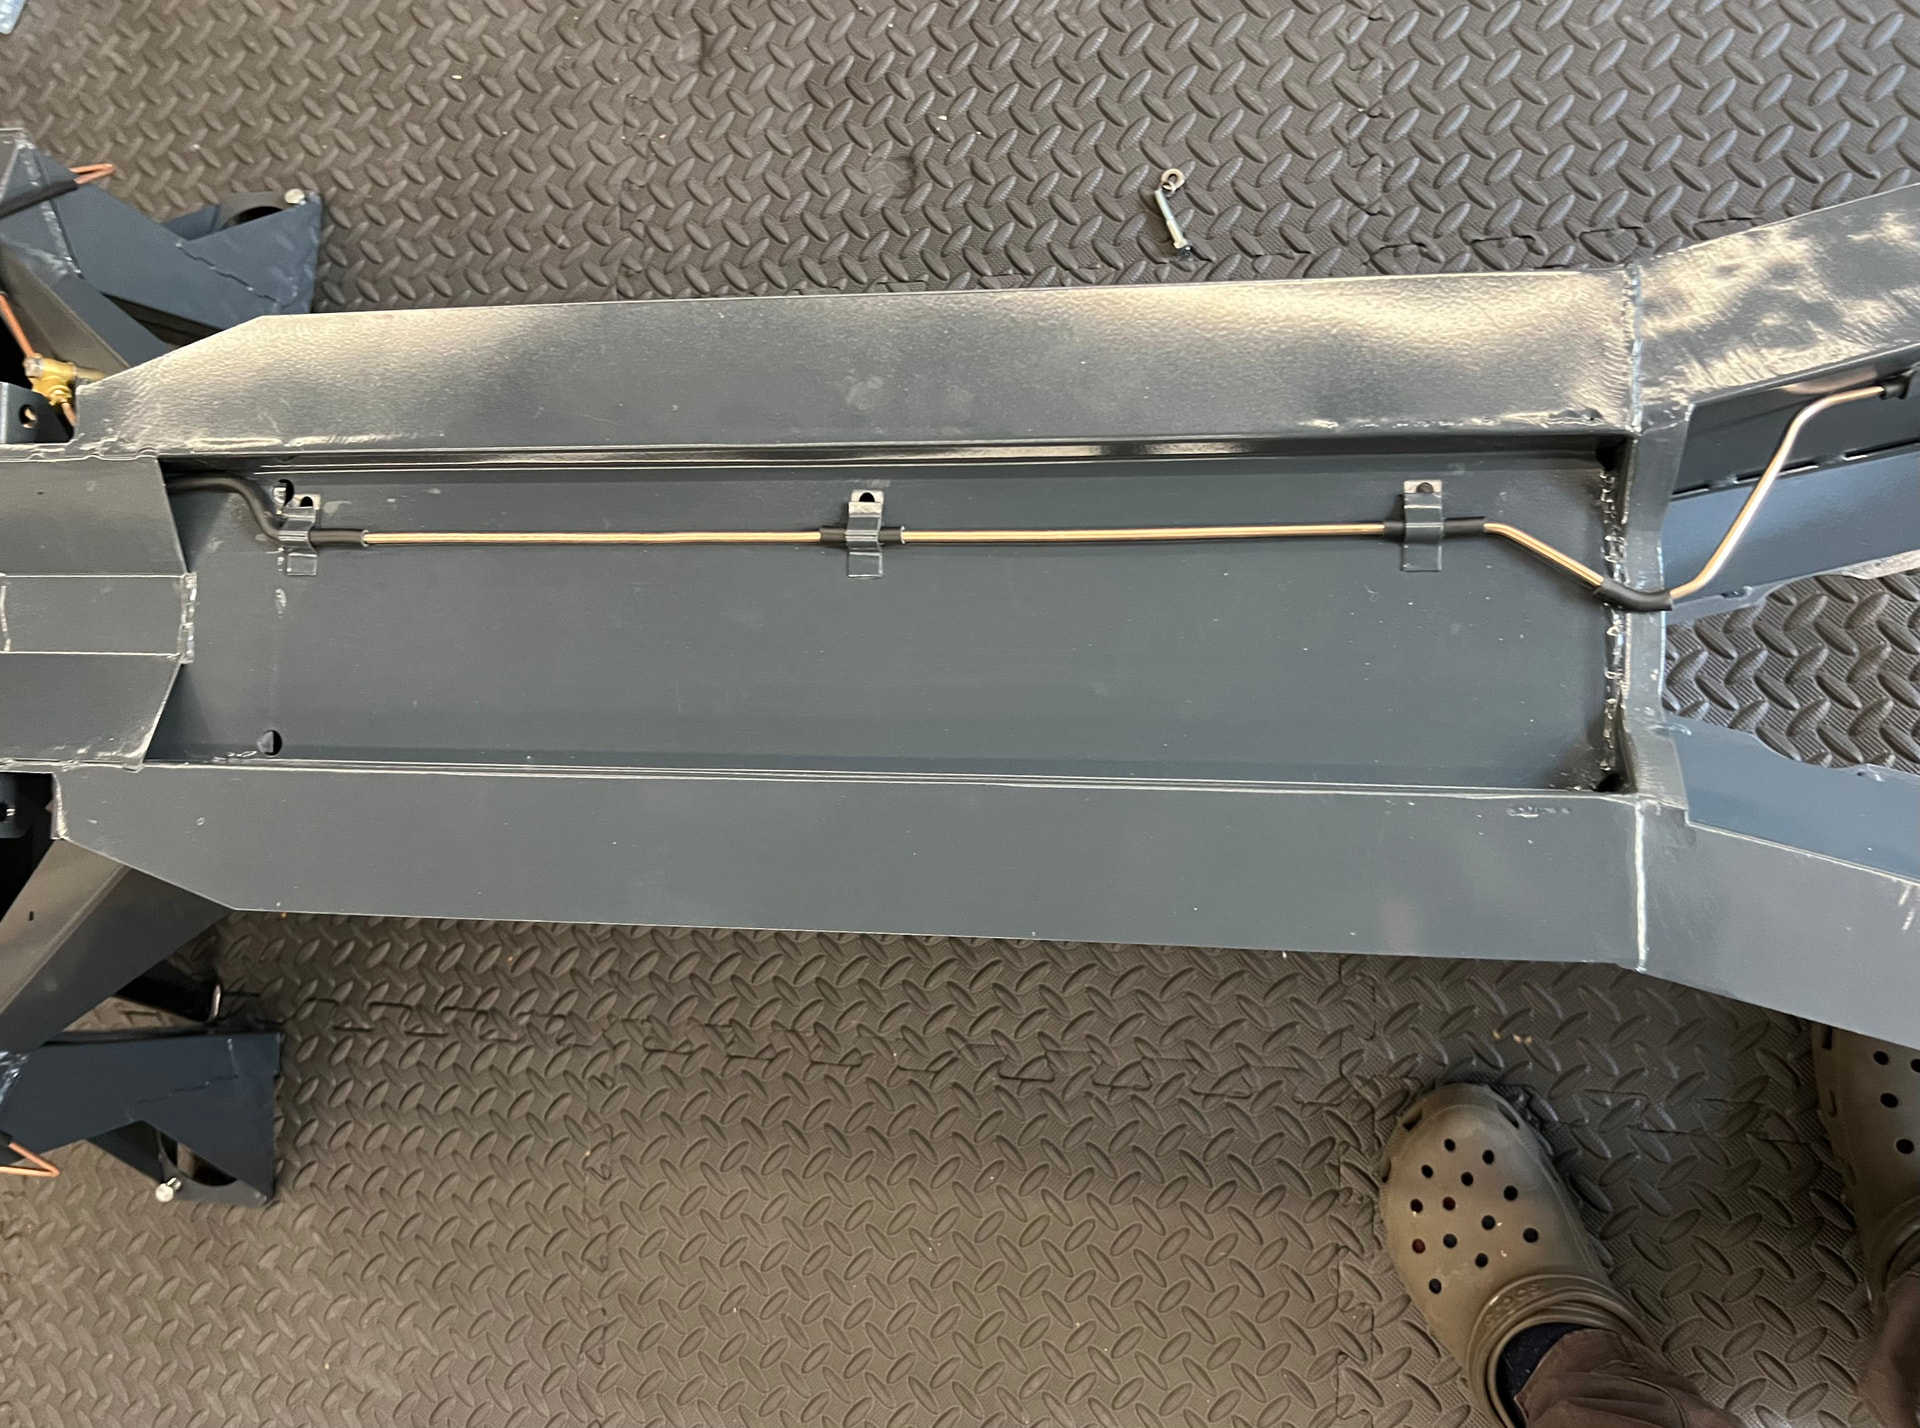
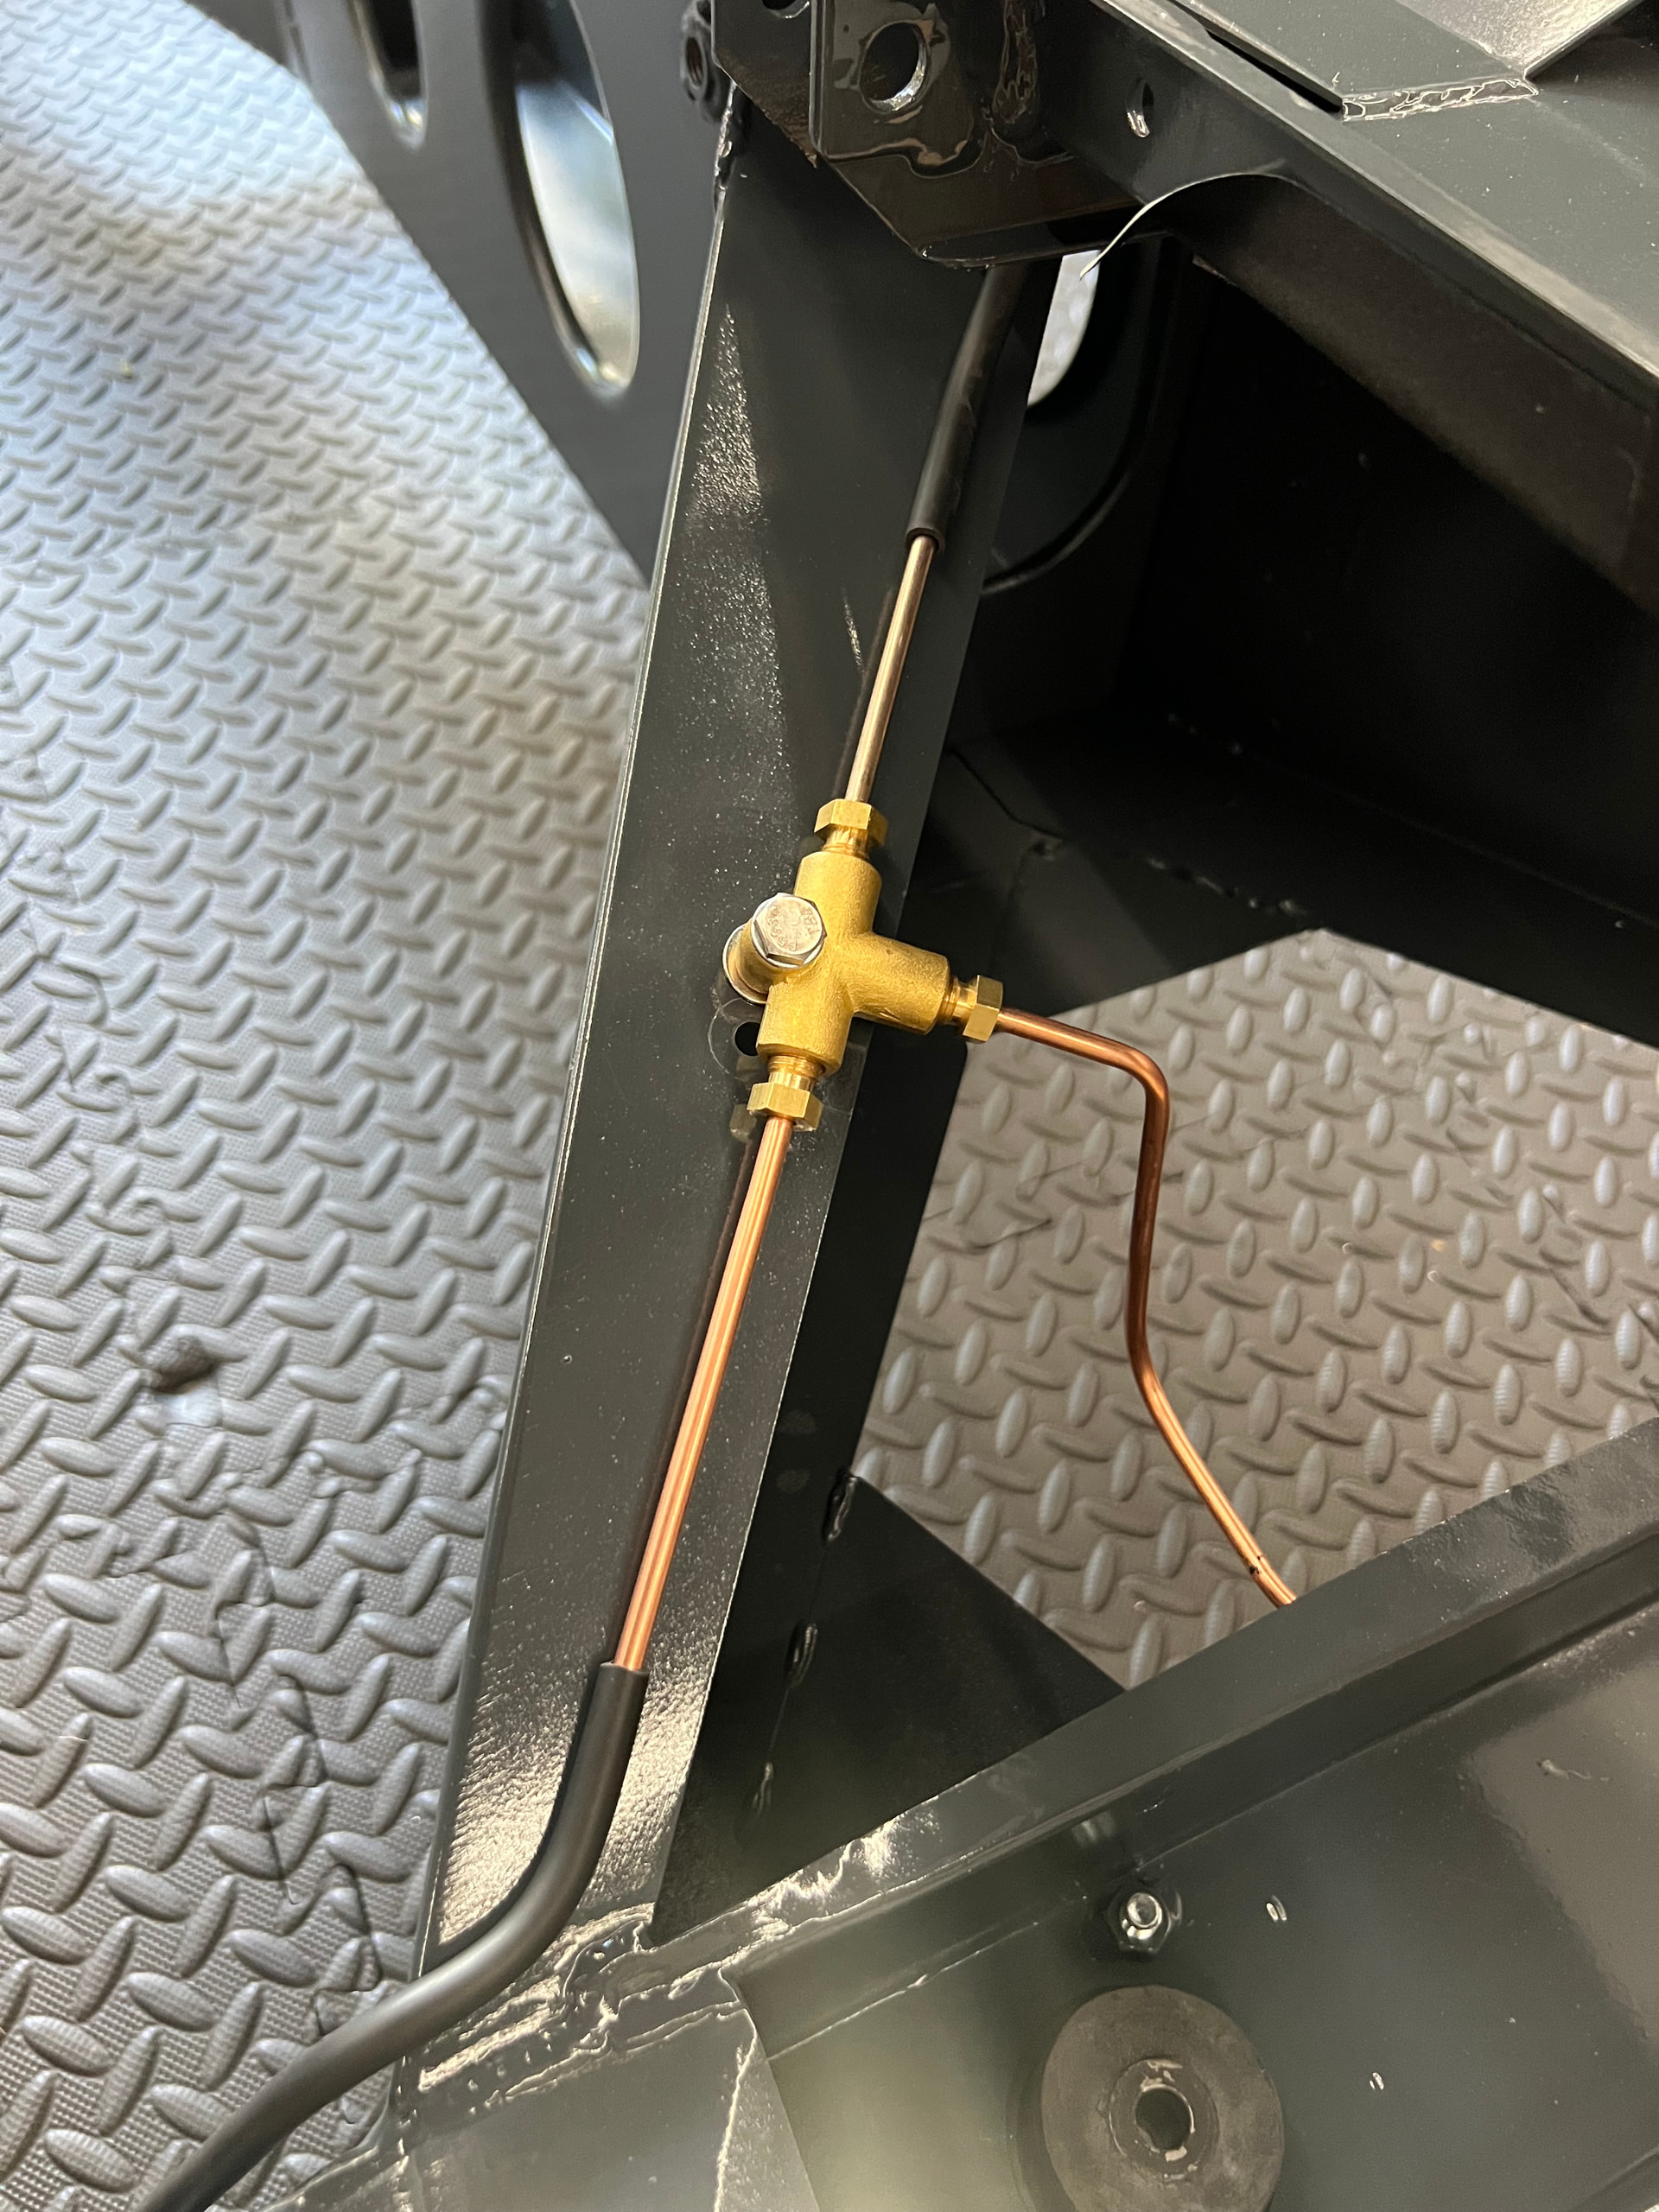
FWIW pip17 I’ve recently had the same challenge on the 26R replacement chassis I’ve fitted to my 1965 S2 DHC. I found that I was able to get the long pipe through the awkward aperture in the chassis forward of the diff - see photos. I was determined that every brake pipe was carefully routed so that there were only straight runs or constant radius curves. Even allowing for feeding the long pipe through the said aperture I found it was possible with patience. What I would say though is with hindsight I’d not bother with a pre-made kit, I’d just buy a long length of pipe and make up each section insitu.
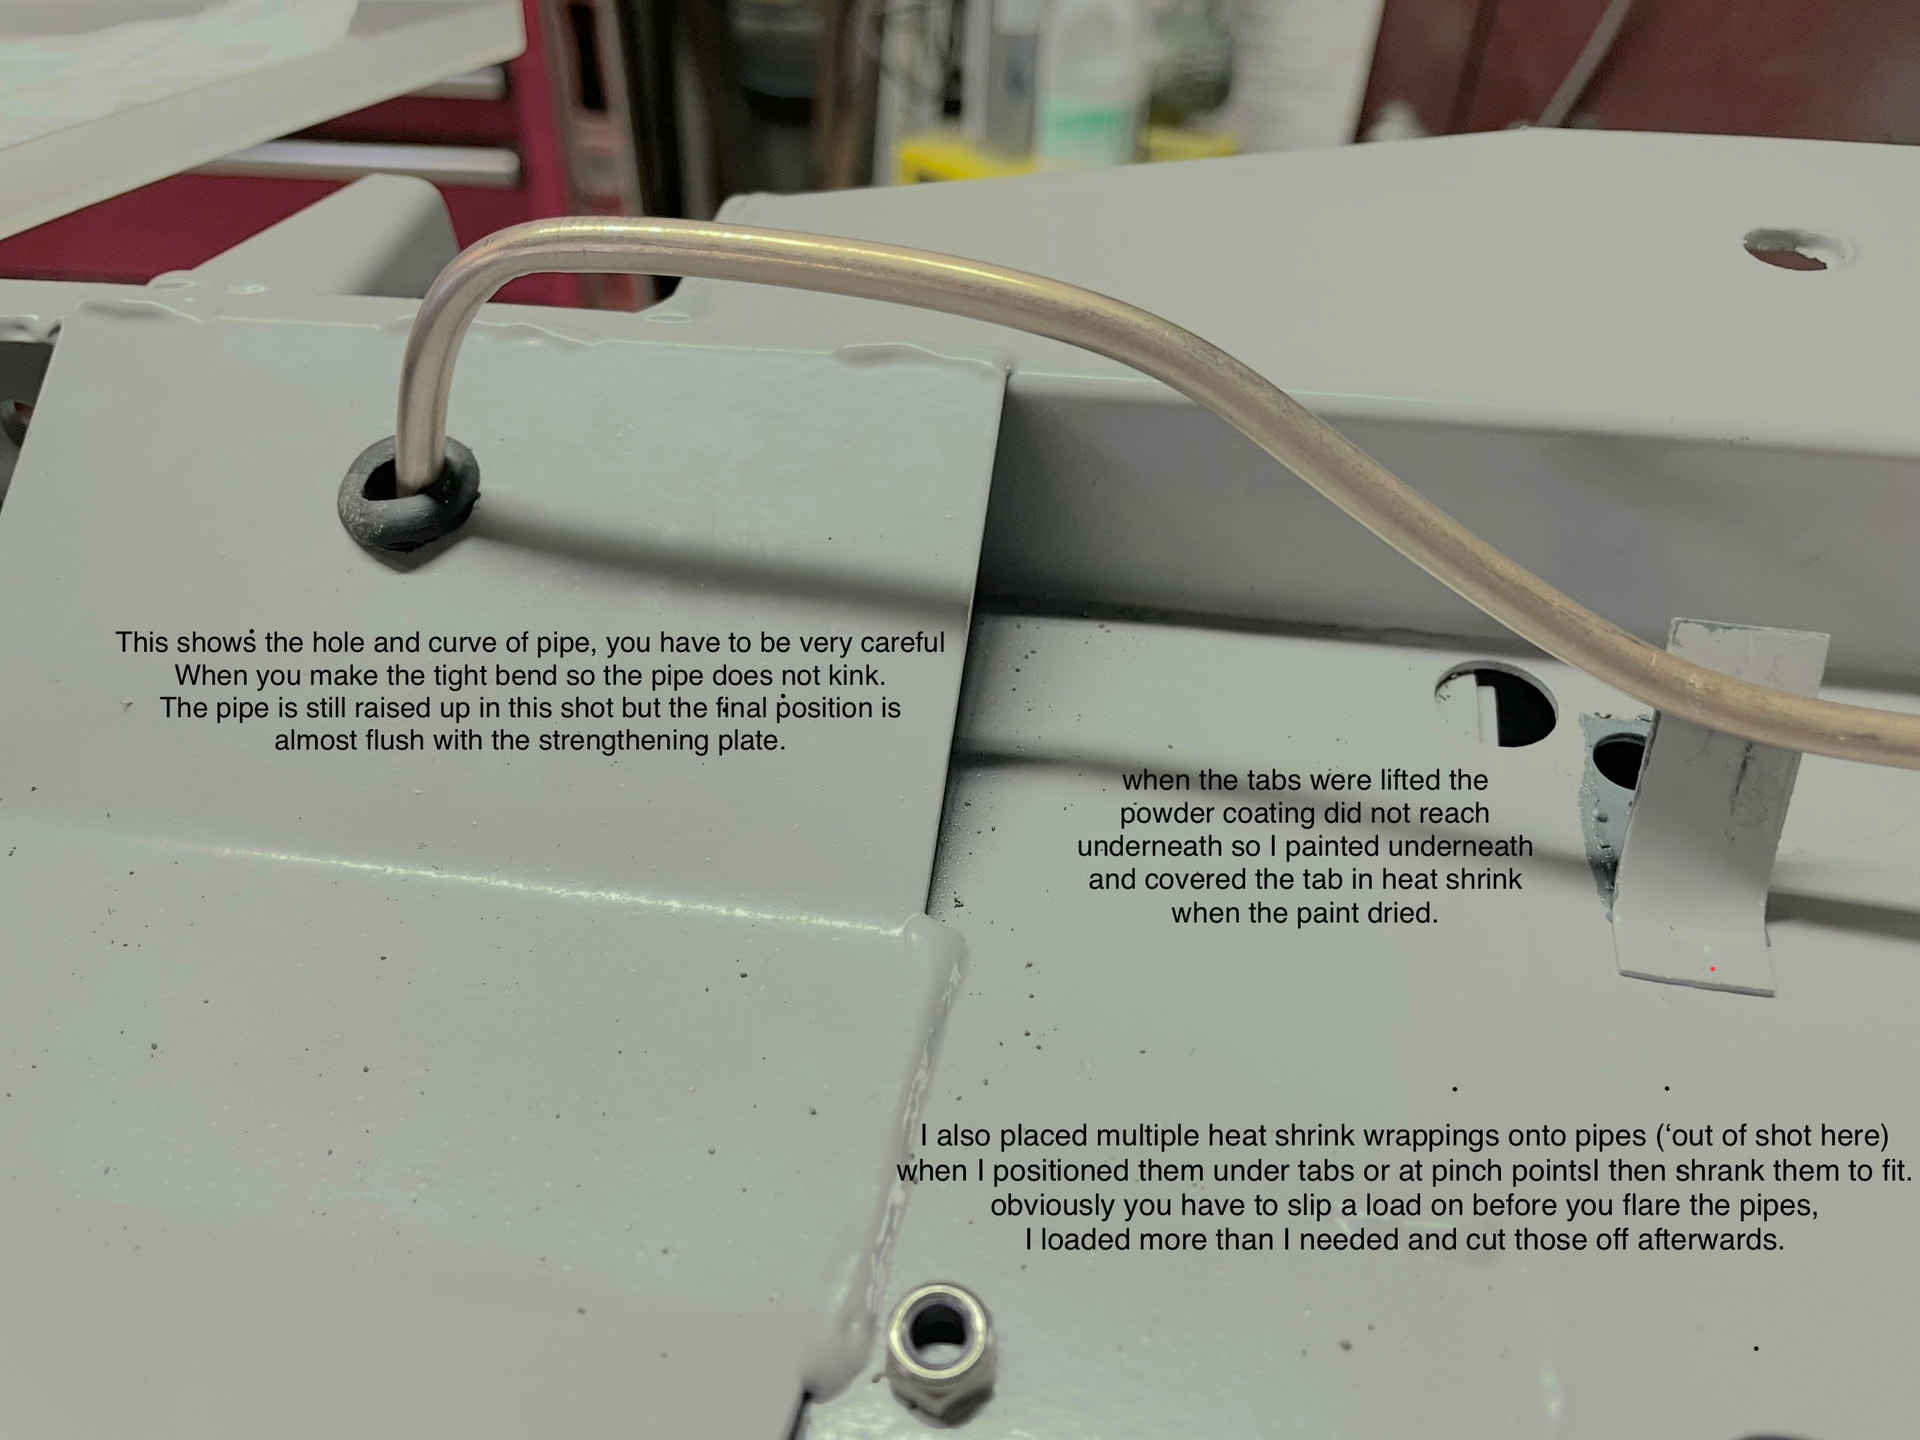
To get the long pipe through I used a hard plastic tube to act as a guide when pushing the pipe through, ensuring that the pipe had a length of strimmer cord fed through it so that the pipe couldn’t be pinched/crimped during the process. At every point where the pipe sat against the chassis I threaded some rubber tube onto the pipe, and of course there was a grommet where the pipe goes through the chassis aperture.
Feeding the pipe through the chassis aperture does tend to result in it curling up but with time and patience is it possible to gradually form it back into a neat route along the underside of the chassis.
1 « J'aime »