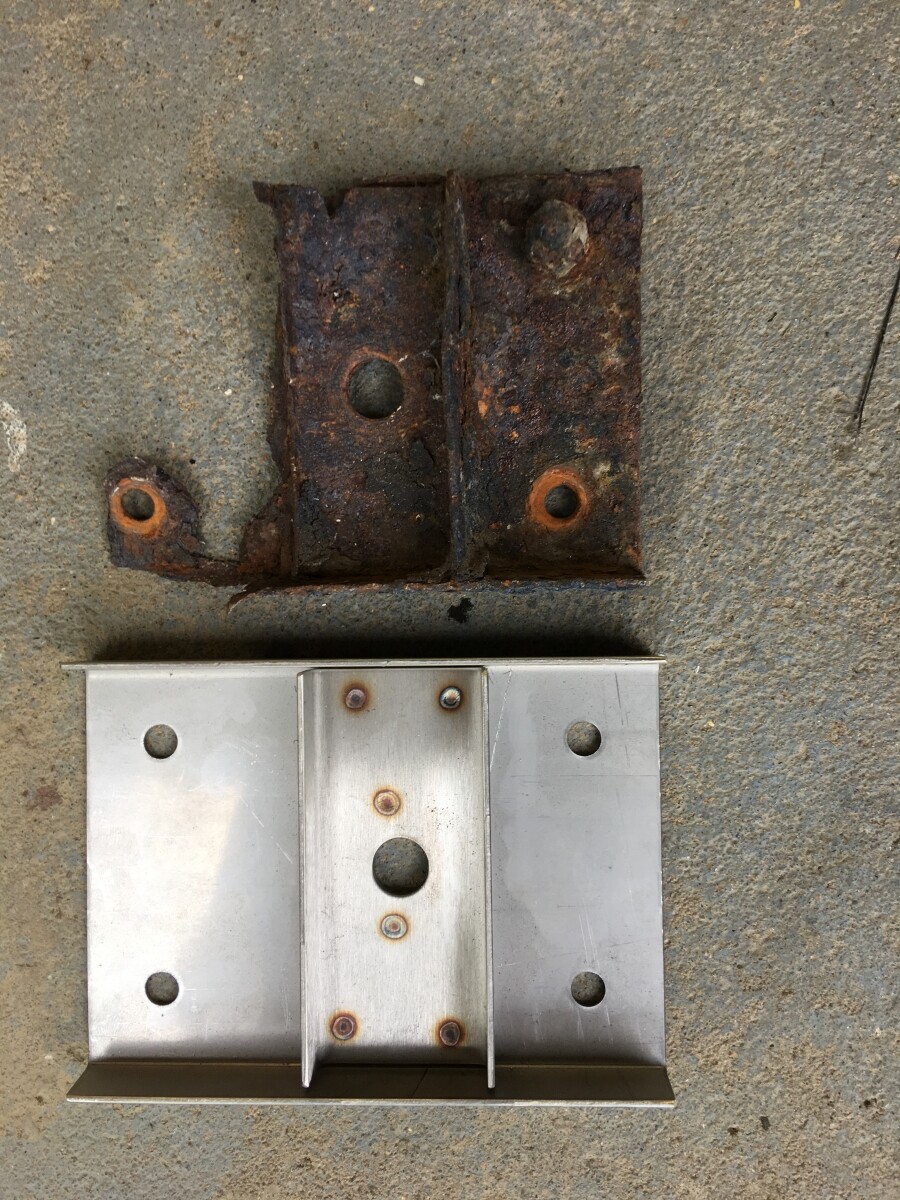
Another update. CV drive shafts collected and fitted, struggled a bit with the first one but the second one went on the easily. Decided to fit the closing plates in the wheel arches while under the car. While cleaning up in the rear arches I noticed the seat belt mounting bracket looked a bit rusty, understatement! Photos below show just how bad it was, but it didn’t really look too bad initially. Probably worth people checking these out if they are replacing the sill members, anyway nice new stainless ones now fitted. Noticed that before fitting the rear ones I needed to fit the door catch, which is proving a problem, as so far I haven’t located them in the various boxes of car bits around the garage, and mine are the very early type that no one seems to stock ![]()
Hopefully I’ll find them. Anyway front ones all fitted, I decided to use good quality black silicon to seal them in place with and I have fitted a u shaped rubber edge strip to the new alloy plates where they but up against the inside of the wing. Pleased with the final result even if I do say so myself. Next job is to grovel under the car to replace the engine mounts with uprated ones to hopefully get the engine level again then it’s finish the wiring including transferring everything to the nice new dashboard currently hiding behind the wardrobe!
My OE plates looked very similar to the dark brown one shown…
Are you refitting the original Irwin dynalock retractors (if this is what you have) ? [on my +2] There is another thick plate that sits in the wheel-arch and the central bolt passes through (I assume the load in an accident might rip the bolt through the mounting in the picture).
If not the Irwin reels, I’d be interested to know what you are fitting. I am currently looking into options.
Adrian
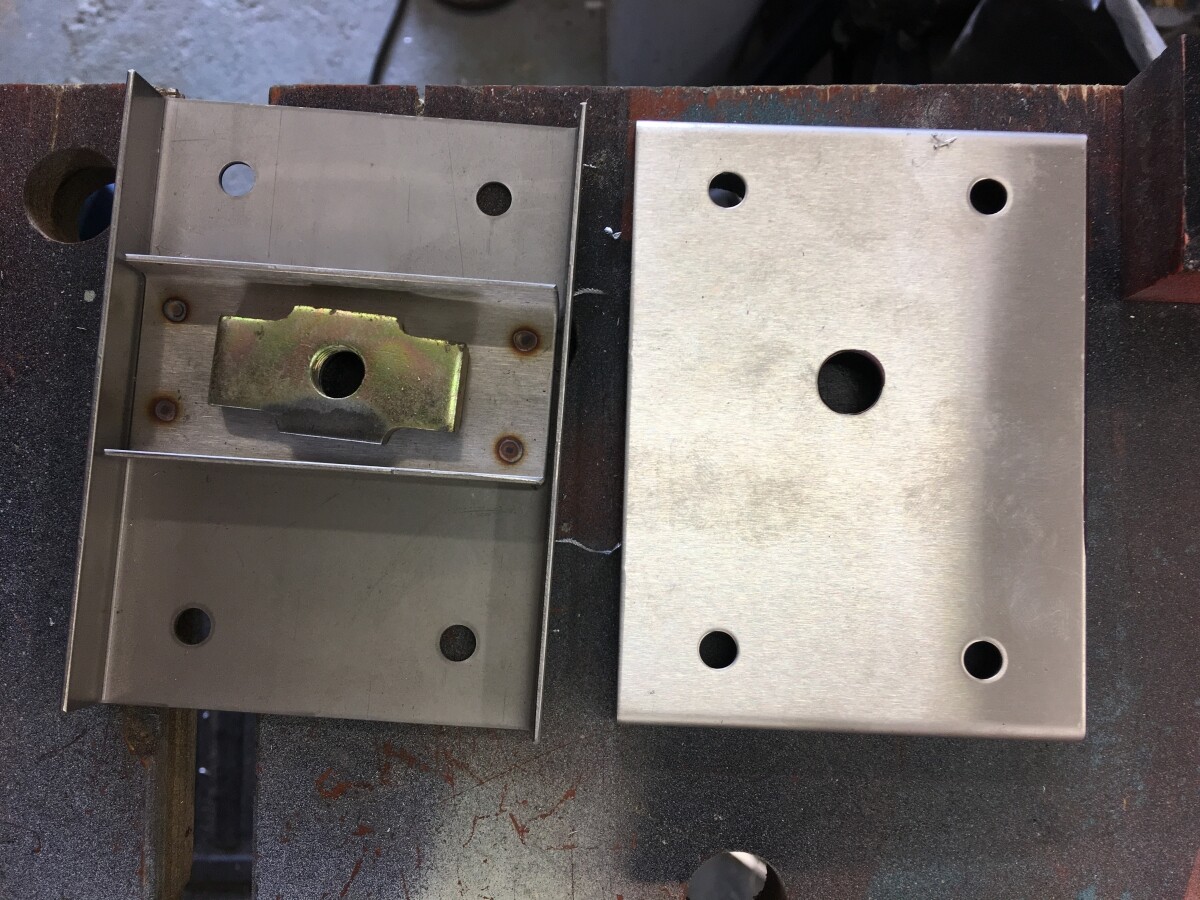
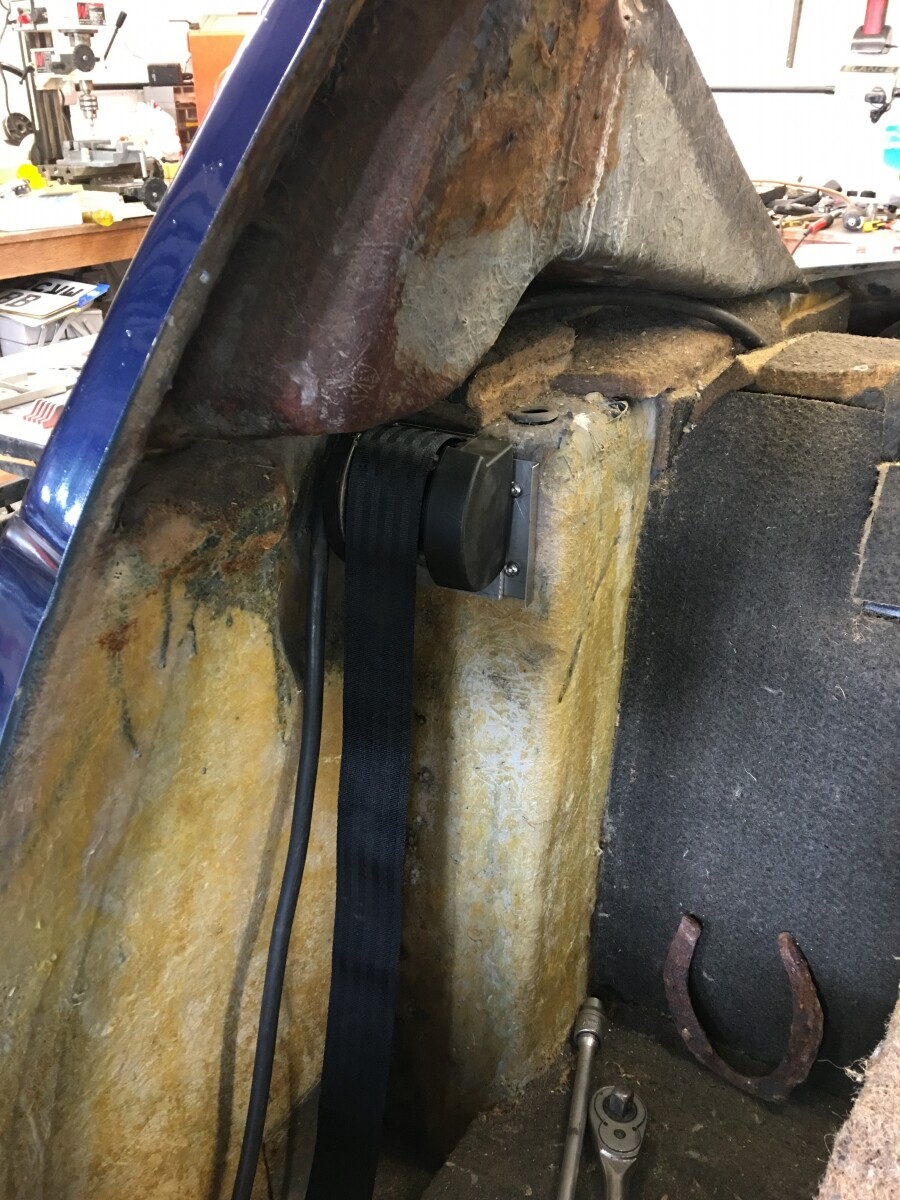
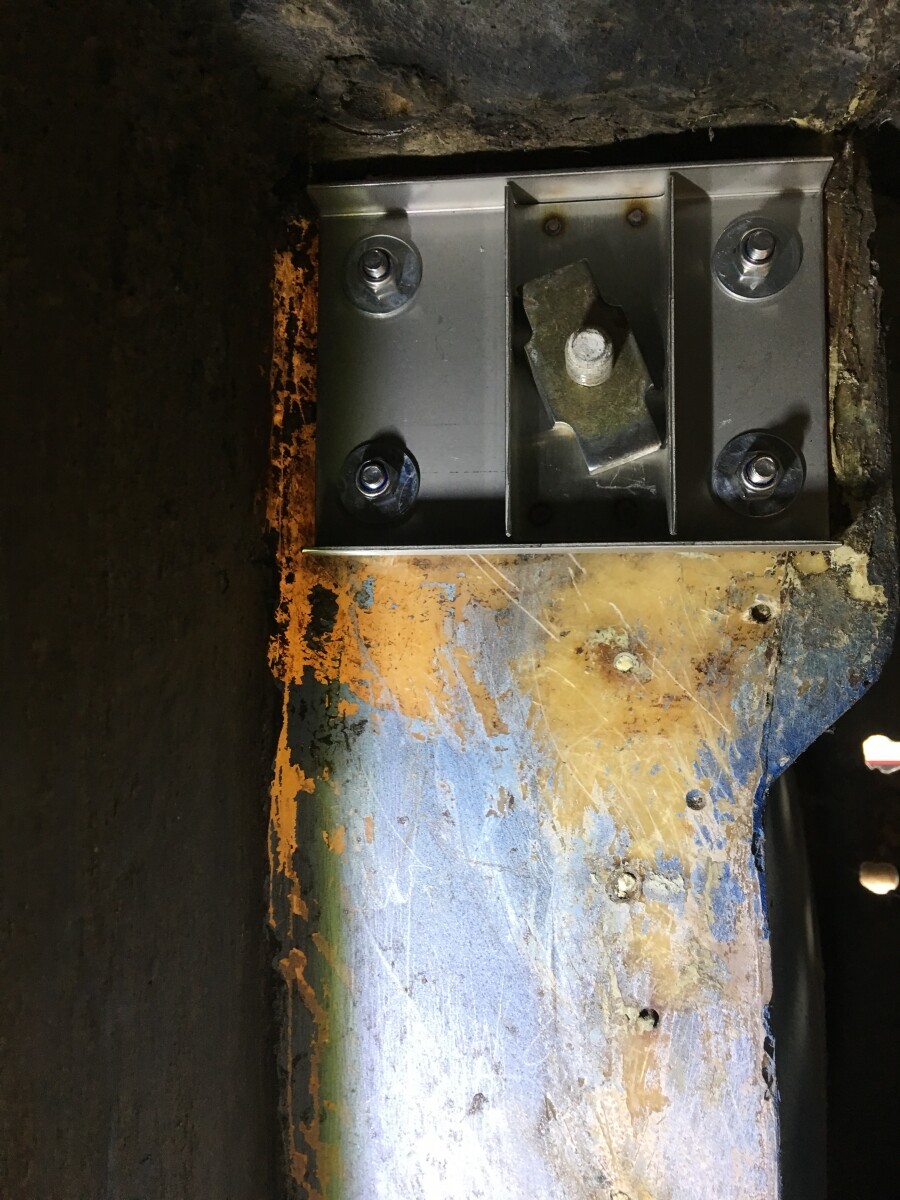
I’m fitting Securon seat belts, not sure if they are the originals, I suspect not. Some clearer pictures of a belt mounted in position, showing the plate and bolt in place in the wheel arch, the two new inner and outer reinforcing plates and the belt temporarily in place. I needed to make a 3mm thick spacer plate so the belt assembly cleared the plate securing bolt heads. You can see the special belt securing nut which is unlikely to pull through the reinforcing plates
This is another job on my todo list. My car has the original plates and belts in currently. The original plates just use a nut in the wheel wheel to secure the belt to the outer plate. I suspect that it may originally have been welded to the plate but doesn’t seem to be now. Those fastener nuts look like a better solution to me.
Progress update, the car is 50 years old today! Was hoping to run the engine today but not quite ready.
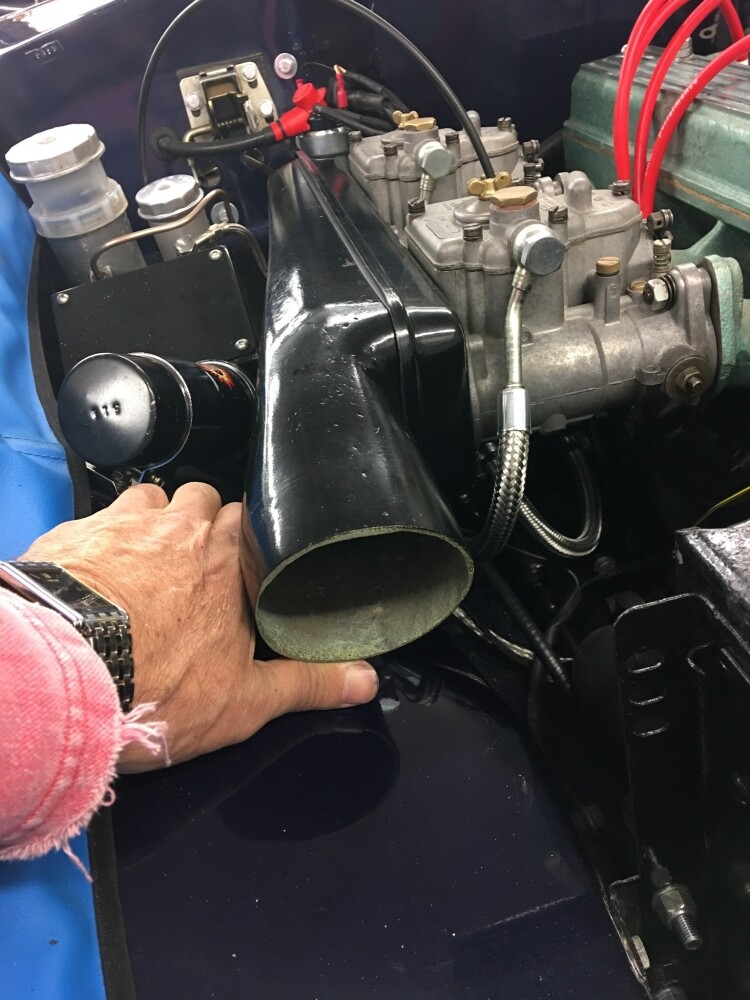
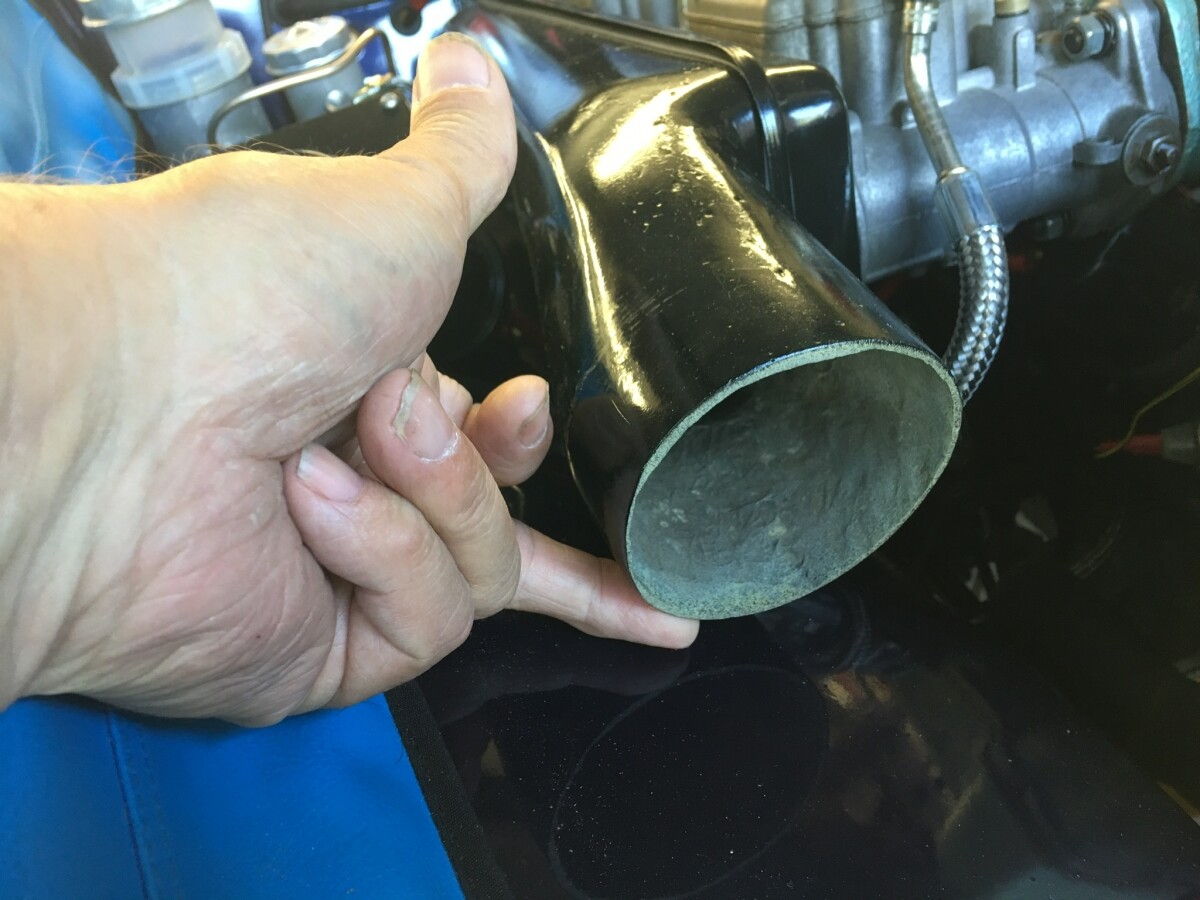
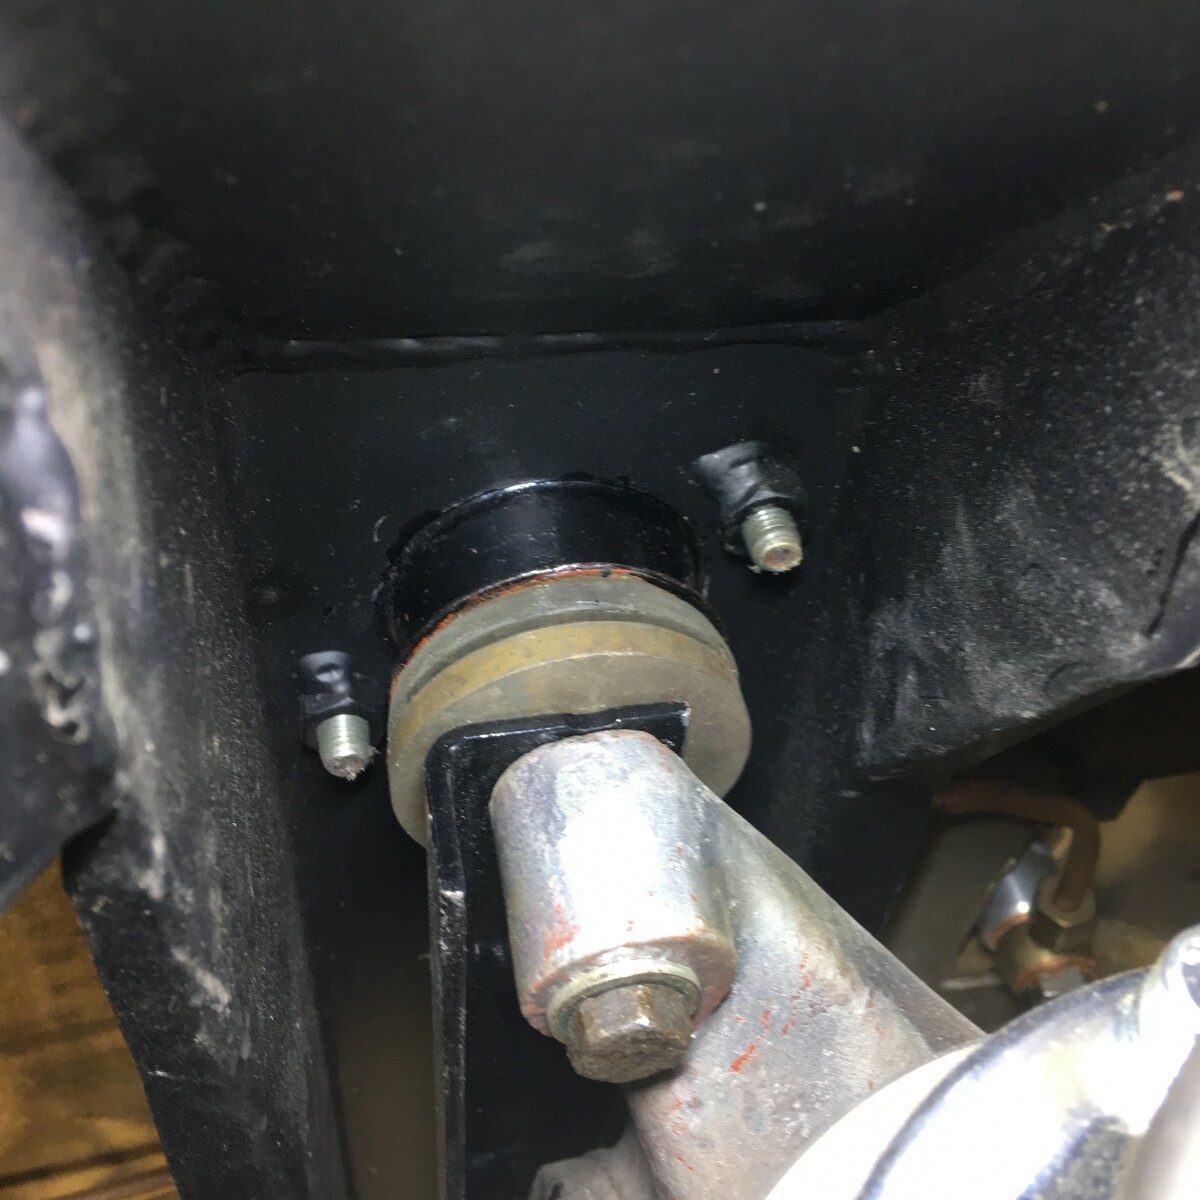
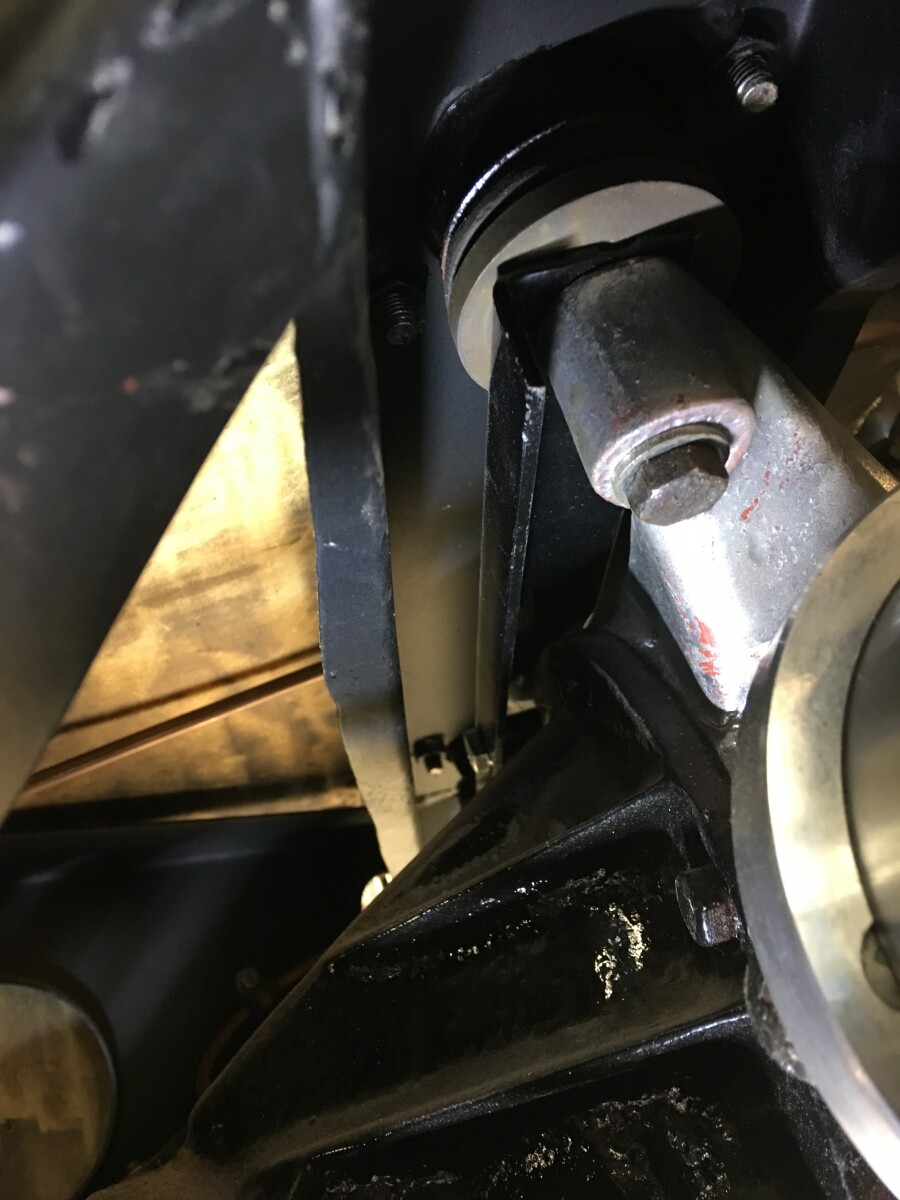
Had a battle replacing the right hand side engine mounting with a heavy duty one to try to level the engine up a bit and increase the clearance between the intake housing and the inner wheel arch. Had to remove the carbs, starter motor and cable and heater hose to get decent access to the mounting bolts. Removing the old mounting was then straightforward, but getting the new one on was a real battle to lever the engine into position to be able to get the bolts back in. Took about 4 hours in total! Bled the brakes and clutch, had just fitted reconditioned rear calipers. Fitted the handbrake lever and completed the connection of the linkage, still needs final adjustment. Had a delay due to a missing passenger door catch plate but a member on here provided me with one which is now fitted nailing me to fit the wheel arch closing plate too. Installed the speedo cable but found the angle drive adaptor that fits at the gearbox end was damaged and unusable so have ordered a replacement. Rechromed rear bumper fitted and rear lights in place and new boot floor supports made and installed. Original floor boards are warped so will use them as templates to make new ones. Went to the Classic car show at the NEC and picked up a few parts, got a new alloy rear number plate and individual digits to fit to the grill for the front number plate, and a new original Lucas indicator switch at a bargain price. Also picked up a proper Lucas bullet crimping tool not the cheap imitation ones available online that only put a flat on the bullet not a hexagon as original. Once the engine has been run the next challenge is the dashboard, I have the replacement but need to transfer everything to it and tidy up the wiring as I do it, plus change the ammeter for a volt meter as I now have an alternator.
Just need to find someone to do the retrimming for me as that?s a skill I don?t have, the main decision is do I go for black vinyl as near original as possible or change to leather, probably in a different colour? Suggestions / recommendations on trimmers most welcome.
Could you post a picture of the diff brace in situ, please? I have to do the same to mine (CVs and brace).
Cheers
JonB
Happy 50th +2!!
yes ! many happy returns of the day . Do you know SMS autospray in Spalding ? They should be able to recommend someone local to you as they are the local experts and will have plenty of experience with autotrimmers .
JonB
Some pictures of the diff brace attached. Quite straightforward to fit but need to check the clearance between the bottom of the diff and the chassis. Mine didn?t have washers I could remove so I milked 1.5mm off the central tube through the frustacone.

Your diff and chassis look nice and clean! Mine is covered in gear oil as the output seals have failed. I have to remove the diff and renew the seals - maybe do the output bearings too. I’m dreading it, can’t get under the car for love or money.
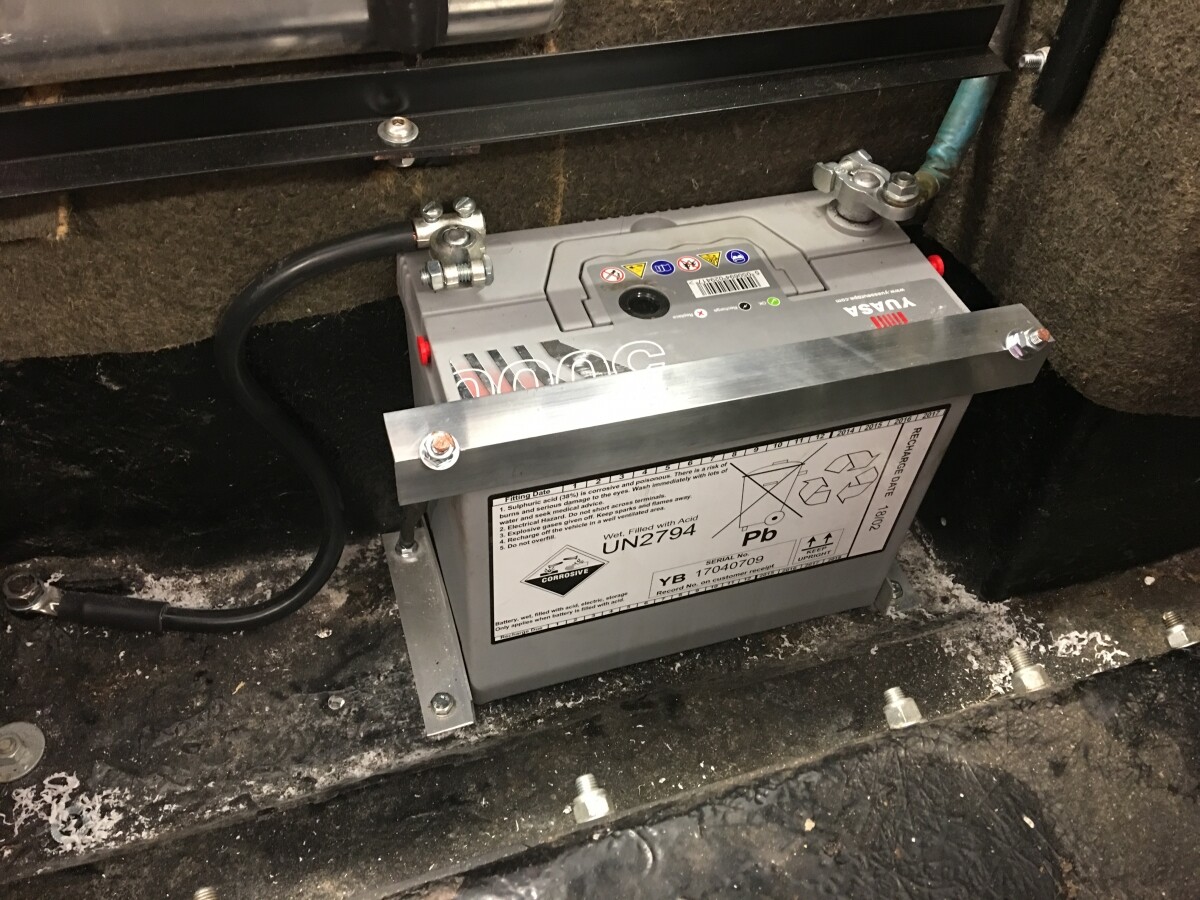
Also serendipitous of you to post your battery installation. I have to do the same thing as my larger than standard battery doesn’t fit in the battery tray and is loose. Thump thump thump over the bump bump bumps.
Thank you!
JonB
Battery secured using 25mm alloy angle from B&Q and some 6mm screwed stick
Personally I believe an ammeter is a better diagnostic instrument than a voltmeter, whether you have dynamo or alternator.
Been away on holiday so not done much recently. I had ordered an angle drive for the speedo cable to gearbox connection as my original one was broken. Mistake, I ordered a cheap one from China, needless to say it didn?t fit, the nut that connected it to the gearbox was 3/4? and the gearbox was 7/8? diameter so managed to strip my old one down and swop the nut over. Tried to fit it and found the square flexy shaft in the coupling was approx 4mm across and the original was 1/8?. Couldn?t use the original as it just turned round in the drive without turning the output shaft so spent some time very carefully grinding down the Chinese one till it fitted. So 10 minutes work ended up as about 1 1/2 hours, false economy, buy the more expensive one from a reputable uk supplier! Anyway it now works.
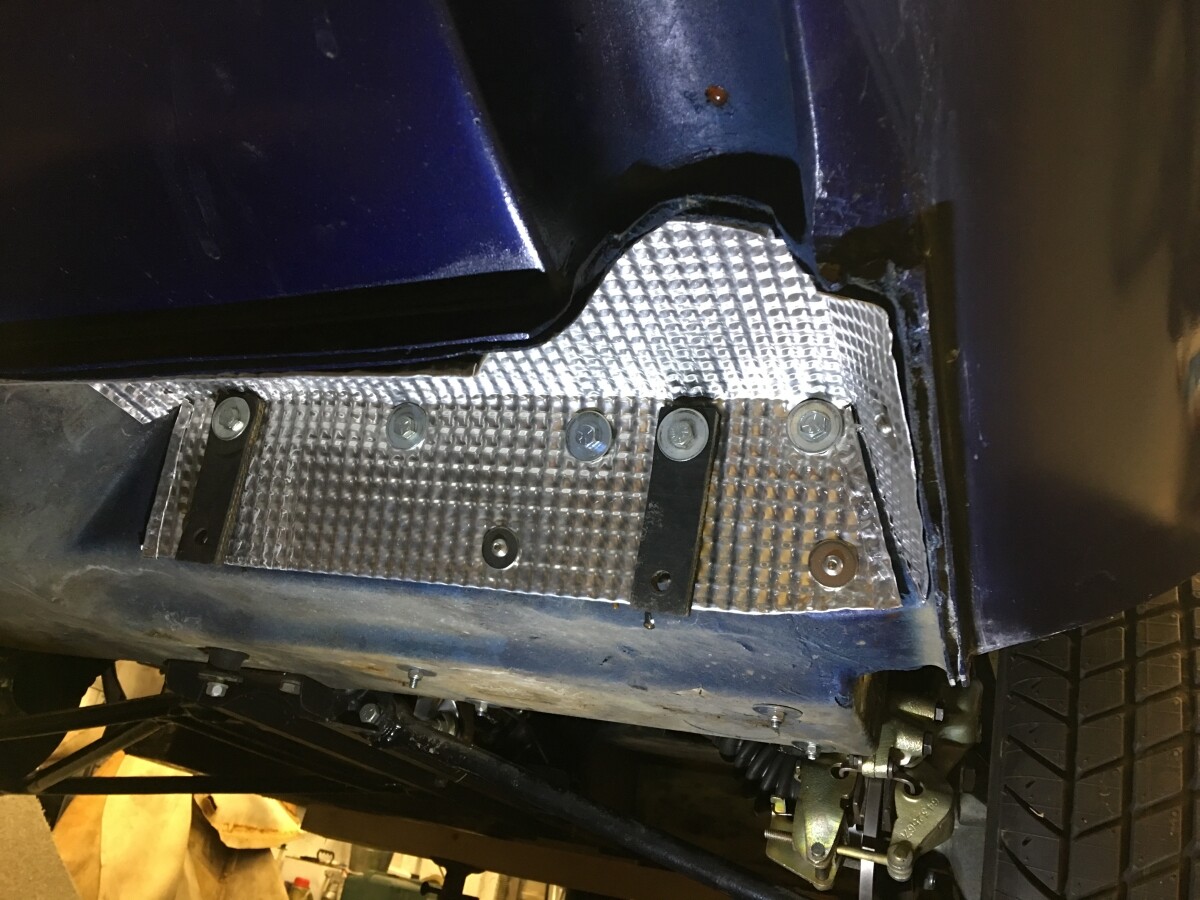
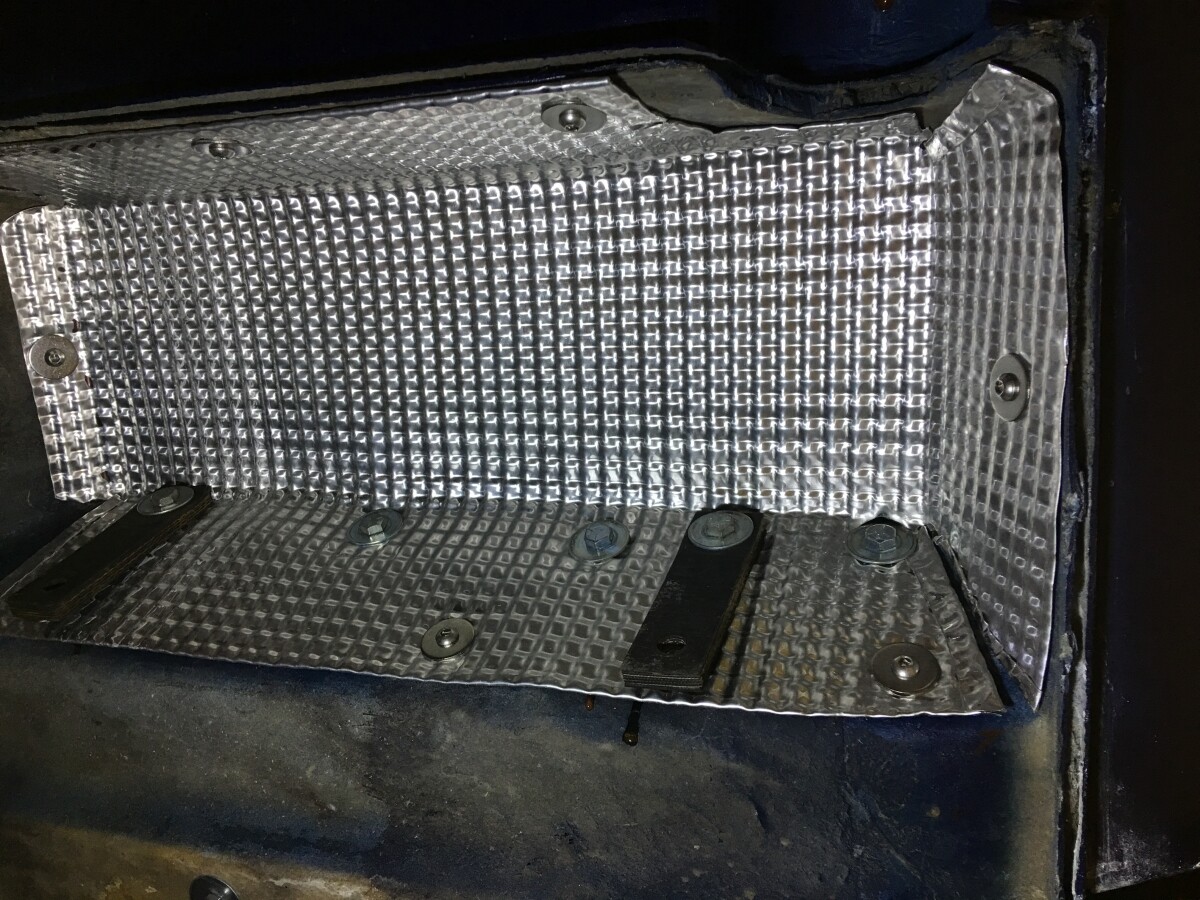
Made a heat shield to fit in the recess in the boot where the silencer fits, mine is the early transverse type and you could see the fibreglass had got quite hot and blistered in places. Fitting the boot lid is now in progress, just got to fit the letters on the lid then redrill the hinge mounting holes as my body spray shop filled in the holes on the rear under the window before spraying it, the boot lid does have the original holes still in it.
If found someone local to do the trimming and have decided to have it done in leather throughout, light grey for the leather with dark grey for the carpets. Not original I know, but looks good in my Porsche so thought I?d copy it! That?s planned for the end of January so the car has to be mobile by then - no pressure then! (I have a backup plan, it?s a mates car trailer!)
Making slow progress, main delay has been the wheels. Years ago I bought a set of 14x6 Minilites, on trying to fit them I found that the spinners bottomed out on the thread before the wheel was secure. Tried to get a thicker set of lock rings, but no success, so I?ve bought a spare set of front hubs and machined approx 5mm off them so the spinner can go further on the hub and properly secure the wheel. While at it it?s getting new wheel bearings, new grooved and drilled discs, green stuff pads and new calipers! Still working in a solution for the rear wheels, not solved yet, may end up buying a pair of later Minilites as they are machined differently now to the early ones and tighten properly.
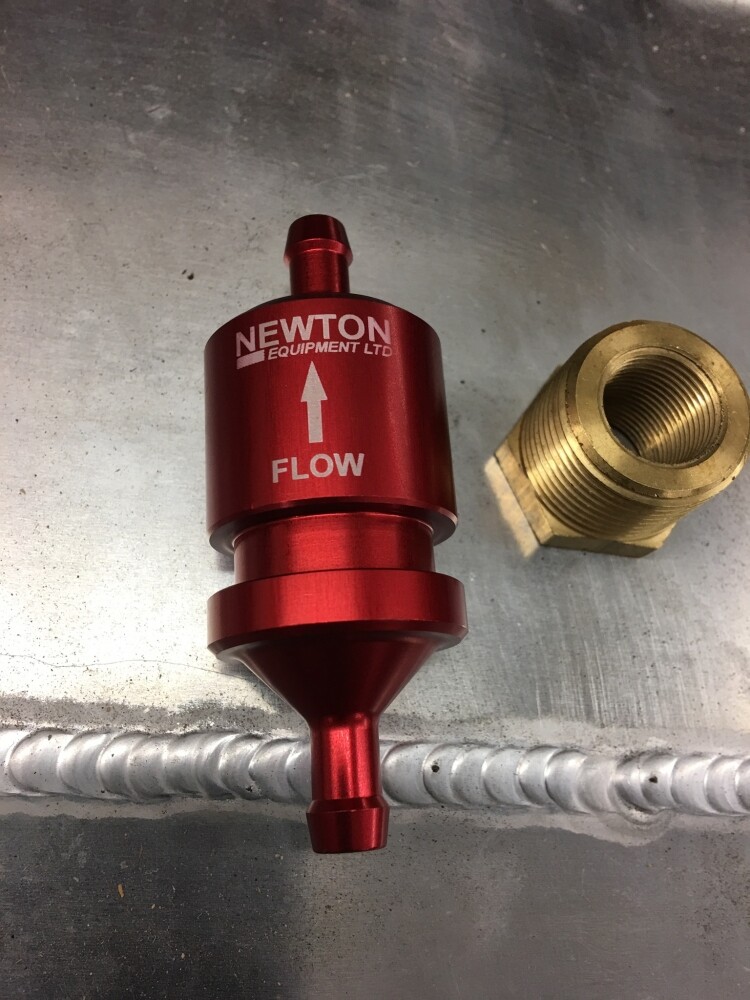
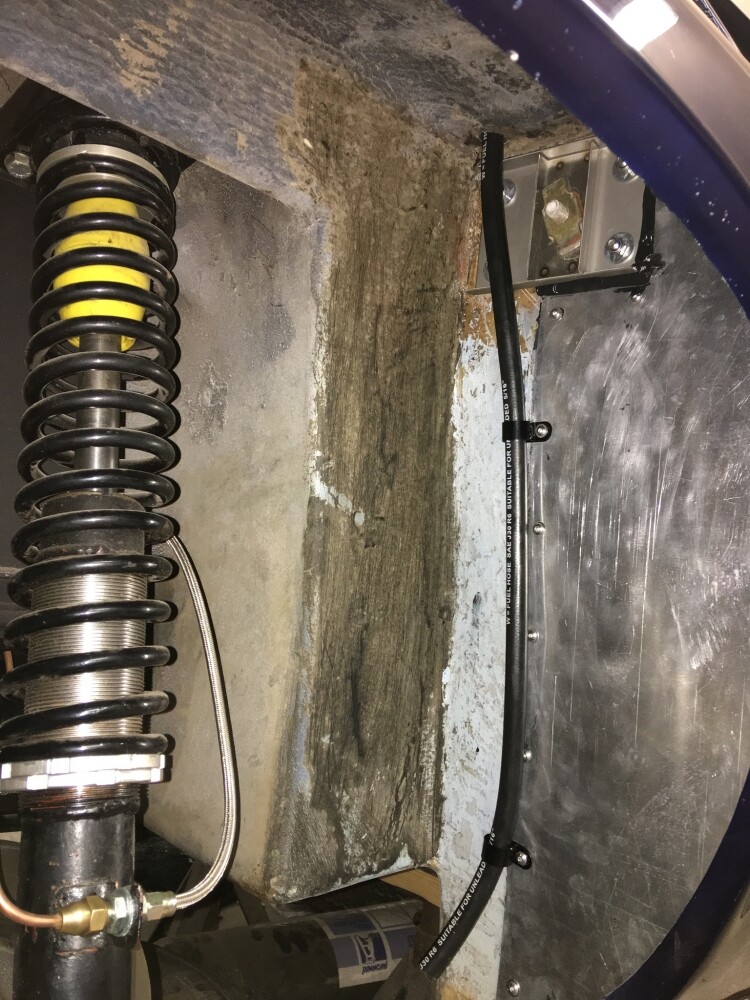
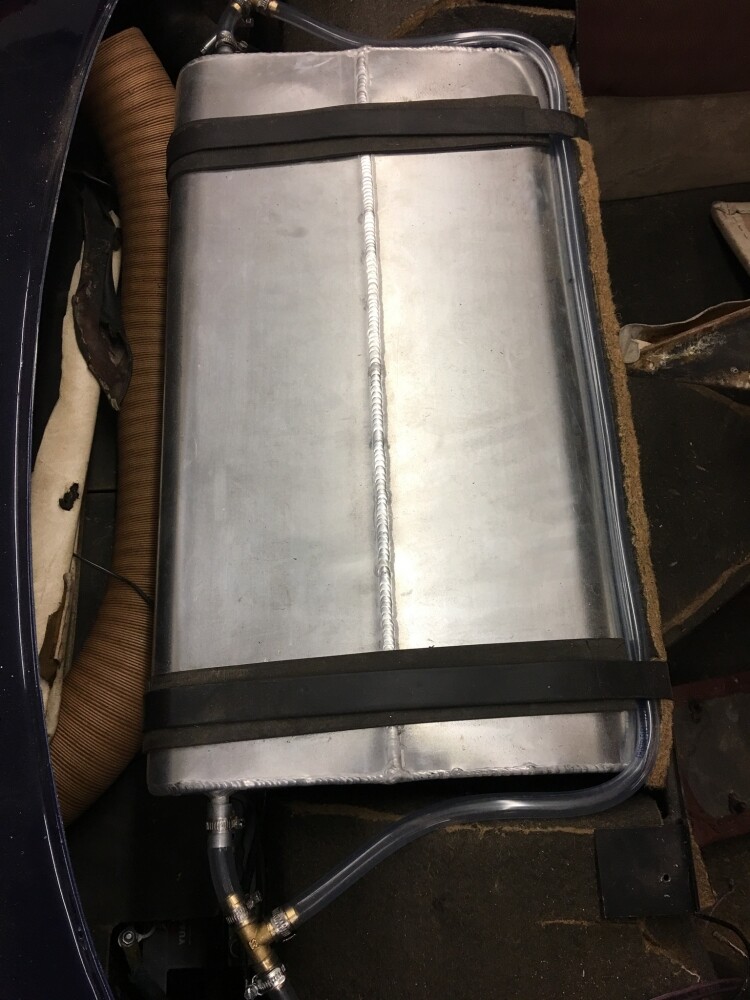
I?ve been sorting out the petrol tank breathers and have gone with a system using special breather valves and a connection into the tank filler neck, see the pictures below.
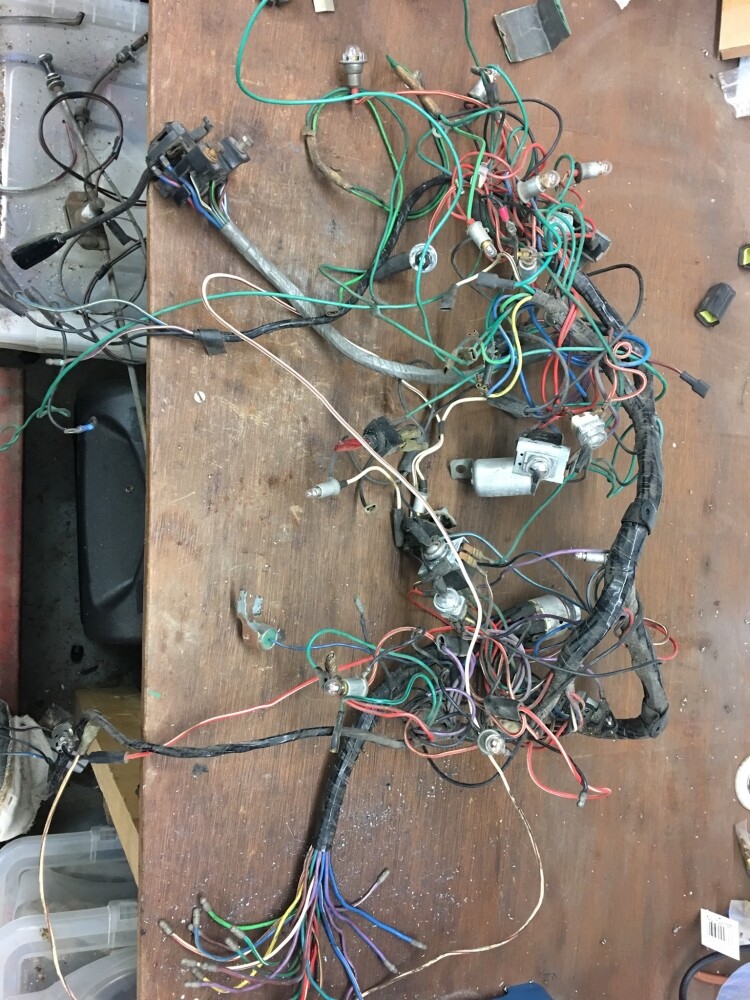
I?m currently working on the final part of the electrics. I?m fitting a DAB radio in the car, a nice short one that fits in the original dashboard slot easily. It requires a special aerial with two cables, one for DAB and one for FM, plus a power cable for the integrated amplifier in the aerial. That is complete and new cables to speakers in the rear parcel shelf are also in place and all these are made up into a harness.
Today I took loads of photos of the dashboard and wiring and removed all the wiring and instruments from the old cracked dash. Next job is to clean up all the instruments and fit them into the new dashboard, then modify the harness for a voltmeter and electric oil pressure gauge, plus I?m converting the headlight pods to be operated by a vacuum solenoid rather than have the vacuum valve in the dashboard. Also to go in is a switch for the spot lights and an electric washer pump.
I?m also toying with putting a small sat nav unit in place of the ashtray, I?d wouldn?t modify the dash, just clip the sat nav in place and use the ashtray lamp supply to power it.

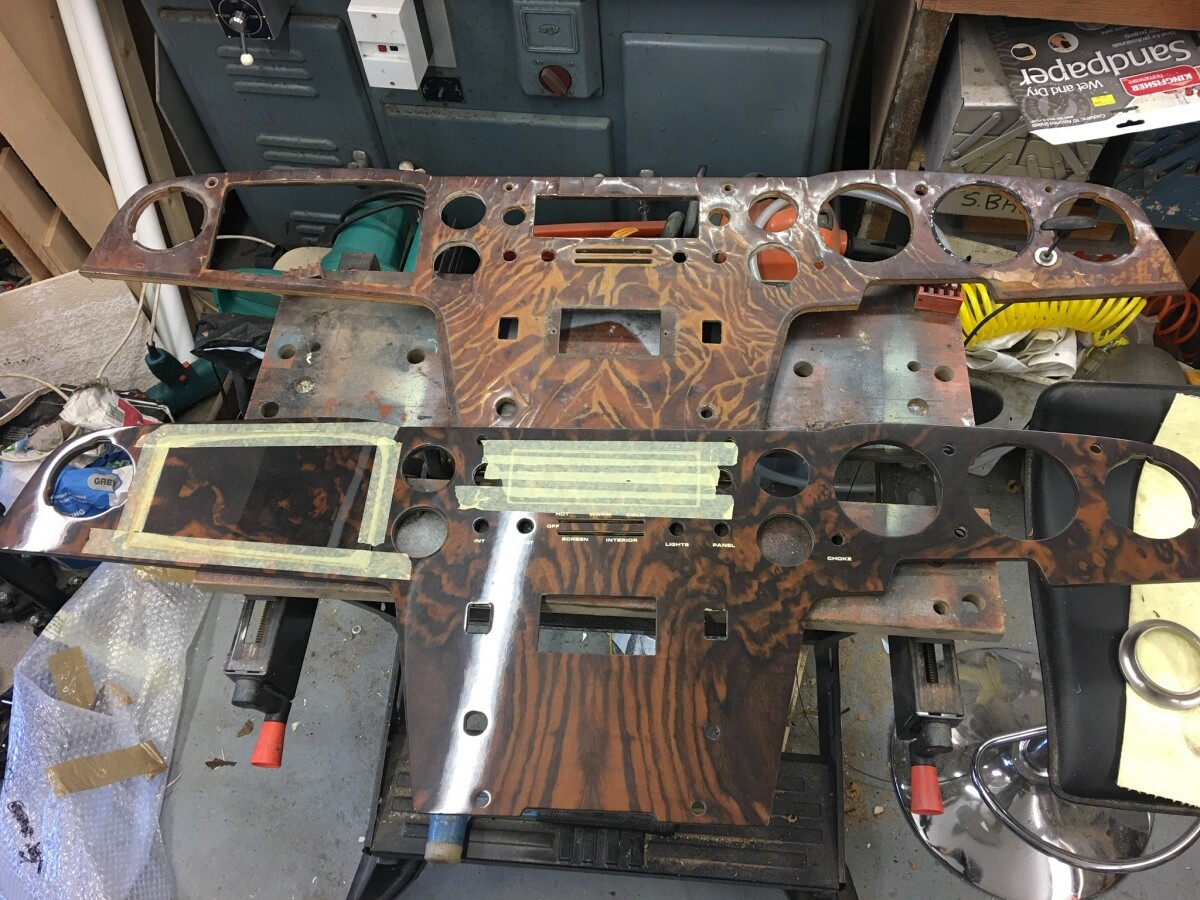
Exhumed the new dash from behind the spare bedroom wardrobe today! It had only been there for about 20 years nicely wrapped in bubble wrap and still with the sellers tape on it. It?s still in as new condition and certainly looks much better than my original one. Out of curiosity, does anyone know what the letters written on the back of the old dash mean (if anything)?

Your photos are very useful to me (and my Elan). Thanks.