A brief update on my S4 resto

(From another thread which I did not want to hijack.)

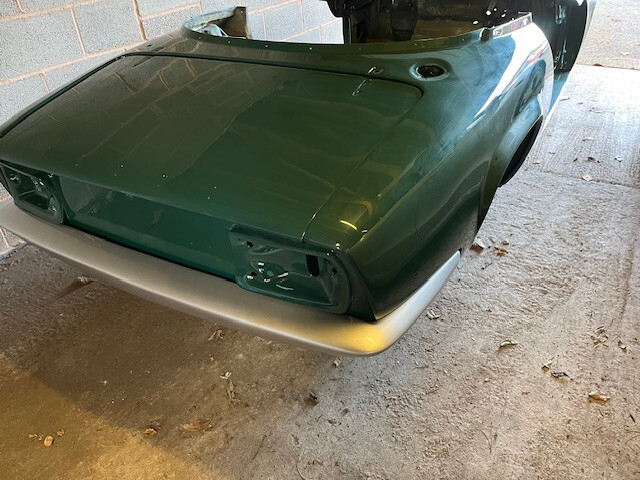
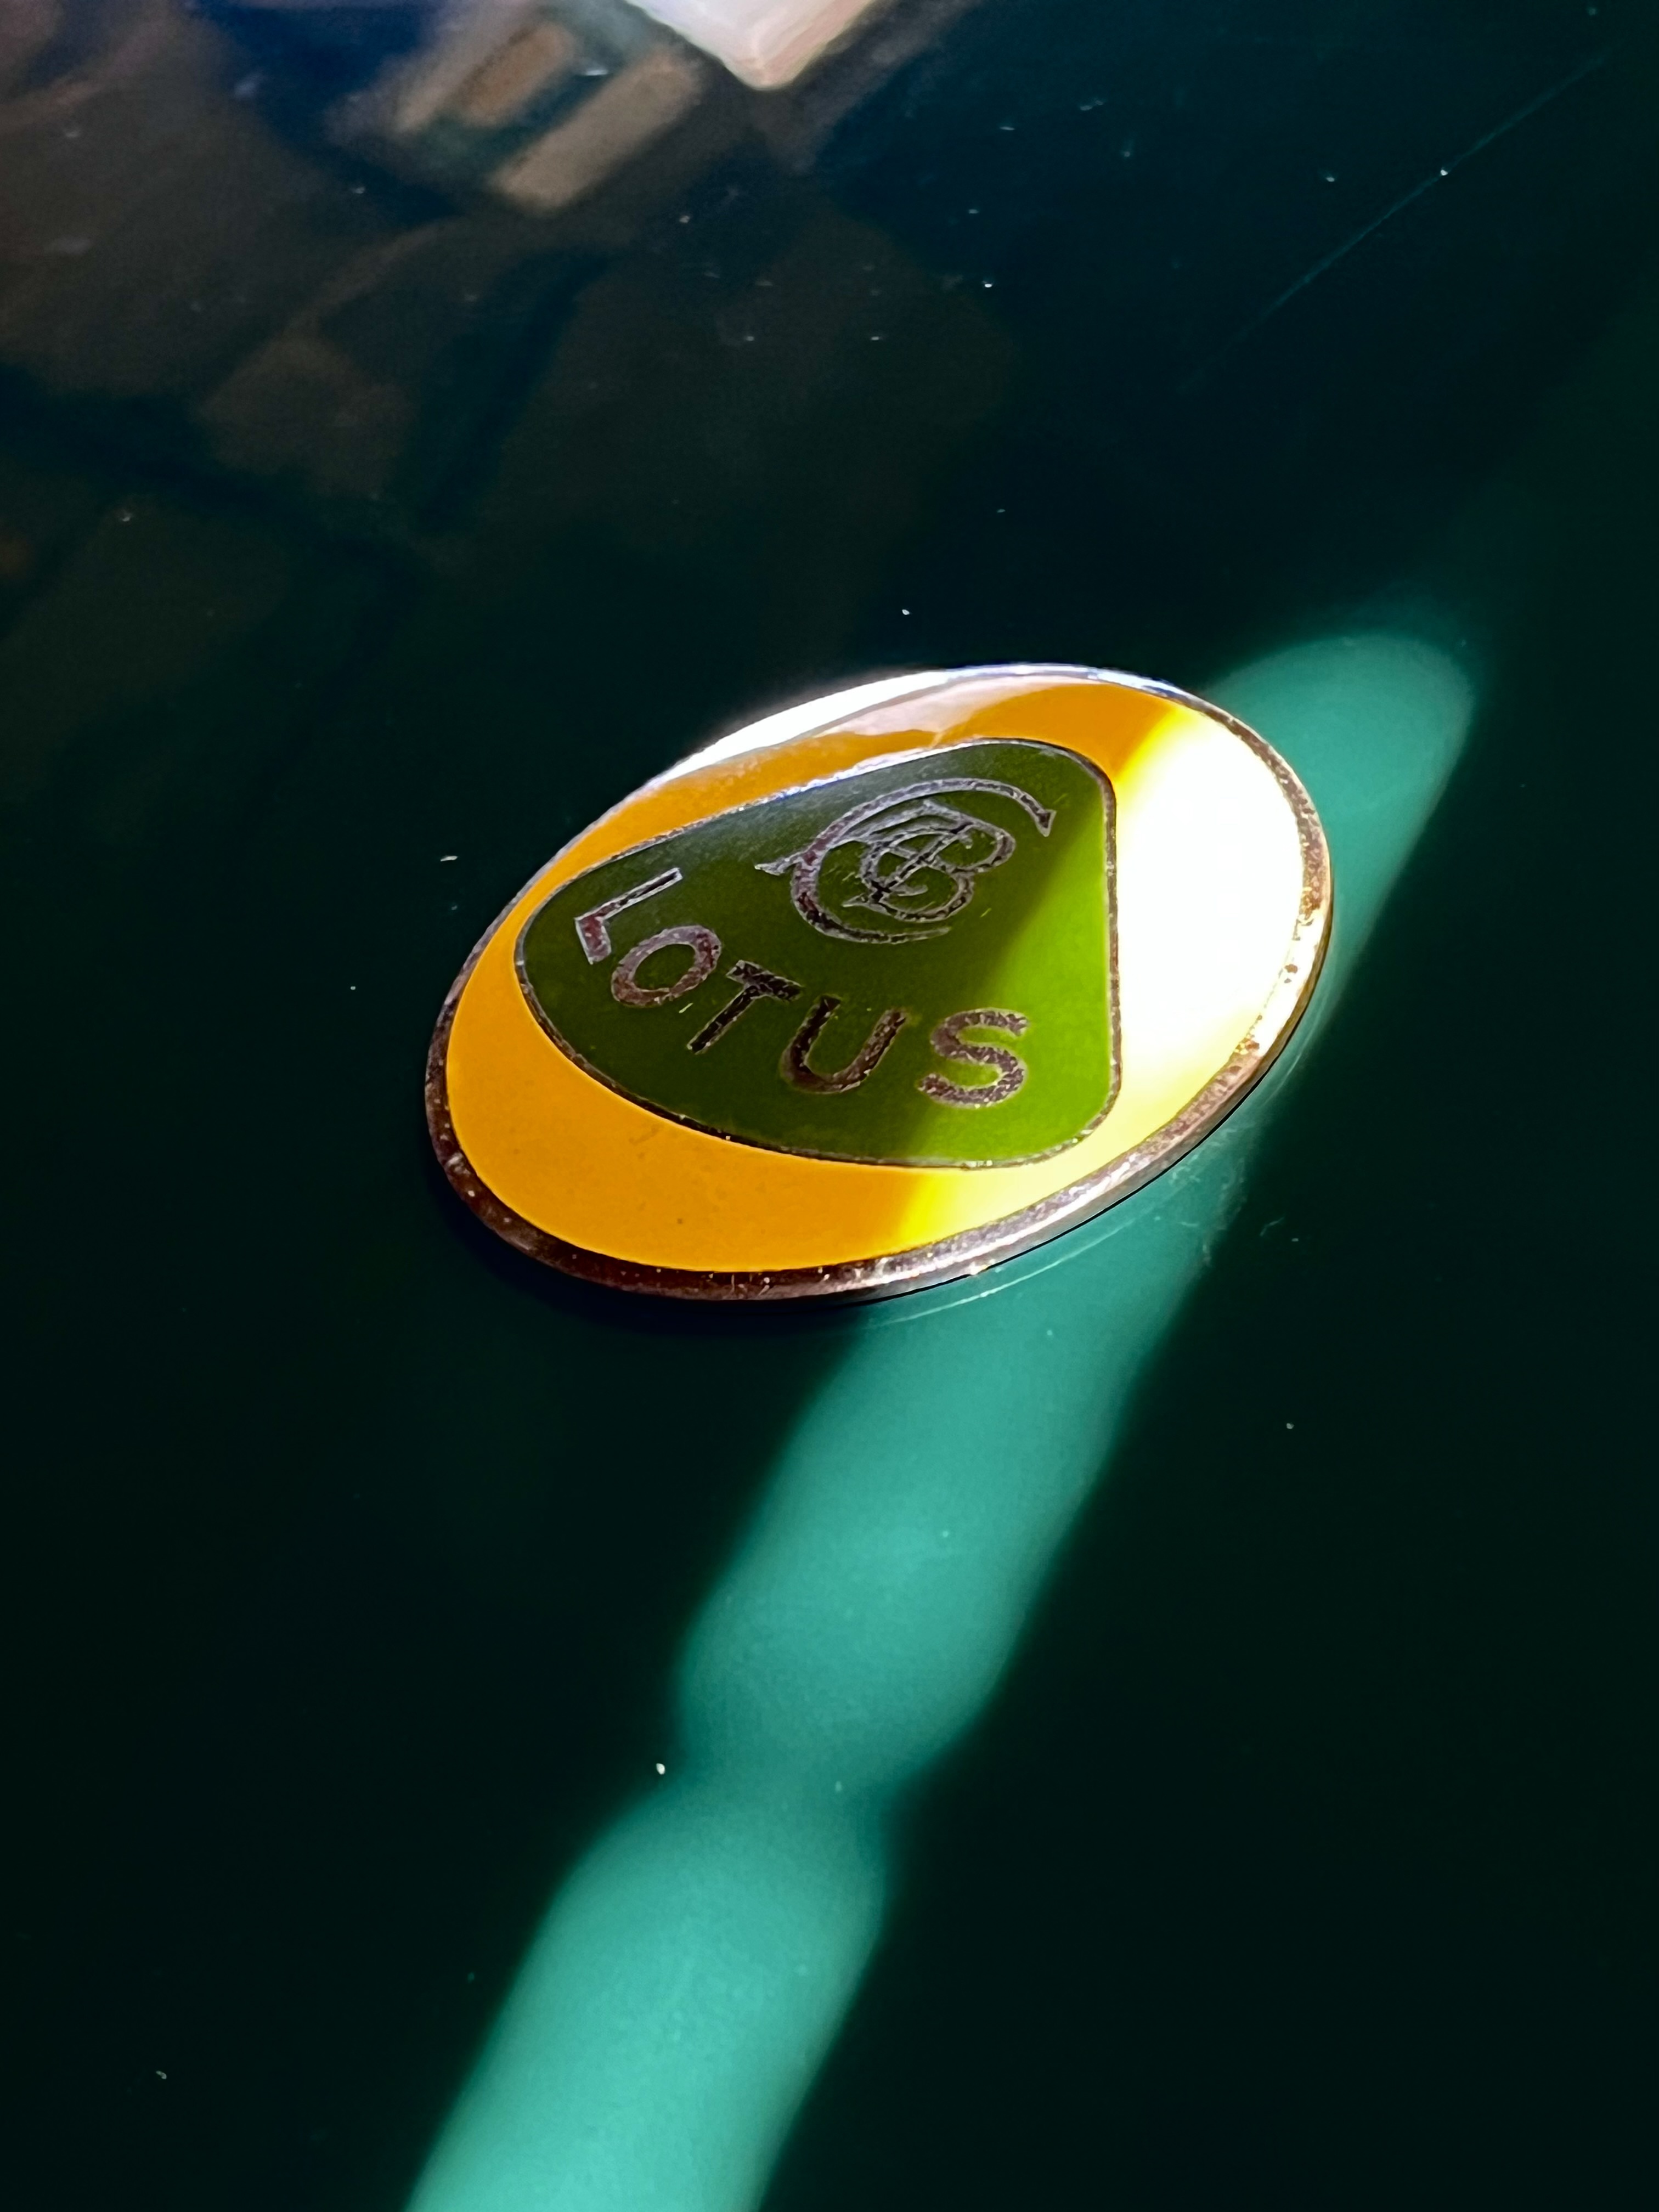
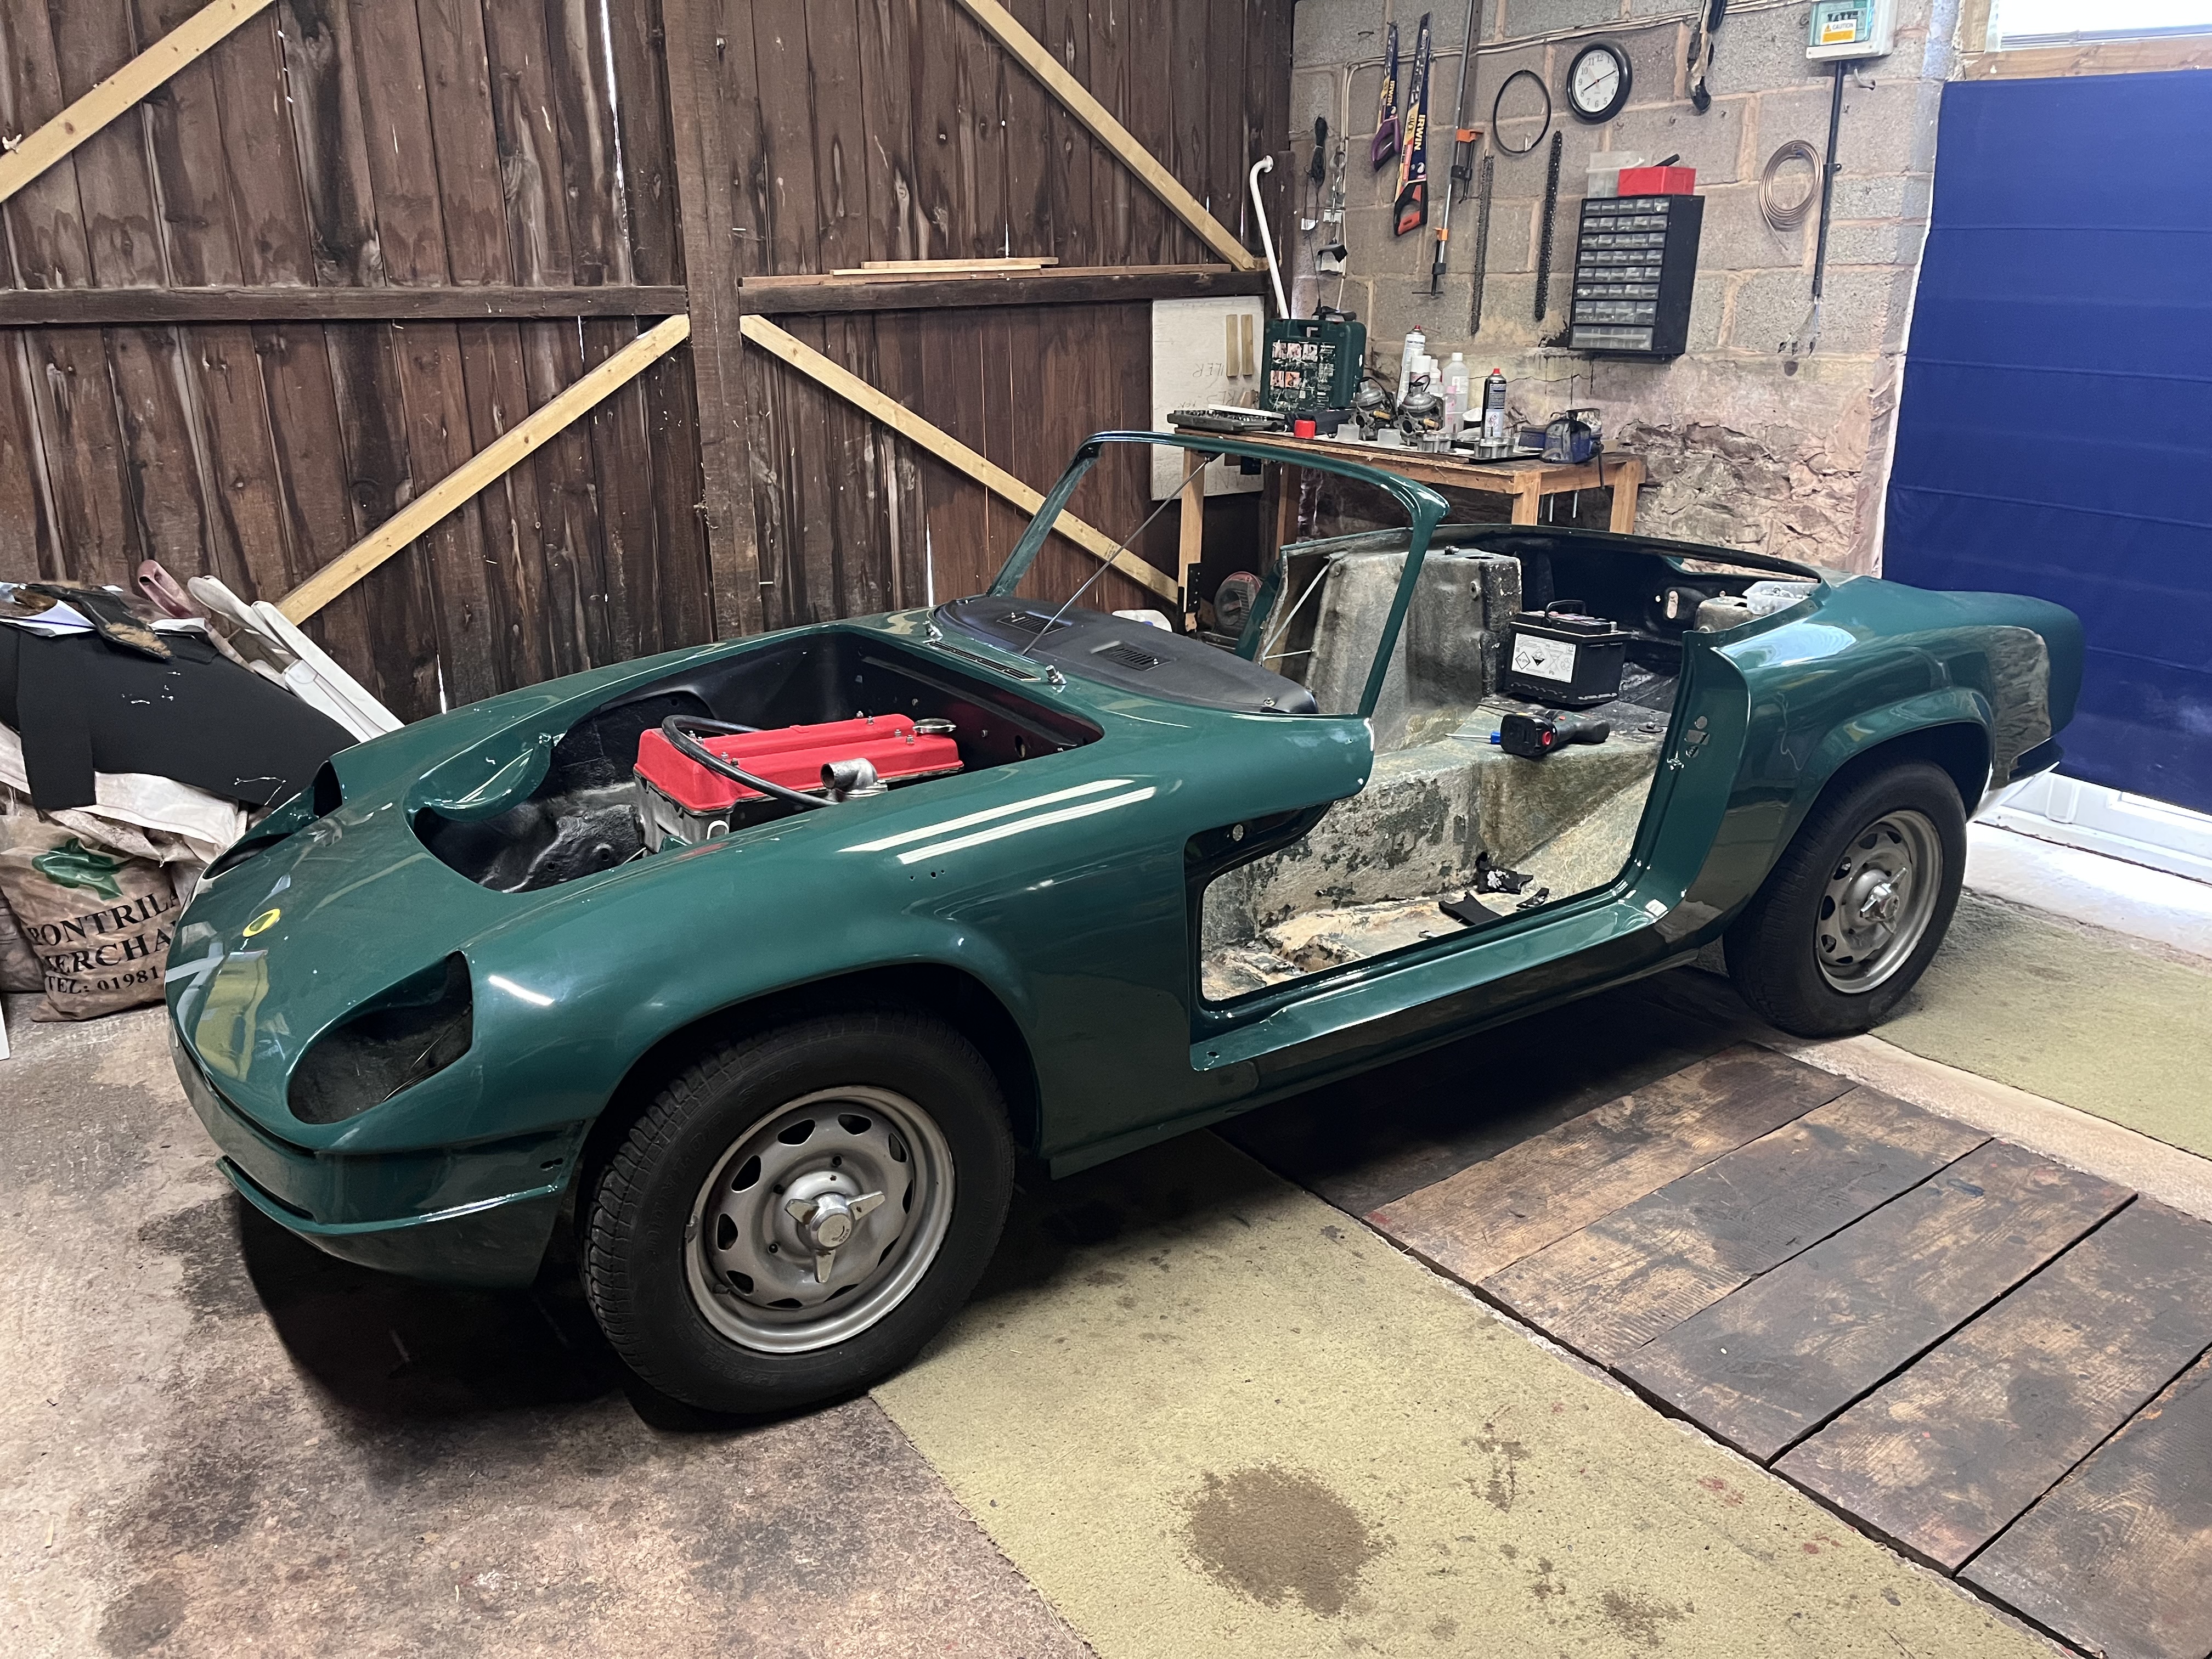
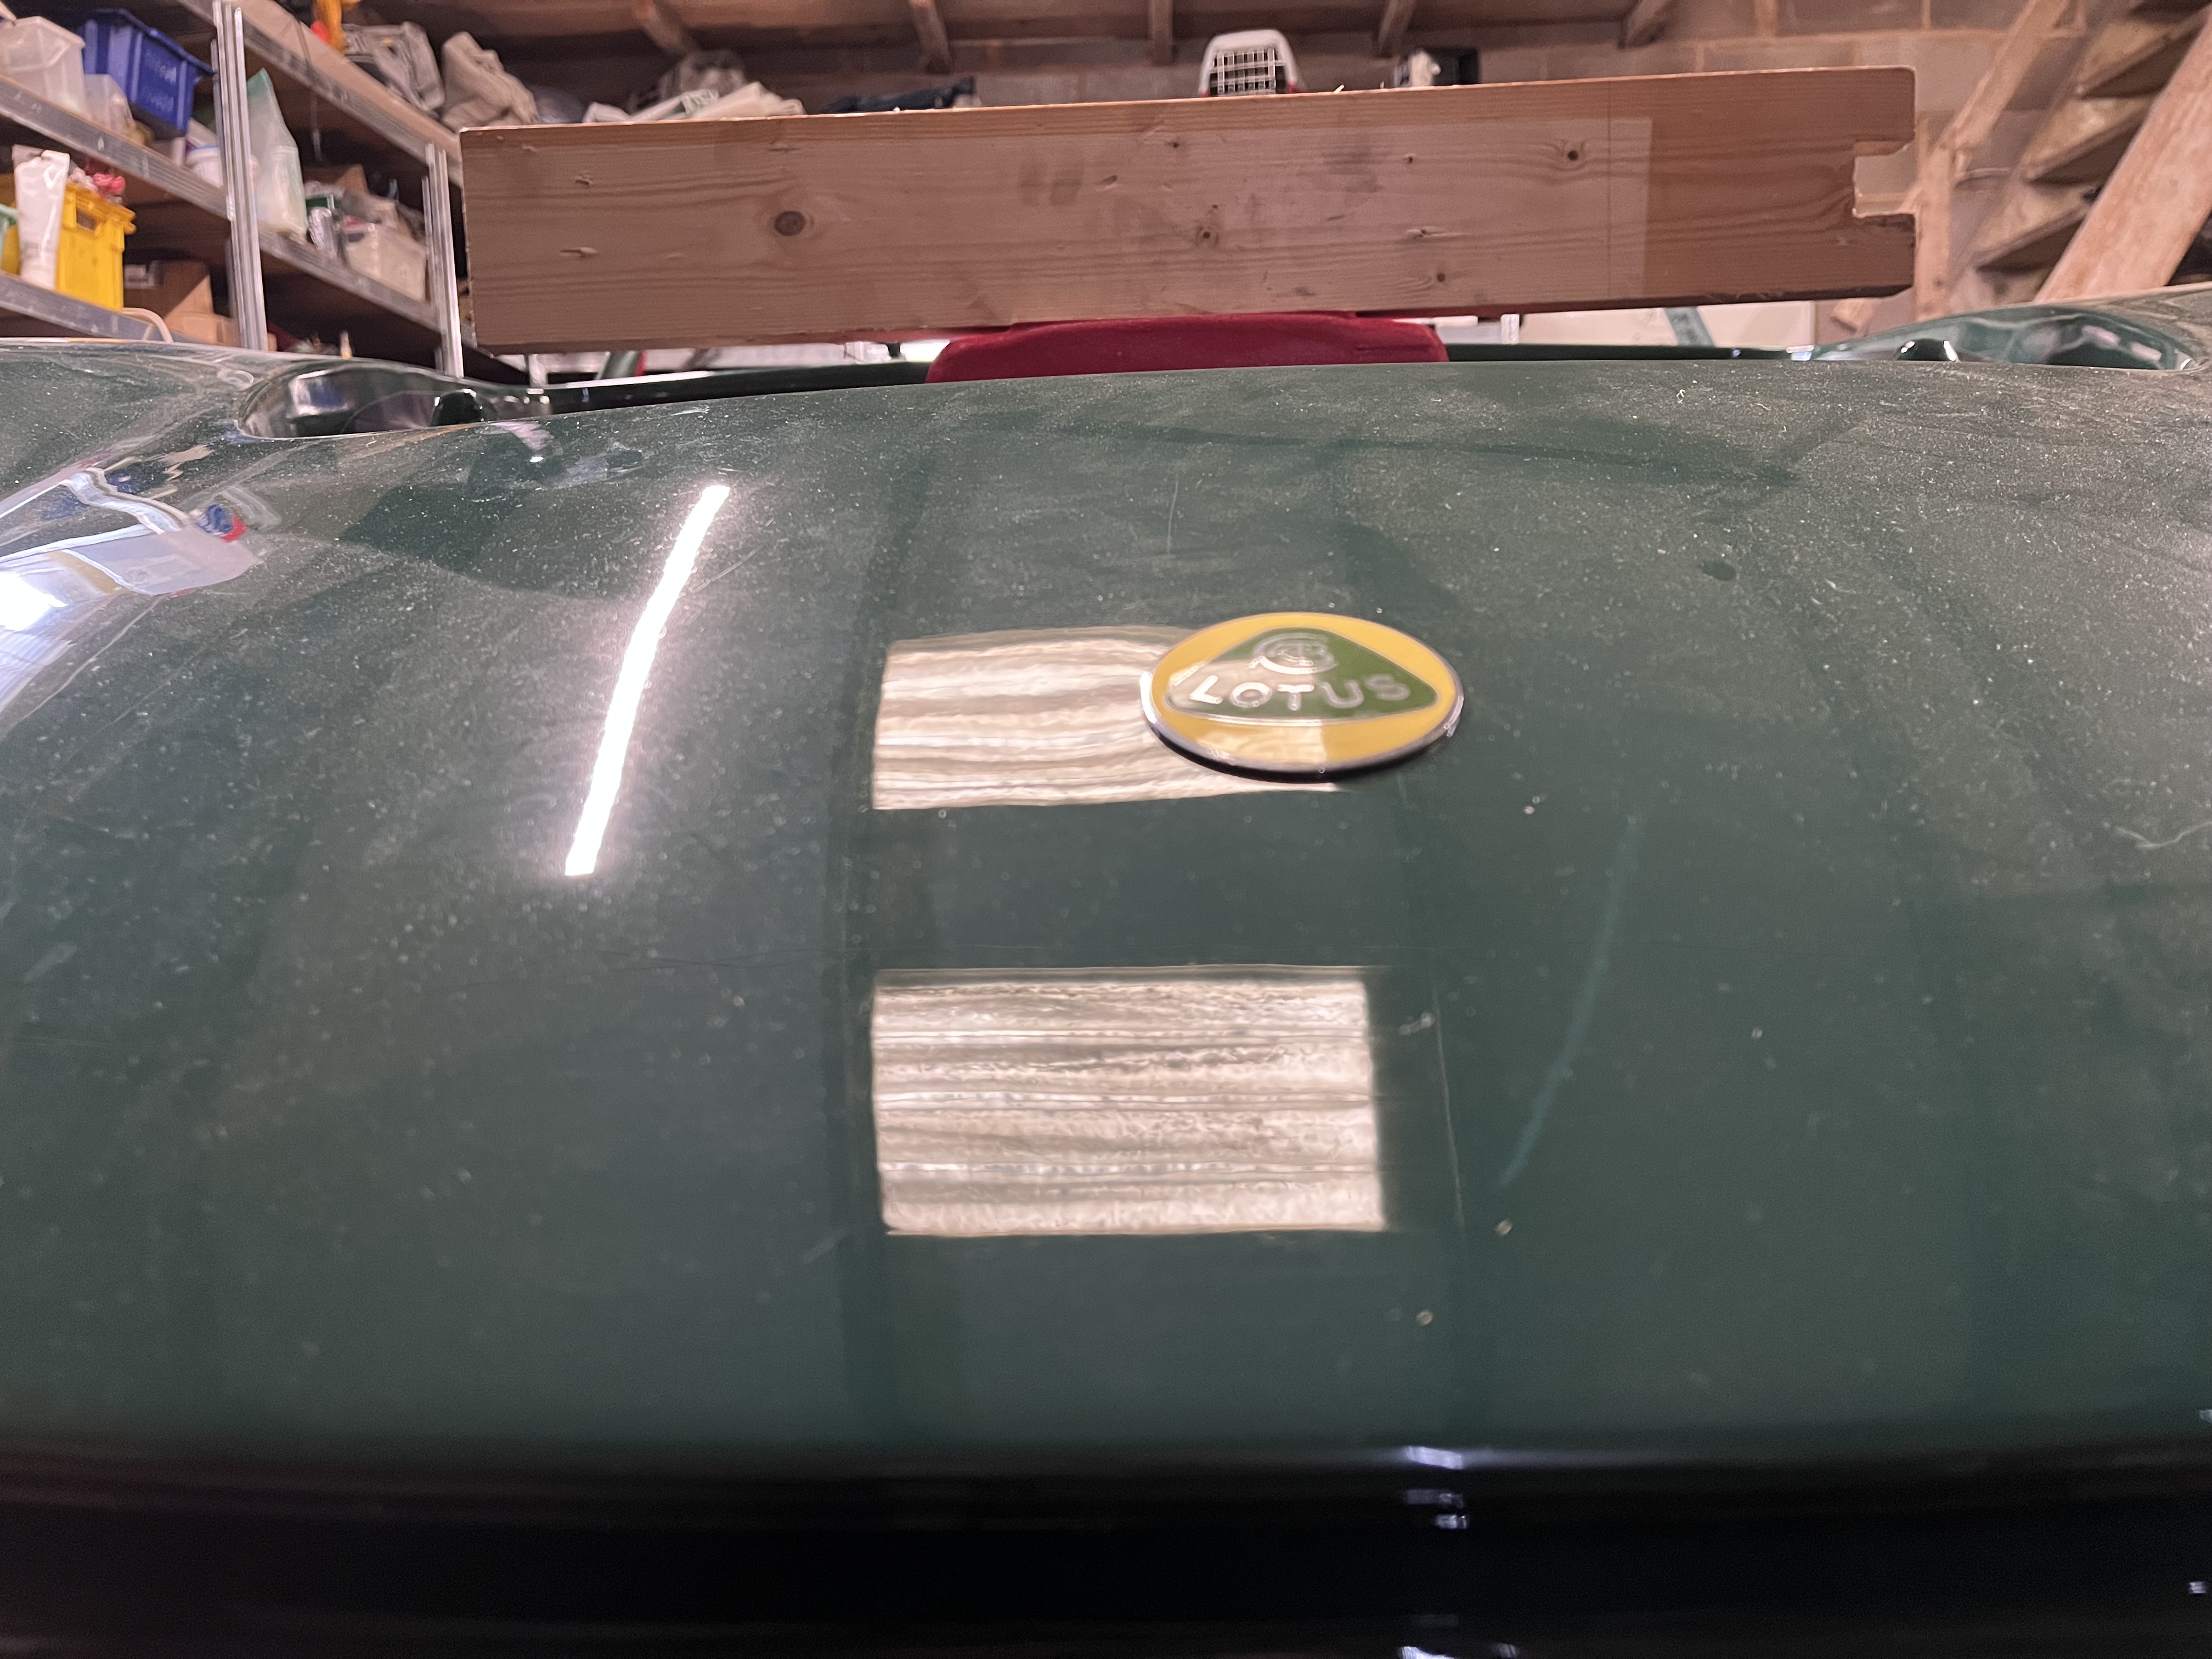
First of all, the body. I reported last year that it was painted and posted some pictures.

viewtopic.php?t=29927&f=50&start=720#p390813

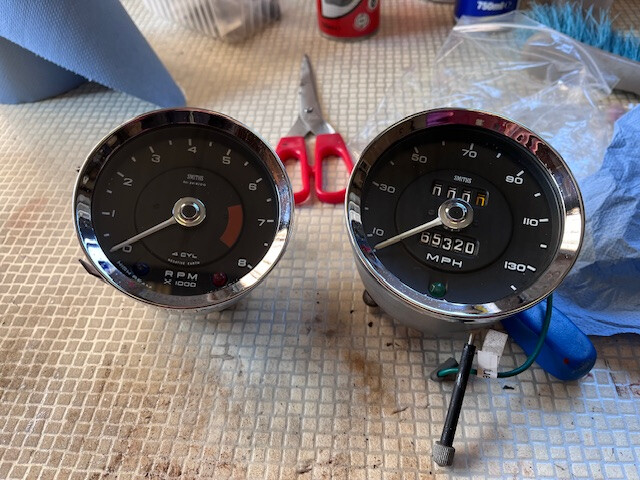
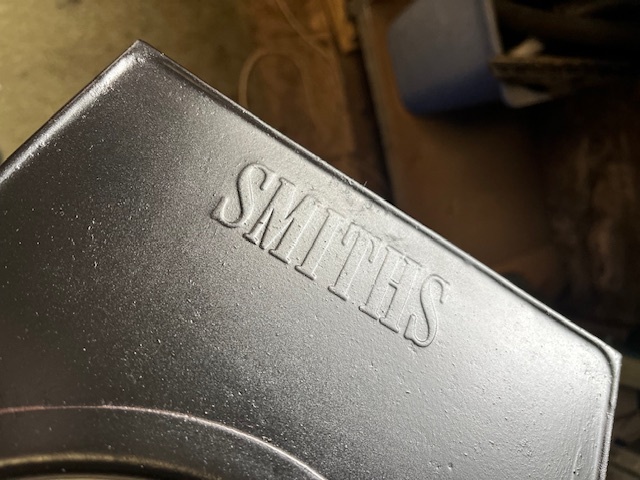
I ordered a new dash from Nick Martin. Took a while but I am pleased with it.

viewtopic.php?t=54702&p=399167

I’ve sorted the door frames too. Lots of polishing!

viewtopic.php?t=54844&p=400187

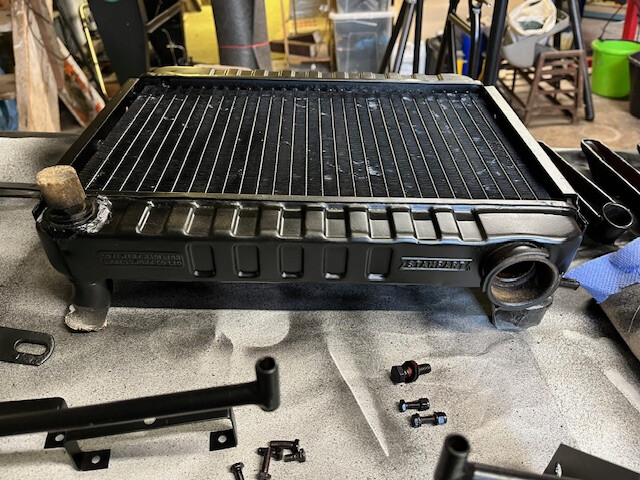
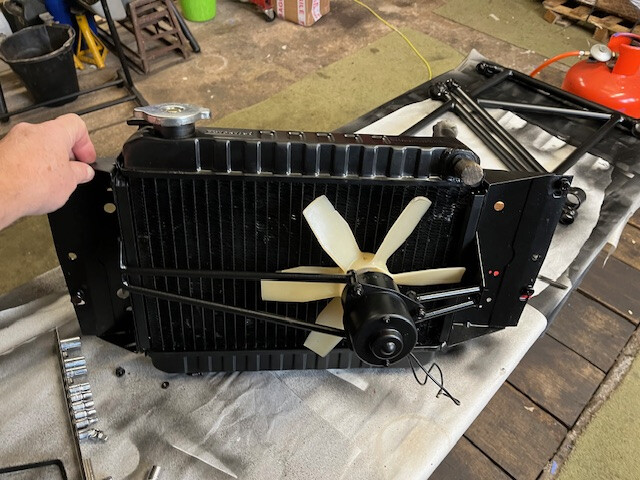
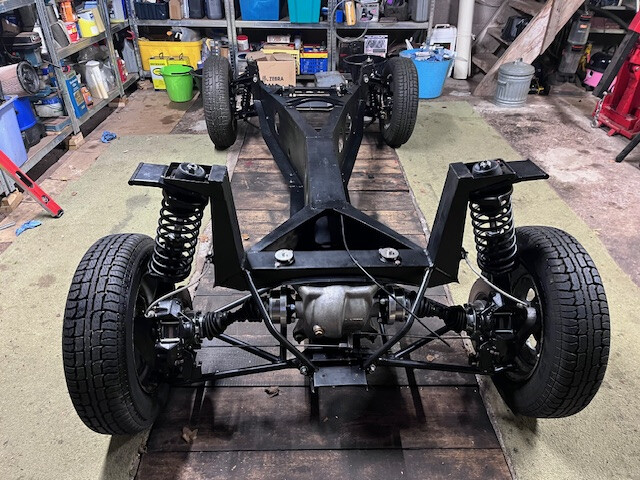
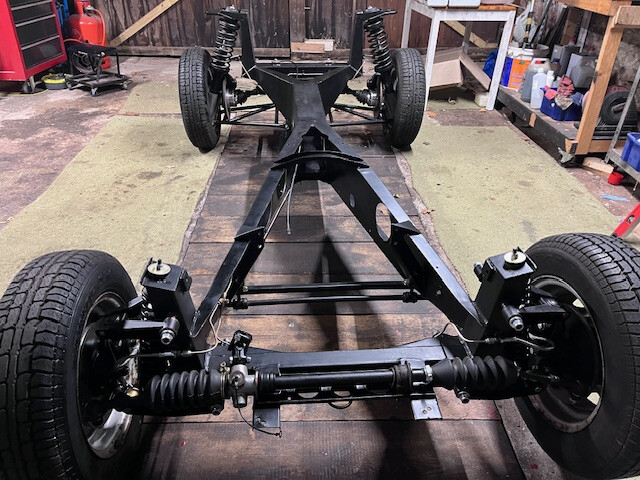
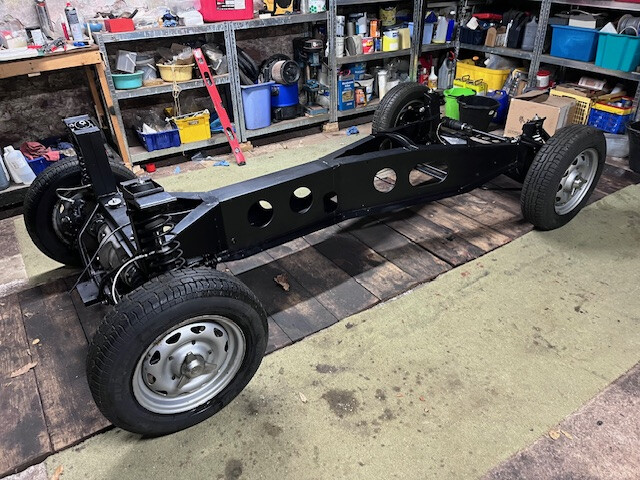
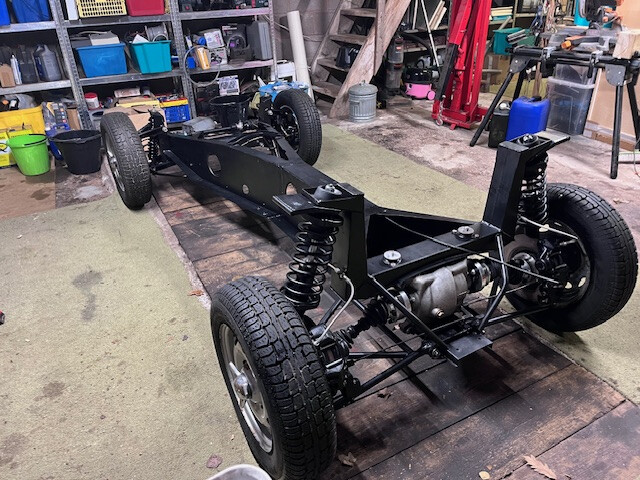
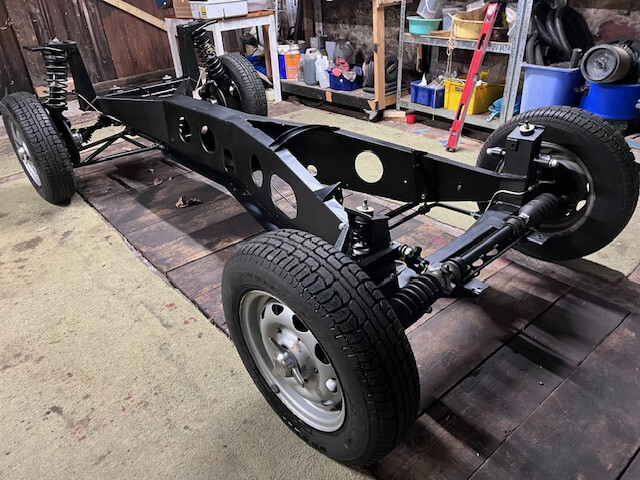
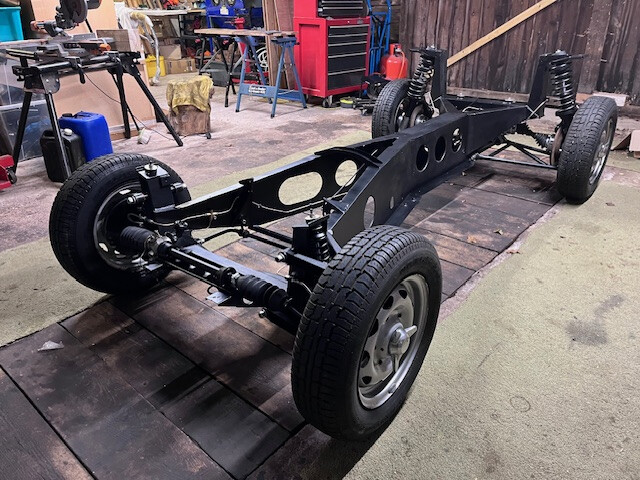
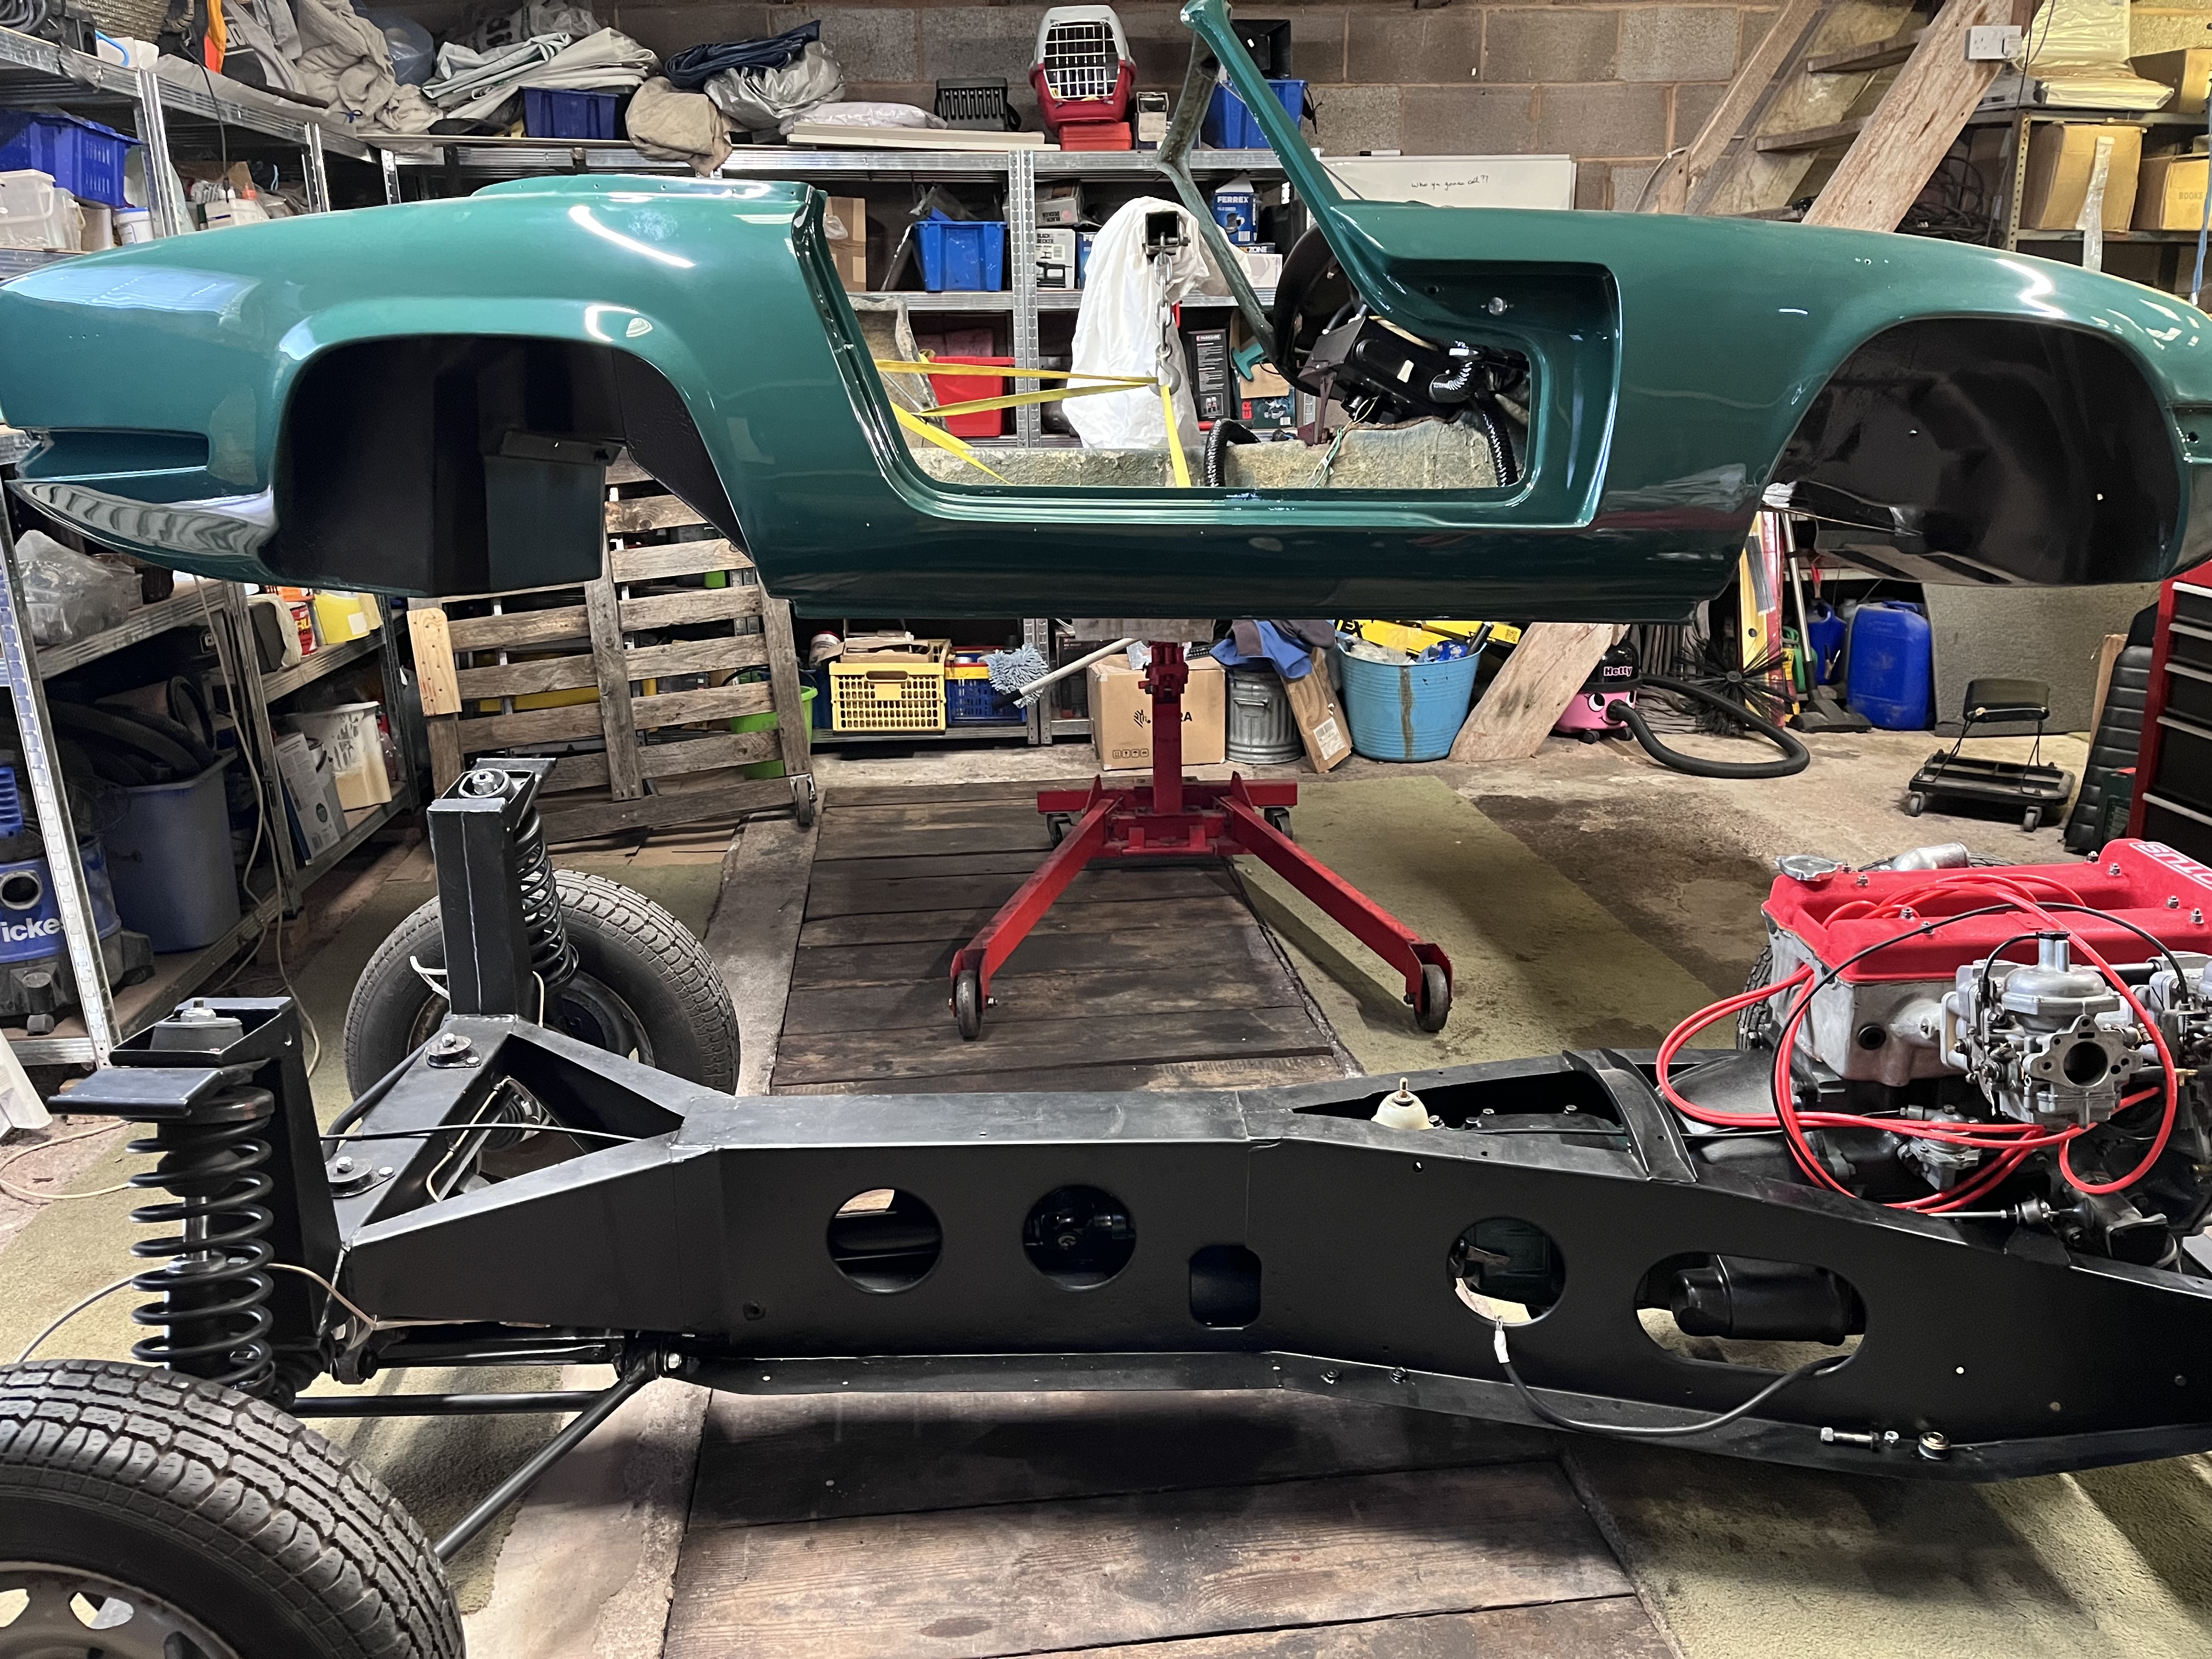
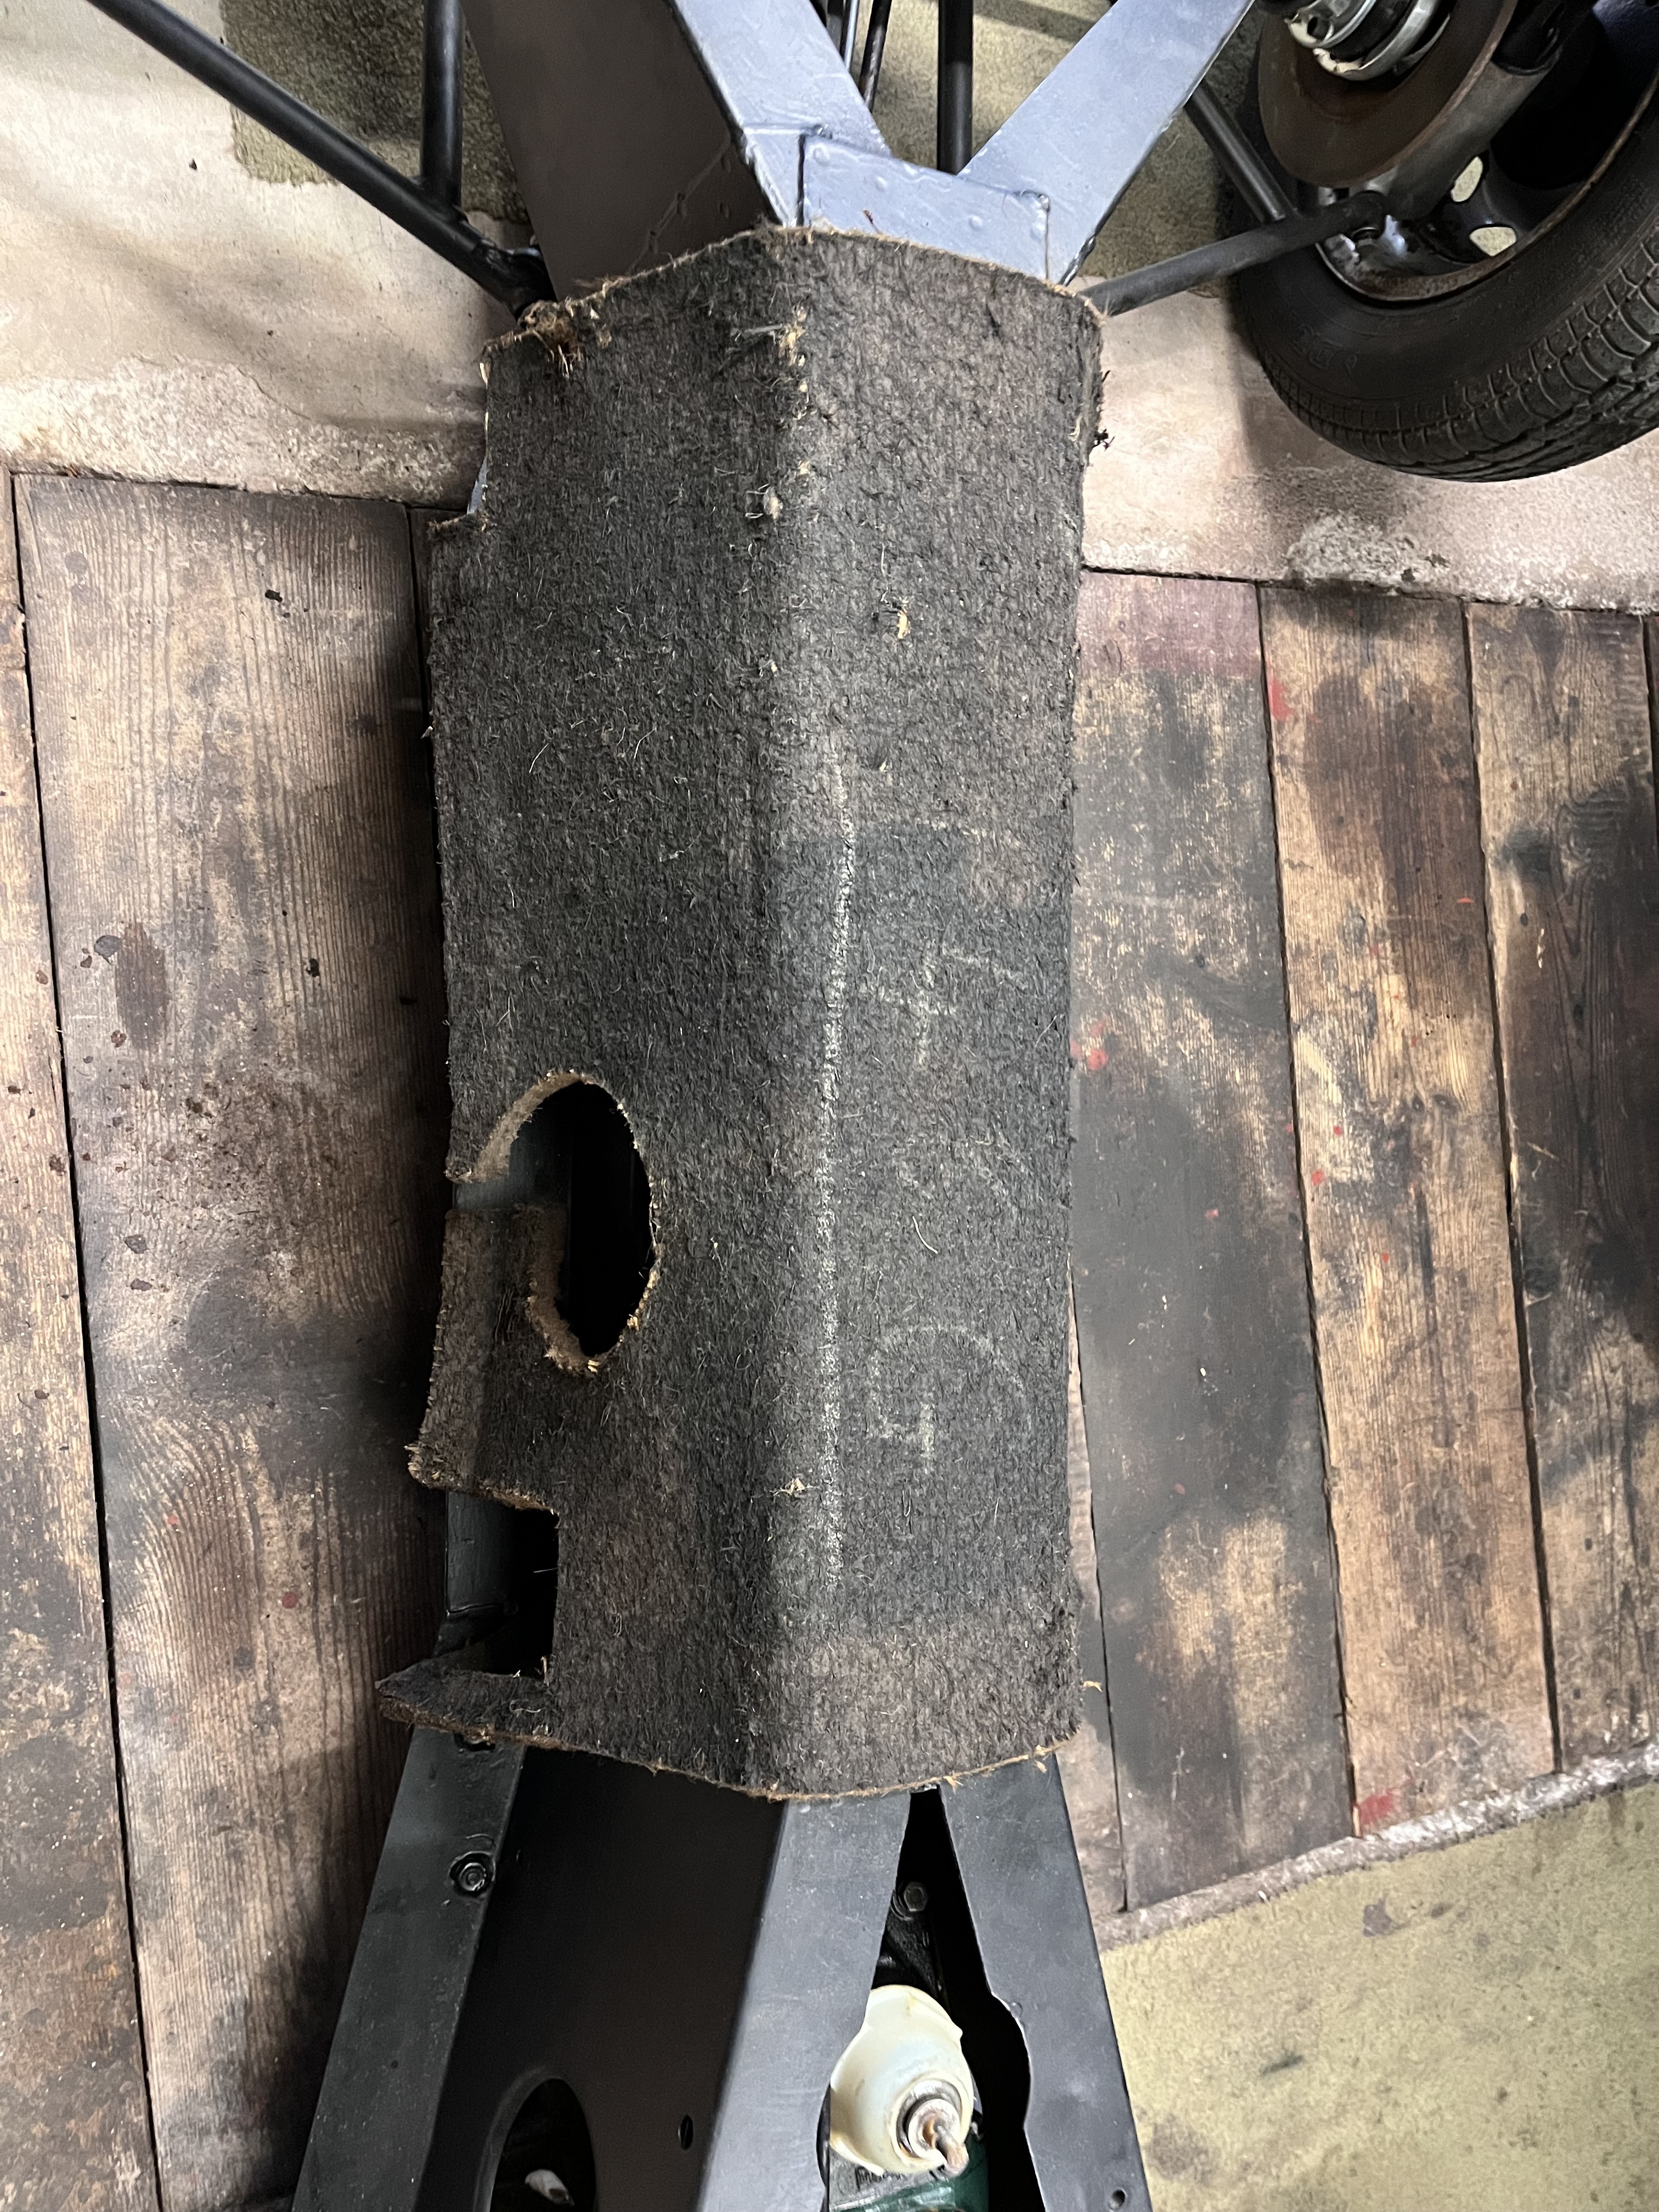
In the intervening time, I’ve been sorting out the chassis and all the rusty bits. I bought a blast cabinet and have been blasting, painting and otherwise restoring parts. It’s a boring grind but the results speak for themselves. The general approach is to prime with Bondo Zinc oxide primer, followed by one or more coats of Simoniz Tough Paint in satin black. This stuff’s acrylic but resists patrol spillage. Not as tough as I hoped but certainly good enough especially with the Bondo primer underneath (which is double tough 'ard). Definitely better than Hammerite!

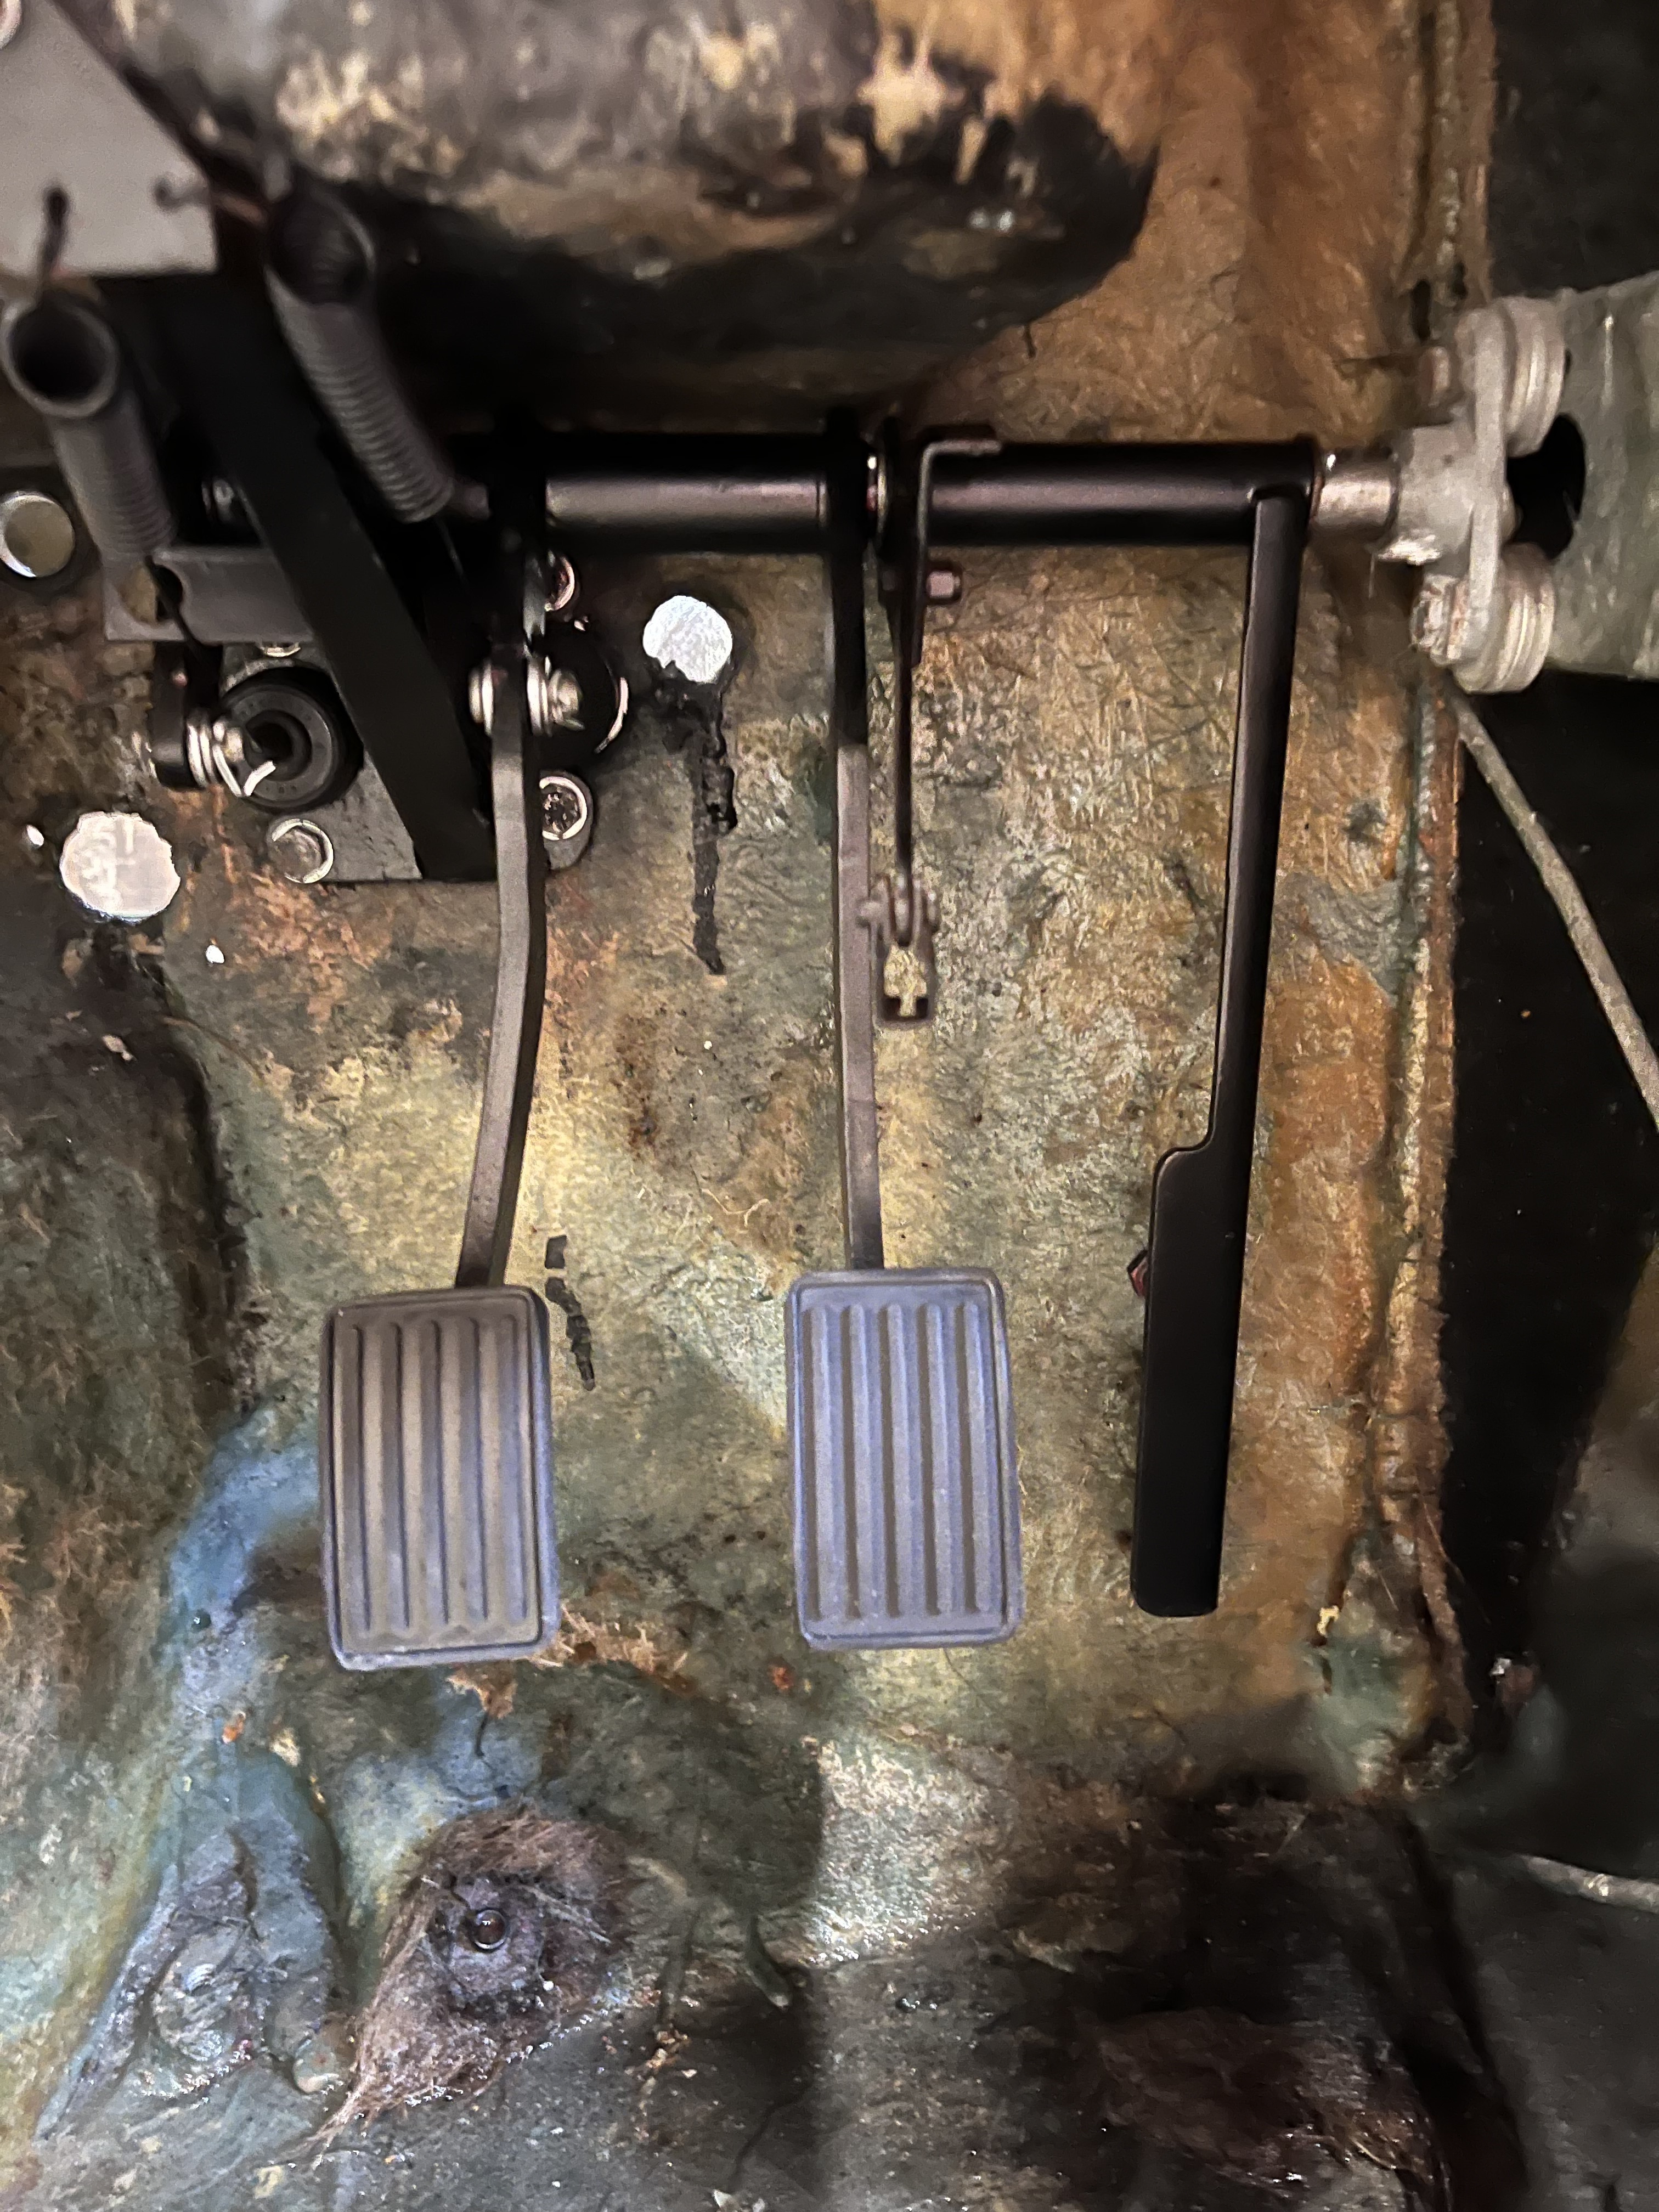
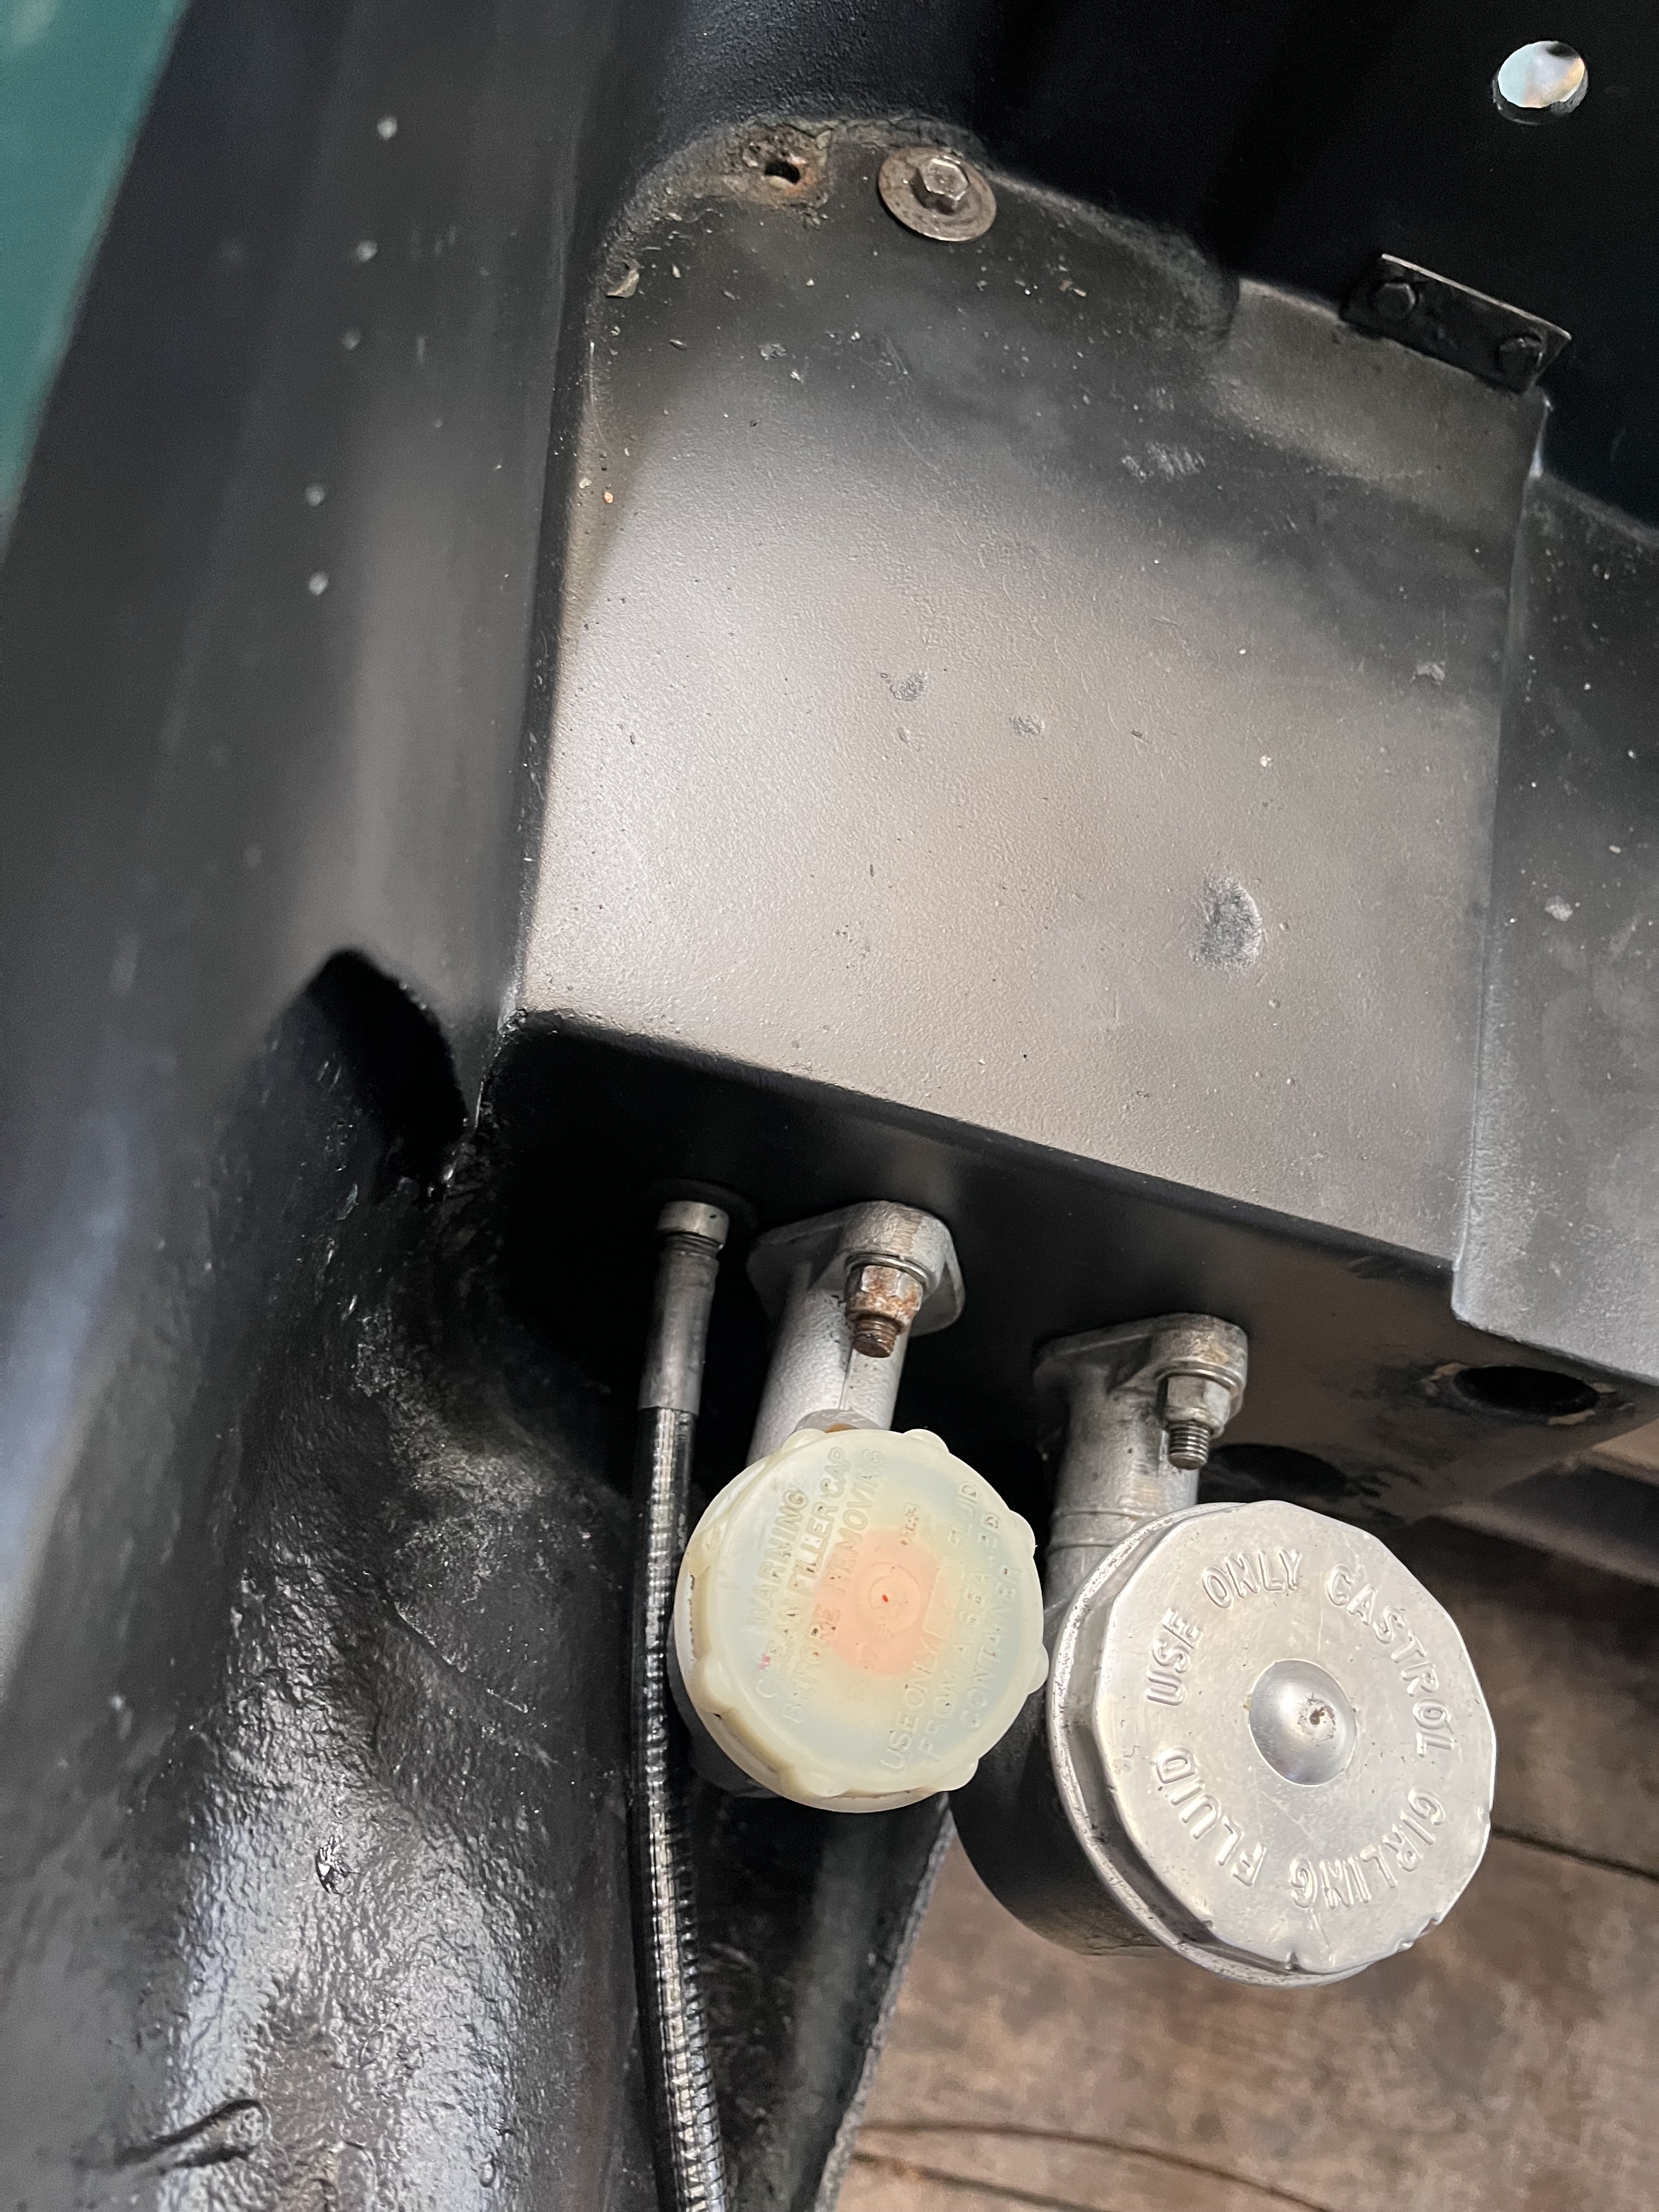
The chassis was hard work. First, it needed repairs to both front turrets (rusted out somewhat). The welder who did this is a bit of a magician, as you cannot tell it has been repaired. It looks completely stock. Then I scraped all the bitumen paint off it, or as much as I could, then gave it a good coat of Bondo then sprayed it with Tough Paint. looks the biz. I had a Spyder style tow hook welded onto the front crossmember, too. Then I acquired a brake pipe flaring tool and some Kunifer and laid new brake pipes on the chassis. And that is where chassis work ends…

A few highlights for you…

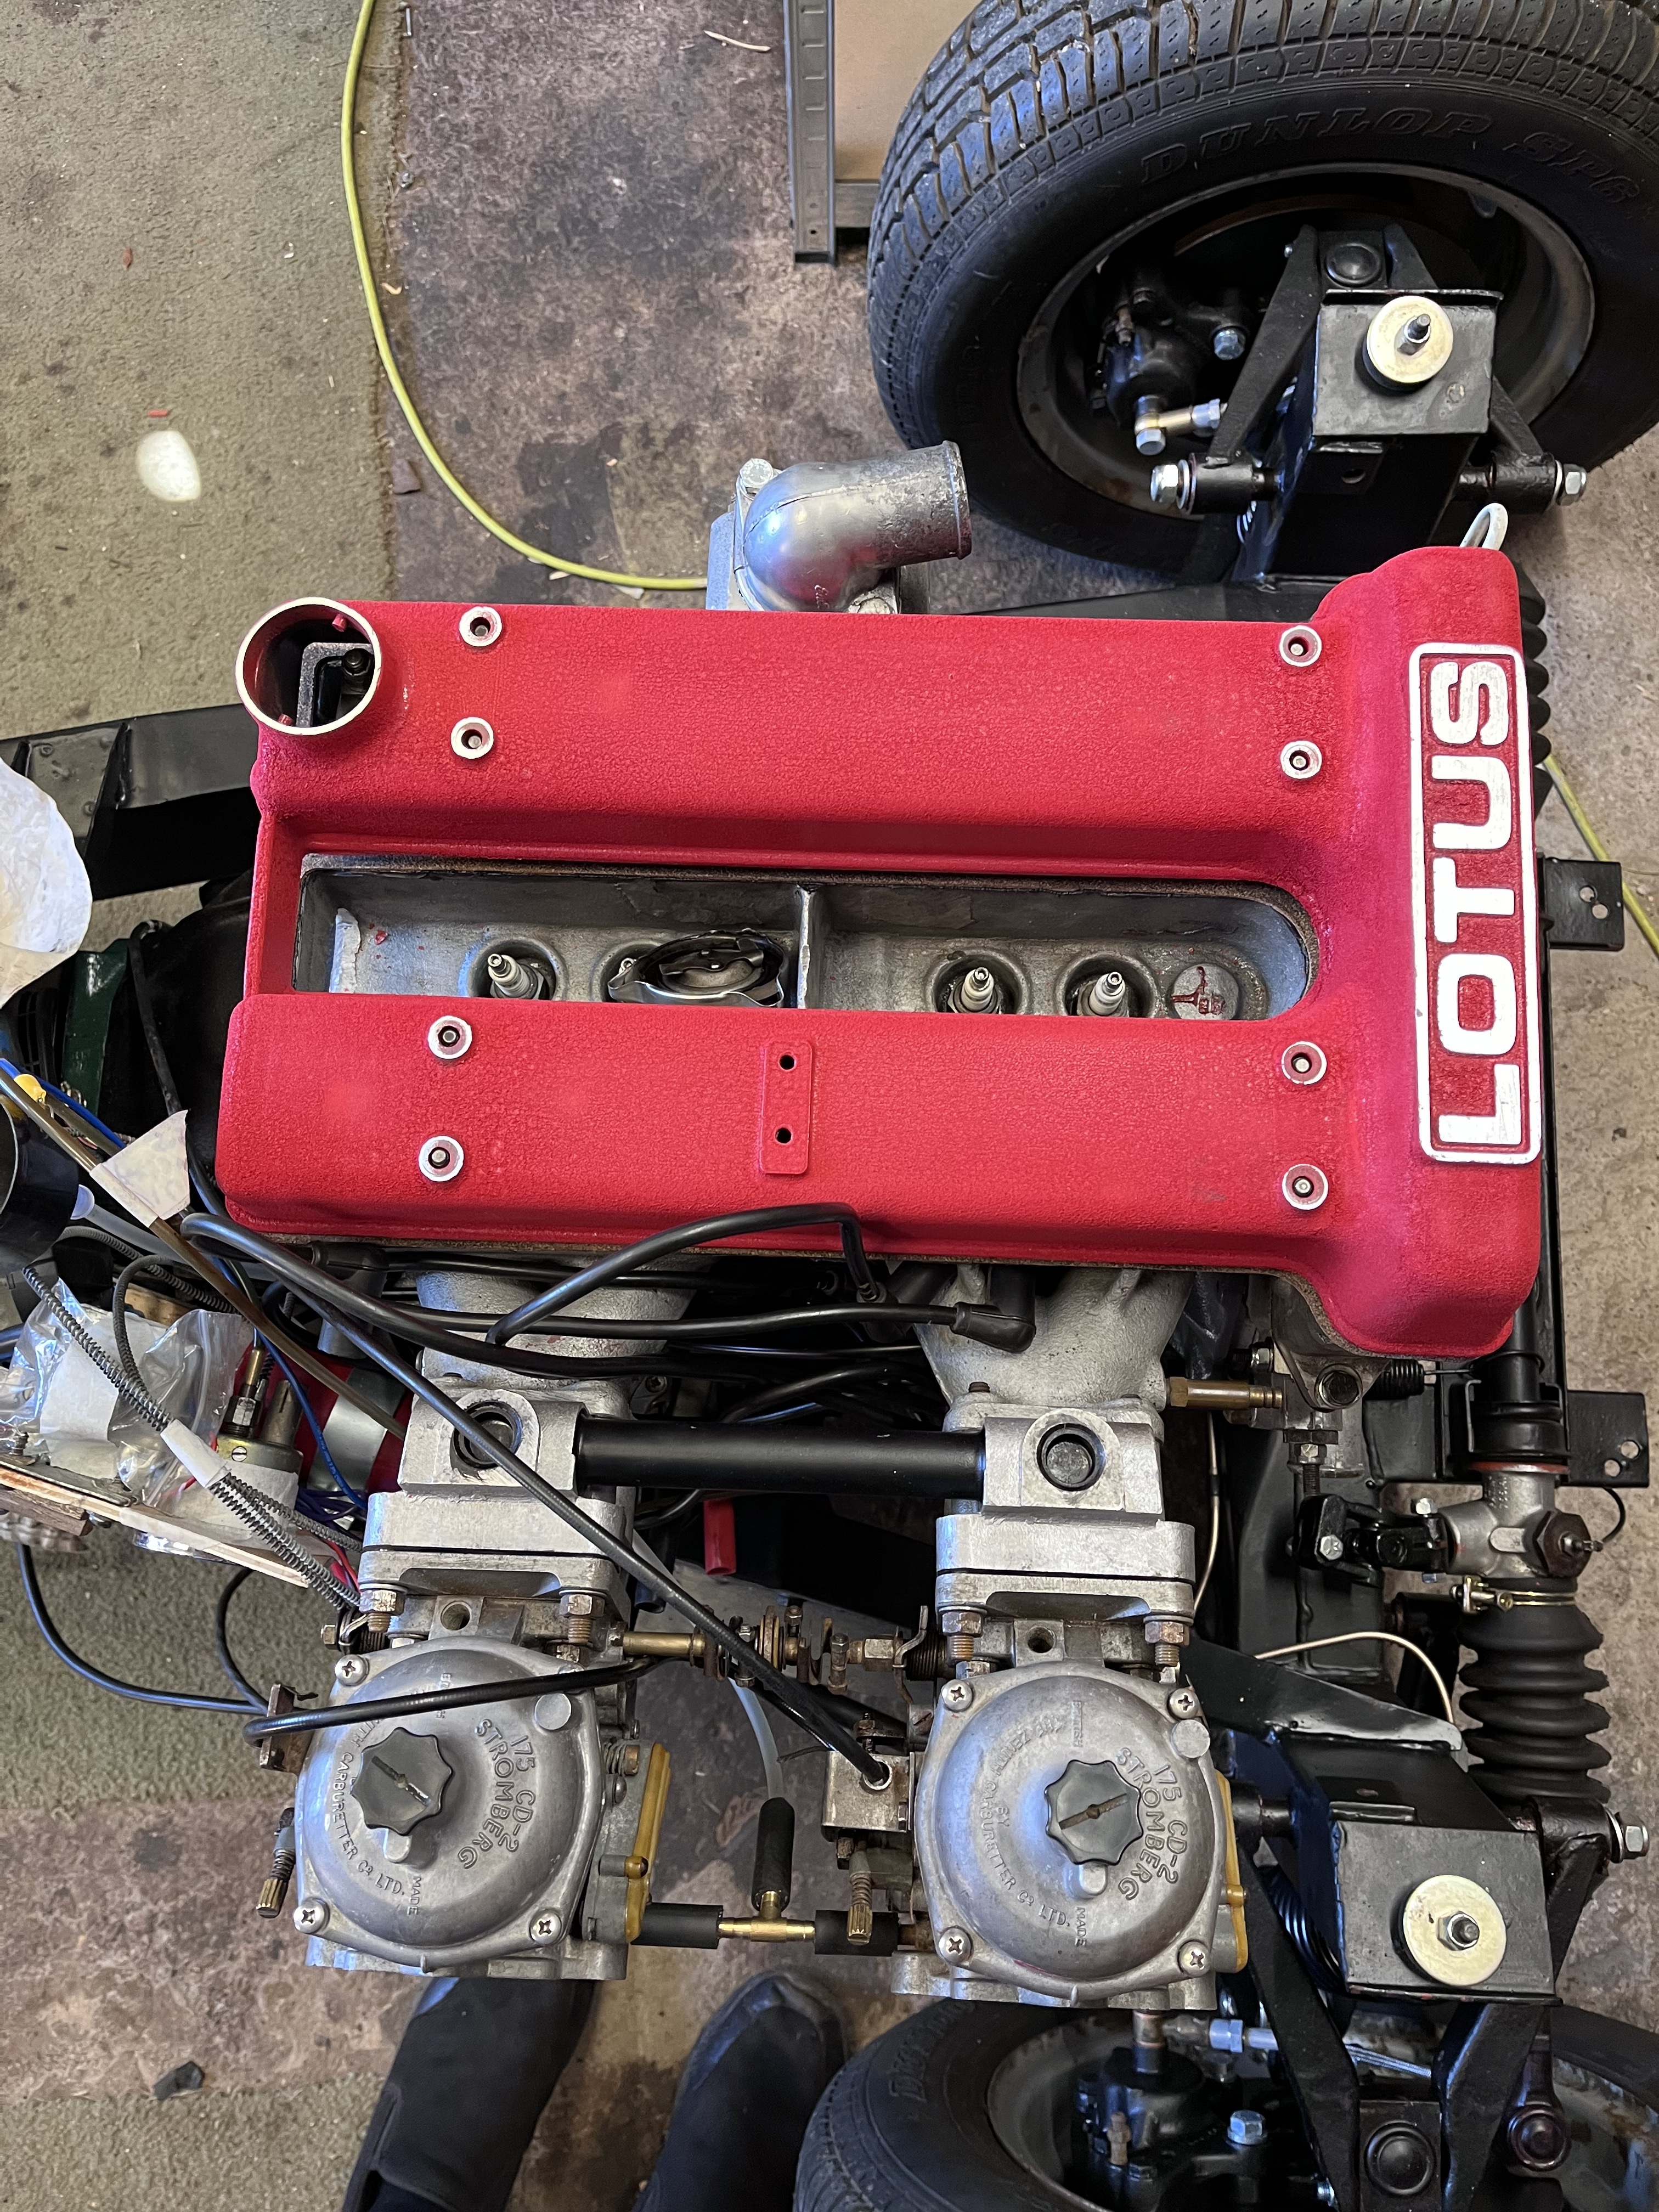
I should also add that the hubs, carriers / uprights, steering rack, rear springs etc have all been painted per above. I did some experiments with the rack, fitting it and seeing what shims are needed to match the measurement given by Brian Buckland. Turns out I need one shim on the left hand mount, nothing on the right, but of course I will be testing bump steer when the front hubs are on. The front shock absorbers are going to be replaced (TTR ones i think) but I’m not sure about the rears. They are the standard Armstrong red inserts and they do feel like they have some life left in them. I’m tempted to try them first.

As usual, restoration work has to take second fiddle to life in general. In my case a restoration of another sort, a house, as we had moved here (Herefordshire) from the South Coast just before I acquired the car. I think we are more or less there after a bit of a plumbing epic that entailed a bathroom, loo and en-suite, followed by tiling and vinyl fitting (both, I am ashamed to say, I had done professionally). Oh and restoration of the ride-on mower which threw a blade and destroyed part of the mower deck. Can’t forget the mower work, folk are keen to hear about that… :unamused:

Some more shiny bits…

1 Like

…and some more…

I spent a lot of time restoring the front indicator holders and lenses. Polish, polish, polish. Also, the rear light clusters. They’re pitted with the usual blobs but came up shiny. One of the lenses was damaged, missing a piece. Which I duly discovered floating about in the glove box. So that’s glued back together and thank you very much, I have saved quite a bit of money.

The centre console also needed repairing. I’m sure I posted photos of it on here as I’d put up a wanted ad for any bits of broken console I could use to repair it. Lo and behold, BB512 had the actual missing fragment lying about (as he had sold the car to me) and sent it. A bit of fibreglassing and some - wait for it - charcoal and superglue (!) later, the console’s fixed and you can barely see the repair.

A couple of weeks ago I got a bit bored with blasting & painting and thought it was about time I addressed the elephant in the room - the engine! I pulled the head and cleaned it up a bit.

Hmm, I think it needs more scrubbing… Anyway, I pulled No.4 valve to check the condition of the guide and mating surface. Some play, which I was told required sorting - more on that soon. The block got a wash but it’s very hard to remove the oil stains from the casting surfaces. I took it and the head to a nearby engine shop. They quoted me something a bit outrageous to do all the work, including new valve guides and valves. I was discussing this last week with 512BB (Leslie) and he suggested I bought it all over to him and we could have a look and then take it to a shop nearby and get better prices. Leslie was of the opinion that I was about to be rooked!

So, up at 0530am and a foggy drive across the Cotswolds to get to Leslie’s at 10am. Yes, it really took that long. We had a look at the valves. Leslie pronounced them OK. We took the oil pickup / return pipes off the block and removed the welch plugs. Much gritty buildup was found in the water jacket, so we hosed it down. Much better now. Also, the welch plug in the head by the breather tube was removed, and oil sludge was found behind it. Leslie’s view was the engine had not really been maintained well WRT oil changes, so bad was the build up. Good job he didn’t see what I’d scraped out of the sump!

Anyway… we drove off to the machine shop and handed it all over. The job list includes a rebore to +20, polish of the crankshaft (but will be ground if necessary), reface flywheel, full balance, possible con rod cap work, some other stuff I can’t remember. Block will be dipped. I’ve acquired a +20 piston set from QED, it is forged and extremely expensive. Also, a new jackshaft per my other thread. Turnaround time should be a month so back by mid December, maybe.

I went to see my older daughter for dinner, then drove home in the foulest rain imaginable. I finally arrived at 11:40pm with memories of the Peterborough trip I’d made to Spyder to get the Plus 2 chassis fixed.

Meanwhile, I’ve started ordering parts to get me to the rolling chassis stage. I put in a fat order to Susan Miller and commodity part orders went to ANG and MEV. Susan’s order includes all the seals, gaskets and mounts to get the engine and box back in the chassis, as well as parts to restore the diff (basically seals and a new pinion bearing, crush tube plus output shaft bearings). Having been on this merry-go-round before I will be a bit more careful about the pinion nut tightening technique.

I’ve also been looking at the wiring, so as to better understand what needs doing. Decided for now not to get new looms until I am sure mine are beyond repair. So far, pretty good - I had to trace out the engine loom to work out the ignition wiring (which I thought was all hacked up but it turns out only the coil +ve (white) wire has been cut so easy to fix). Next up will be the dash loom and switches.

So, to summarise, the car is still in pieces, but they are mostly very good looking pieces!

4 Likes

All looks very good Jon! Thanks for updating us all.
You have been very busy and although you obviously still have a long way to go it looks like you have broken the back of it so to speak.
Also nice to see you retained the original colour!
I will look forward to reading more updates, as and when… :smiley:

Alan.

Thanks JonB,
for the nice update.
On my Sprint i fitted a Lucas Alternator so the Electrics work better. I gutted the Original Voltage Control and used it as a Junction Box. Also put a second Cable(brown) from the Alternator to Solenoid Terminal because Alterntor is 45 Amps and Generator was only 22Amps.
I think it’s a good mod and a Lucas Alternator was an option.
Keep up the good work JonB
Alan

Thanks Alan and Alan.

I’m not sure a Lucas alternator is a good idea unless I can get an original. On Oliver Naylor’s YouTube channel, I just watched him discard a repro 17ACR because it failed. He replaced it with a Denso unit that is much smaller, weighs 2/3 of the Lucas and puts out 45 amps.

Given this is a relatively easy retro fit, I am going to start with the generator and control box; however they will both be restored. I tested the generator and it appears to be working. Control box, not so sure. When I ran the engine the charging light stayed on, but then, the engine loom wiring didn’t look correctly connected up especially round the fuse box, and many circuits were inactive. Just thinking about it, I expect one of the fuses has gone.

I plan on replacing the incandescent bulbs with LEDs as I did on the Plus 2, which will help reduce current draw, so I hope the generator will cope given its measly 25A output. I’m not sure how best to do the headlights; the LED units I have seen so far have big heatsinks and I do not know if these will fit in the headlamp bowl, or, if they do fit, whether or not they will be able to dissipate enough heat.

I’ve analysed the wiring diagram (mainly to understand the ignition) and shouldn’t have too much trouble working this out. As an aside, I sussed out how the S4 headlight flasher circuit operates. Apparently if I can get that functioning, I will officially attain some sort of expert status. Or not, haha.

Cheers
JonB

1 Like

So… further to my recent post, here’s where I’m at.

Yes, it’s a rolling chassis, hooray!

Waiting for the engine now, and assessing the wiring loom. This looks ok as it’s not been hacked about, but a few wires are a bit stiff, especially dynamo and reverse switch wires. I think I’ll have to rip off the insulation from spade connectors and clean them up. Reinsulate with heat shrink. The Lucar (bullet) male connectors look good, are cleaning up well with a wire brush on a Dremel. Not so sure about the female blocks and haven’t read good things about modern reproductions. Male spades like on the relays also clean up well, being brass. A new loom from Autosparks is tempting, but a recent thread is sounding a note of caution. So, it looks like I’ll stick with the 54 year old original, for now…

1 Like

Hi Jon
Freat to see yoir progress.
Mark

Jon,

Great progress. A word of warning regarding old wiring. The insulation on old wiring hardens (as you have found out) particularly in hot areas like the engine bay. The worst effected are the wires down to the dynamo and around the voltage regulator with the heat from the exhaust. Hard insulation cracks, which lets water into the wire, which then leaches along the strands causing corrosion. Eventually the wire fails. My advice is to replace the loom while you have it out, but if you want to use the original loom as a basis, I would replace all of the hardened wires, particularly those around the exhaust.

Good luck.

1 Like

Completed engine rebuild and fitted it to the chassis

Yes, it’s red. Not a bad result for my first crackle paint attempt. Then, I rigged up fuel and ignition and started it. Ran well, for 30 seconds, then I killed it as no radiator fitted.

Fitted pedals, master cylinders, heater, alternator.


That’s a reconditioned Mitsubishi alternator, a bit smaller than the usual Lucas item. My car had a generator but I decided to ditch it after it fell on the floor and a mounting lug snapped off it. Duh. Pleased that I didn’t need any special brackets or fitting kits, and the generator belt fits perfectly.

I pulled the body out of the garage and cleaned it, then fitted the nose badge. Classy.

I fitted the TTR roll bar side impact bars. Bit of a bugger doing the first one, but the second one was plain sailing. Except, the anti intrusion bar fouls the accelerator pedal.

What do people do here? Cut the pedal short?

2 Likes

Now preparing to mate the body and chassis.

The saddle still has the unit number chalked on it.

I cut a couple of inches off it per Buckland to lift it off the chassis flange. This helps it not get wet. Then remembered I have no adhesive so cannot attach it to the spine. So, no body-on action until I get some (it’s on order).

That’s it for now!

Well done Jonb,
Nice crackle red. Did you pop it in the Oven while swmbo was shopping lol.
Alan

Nope, not necessary. I cleaned the cover, applied paint per instructions and waited. It was a warmish day and I did have the cover in the sun for a while. It’s difficult to prevent sagging, and it looks obvious when the crackle finish forms, but I found you can use sandpaper to knock the ridges off and that improves things greatly.

Yes, it looks fab now. However, I imagine the crackly finish will soon look dirty with oil and greasy marks. My Plus 2, having a Big Valve engine, had a black crackle finish which hid all the grime, but this one? Not so much!

It may be the camera angle, but something looks a bit squiff here. I have the Spyder side intrusion bars and the accelerator clears the bar with room to spare.

IMO the foot bar is a pain and makes operation of the pedals (particularly the clutch) clumsy and detracts from the pleasure of driving the Elan. I am restoring my Sprint that has the bars fitted, and I plan to remove them.

Yes, it looks pretty clunky, but I want the added safety. Even if it is illusory!

Hi Jon

I have the TTR cage and took a little bit off the end of the accelerator pedal to get it to clear.

Cheers

Will

1 Like

Right!

Let’s get back to the fun!

Here is my method for dropping the body on the chassis.

Good old engine hoist to the rescue (again)! No need to dragoon a bunch of mates to come round and lift the bugger.

Good job too. I’d fitted the rear turret outriggers wrong way round, so couldn’t screw the seatbelt mounts in. So a quick lift and swap the outriggers (is the the right word?) then dump the body back on.

Very gratifying that all the mounting holes line up perfectly.

However.. I bolted the body down (just the ones underneath), then spotted this:

No clearance for the bonnet, if I’m not mistaken.

I couldn’t fit the front mount spacers. The nose cone bobbins are touching the chassis. And the front turret bolts are aligned.

So, I’ll loosen the body bolts, raise the nose and fit the spacers, then revisit the body mount bolt, packing with washers. Don’t recall that many washers coming out when I dismantled it, but - hey ho - that’s Lotus for you.

Feel free to comment and/or advise on this.

1 Like

I see the hoist, I see the body, but I don’t see how they are connected?

Zoom in. You’ll see the chain and hook connected to a strap that goes under the seat mounts and body lattice. There’s a battery placed strategically to balance the body.

1 Like

Is it possible that the gearbox mount is missing a spacer? Lifting that end should bring the front end of the engine down a little. If the front turret bobbins line up that limits how much you can pack up the body, unless you want to get involved. It may be the perspective but in the second to last photo the engine looks like it is tilting back a bit(?)

Cheers,

Will