I used to have a cast iron manifold, but it was replaced with a tubular type, but they do not come near the fibreglass. Maybe the ‘poor design’ in your case was of the tubular manifold not the rest of the car.

Colin, Rohan, and all,
I
Just had a shiver down my spine!
I have rebuilt the car with a new Lotus Galv chassis, so maybe the body is not sitting how it used to?
I just remembered that when I separated / parted the body from the original chassis, I noticed large penny washers on the floor of the garage, I later thought that these were probably packers between the body chassis mounting points and chassis rails, thus used to lift the body higher above the engine etc. is this the case??
I rebuilt it onto the new chassis without these because I didn’t realise at the time what they were for!
If this is the cause of my challenges, I sort of knew this would come back to haunt me later, but have ignored it, up until this point !
Problem is now, that all my chassis rails are drilled and bolted in place! maybe this is causing the lack of clearance I require?
Any thoughts on how to progress this to a positive solution?
Not having a very good time of it recently, as these issues are delaying its rebuild completion
Another one to add to the list!
I will investigate the engine mounts and associated issues tomorrow and post some photo’s to maybe attempt to help you, to help me, with some suggested or adjustments if possible?
Thanks for bearing with me on this one, Regards,
Phil.
Unless logic fails me, mounting the body on chassis without the spacers referred to would actually result in MORE clearance between the heater valve and the body not less. So I’m thinking the solution to your issue is still gonna be fettling with the left hand side engine mount. Robert
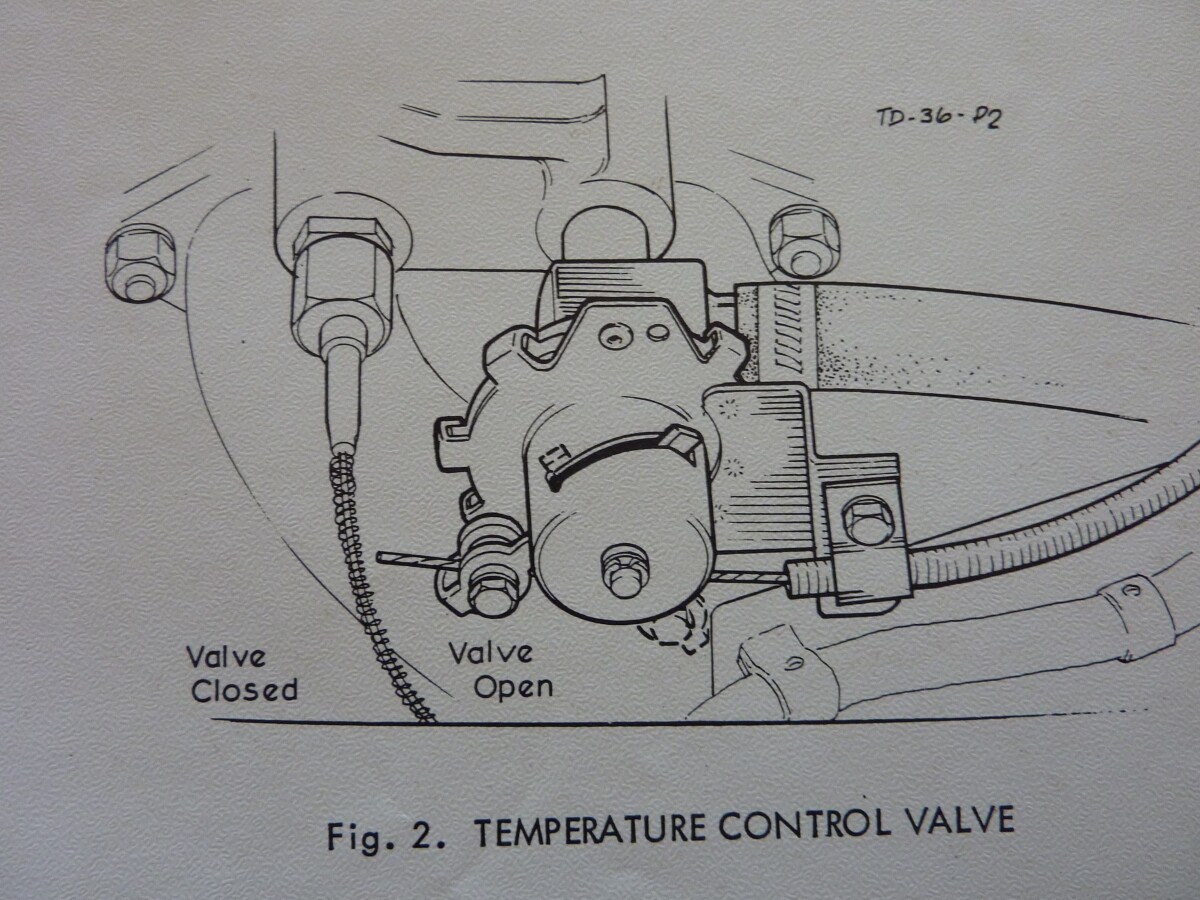
Yes there are two types of valve one is push to close the other is push to open - you can’t get a push to close with the bits on top - so we are stuck with them on the bottom.
We all have a tendancy to consider everything is wrong - you have a small problem somewhere - Take a step back, a deep breath, and logically work out what it is.
Phil, It is all exceptionally well engineered - That is the point!
It is the subsequent fixers, bodgers and parts makers that are not very good engineers!
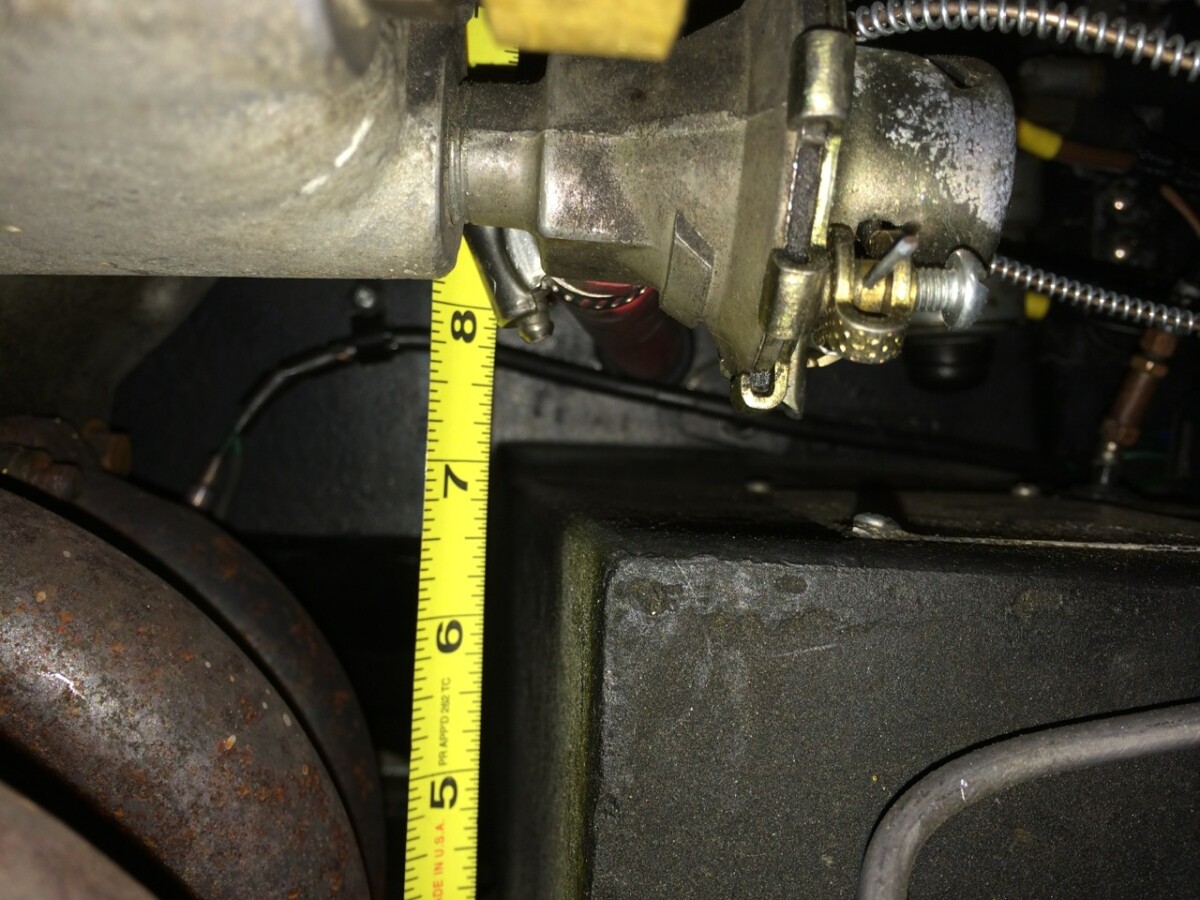
My car is a rebuild or two from the factory, but here’s a quick measure from the chassis to the top of the footwell.
I’ve edited this a couple of times because I can’t figure out if my brain is working right. But I think you need the valve lever to be under the valve in order for the dashboard heater knob to work rationally - push it in to turn the heater off. Of course, if you have the wrong type of valve it might be the other way around. 
Nick
Washers are used if the body is not eactly level and does not evenly match and sit on the chassis at all the bolting points along the bottom flanges. To avoid distorting the chassis flanges when you do up the bolts to the body, a washer is inserted as needed to fill any gap…
Provide the body was sitting on the new chassis flanges properly it does not need washers and it is a low as it will go and thus maximises the clearance for the heater valve over the foot well.
cheers
Rohan
Gents,
Thank you all for the well informed replies.
I feel a little better now all the points covered seem to suggest “it’ll be all right on the night” !
Engine mount looks like the obvious answer here - I intend to investigate more and report back with better pictures ASAP.
Thanks for your assistance.
Regards,
Phil.
Just a thought, if the Manifold is so close to the passenger foot well that it is making the body smoke how is it fitting down between the Chassis Rail and the Bell Housing ???
Well I did some checks over the weekend and here are the results:-
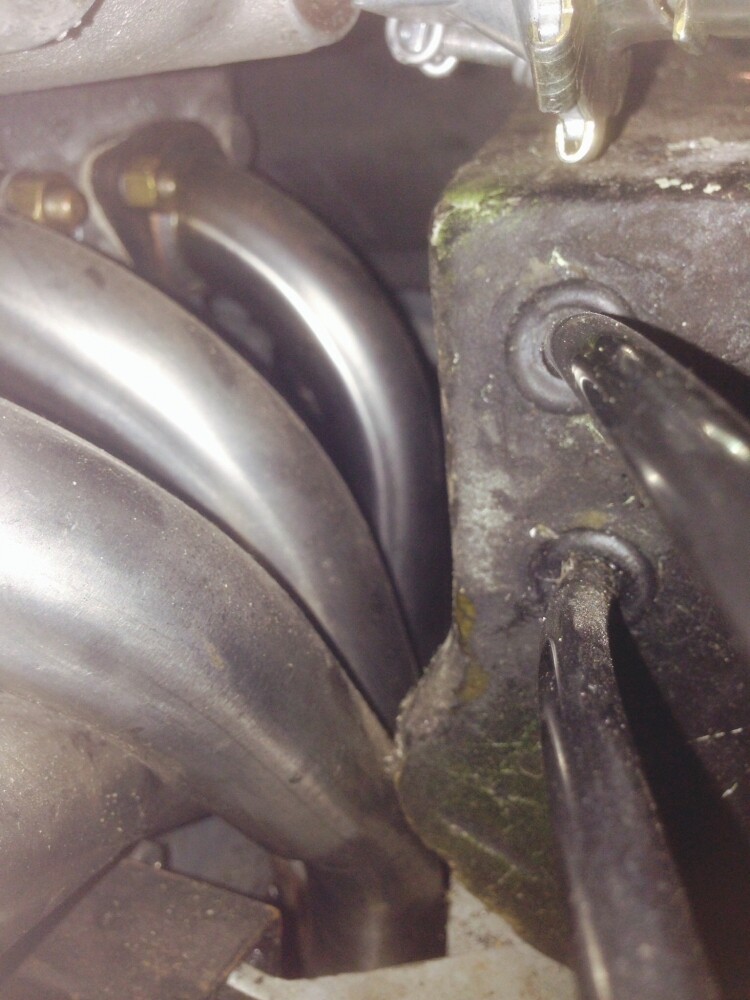
Exhaust is about 1/8" away from the lower bulge in the passenger footwell (really close).
Exhaust misses the un-butchered galv chassis by about the same amount !
Engine mount spacers are on the correct (exhaust side).
Engine mount seems to be ok, with about 8mm clearance between the top metal hoop and the top of the rubber.
Heater valve is opposite hand to the original one, but your previous comments seem to suggest this may be the correct one, as you say the other hand is not available? Do you think the one I’m using is the correct hand ? - the largest part of the riveted flange is on the top?
No washers spacing the body, as the body / chassis fit is a reasonable one - (as reasonable as any Galvanised one - I’m led to believe the painted only ones don’t distort due to not being hot Galv dipped?).
Not checked the Rockerbox filler cap / bonnet clearance yet, as timing still to be done, and the r/box isn’t fitted yet!
So everything clearance wise, seems to be on the upper limits ? (I.e. TIGHT FIT !)
I’ve ordered some 1mm heat reflectant to stick to the footwell, I’ll distort the Phnumatic pipes run away from the exhaust, I’ll buy another L/H engine mount - to pick the one with most clearance.
What’s the story with the Bulge in the footwell wall -anybody know ?
Might have to notch the chassis to give better exhaust clearance - (but surely the Sprints were all fitted with tubular down pipes so I can’t understand why there is a tight fit here ?) - although having said that, I remember at the time of purchase from Paul Matty, there was some talk of a batch of Stainless Steel exhaust systems being a bad fit, mine was tight but I was so relieved to get it fitted at all, that I may have not realised it was too tight a fit ? - May need to ’ Persuade - it’, a little.?
Still all very tight !
Problem not really resolved, but I’m sure I’ll / you’ll find the answer eventually, or is it just a “live with it” situation do you think ?
Thoughts please?
Regards,
Phil.
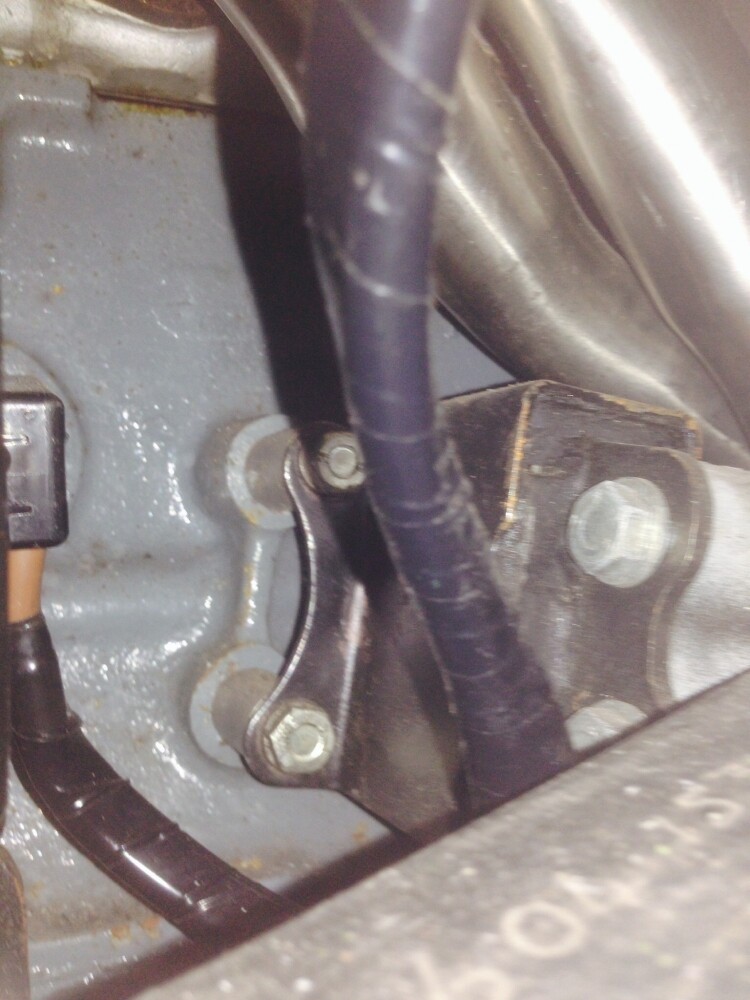
Looks like you need to do a set of “minor” adjustments 
The exhaust mount looks like it is a few mm closer between the centre steel section and the inverted U than typical. A new mount may help that and slotting the holes in the mount to lift the engine a little will help also. The heater valve certainly orginally had the cable and lever on the bottom which I beleive provided more clearance. If you cant source this valve then raising the negine should help or fitting an elbow and a different style of valve in the hose may also be a solution.
The exhaust looks like it has not been bent quite right as it comes to close to the body at the bulge where the steering column comes out in a left hand drive car. It looks like your exhaust pipes are bigger diameter? than the standard sprint ones (which were very small) most people seem to notch the chassis to fit in the bigger diameter pipes and still dont have problems with them being to close to the body. If you cant get a new set of exhaust headers or rebend the ones you have a little I would probably put additional spacers on the LH side of the engine to move the engine about 5mm further to the right to increase clearances.between body and chassis and pipes. The RH engine mount will need its holes slotted to accomodate this movement. Check clearances on the RH side with things like the oil pump and steering column to ensure you can move it across OK.
cheers
Rohan
Phil,
Further to Rohan’s reply, some pictures of my 68 S4. Your engine mount definitely looks to have sagged badly. I have an old one that is similar, they take up a “set” and can’t be saved. Replacement, probably of both, is the cure to your clearance problems.
Cheers,
Colin.
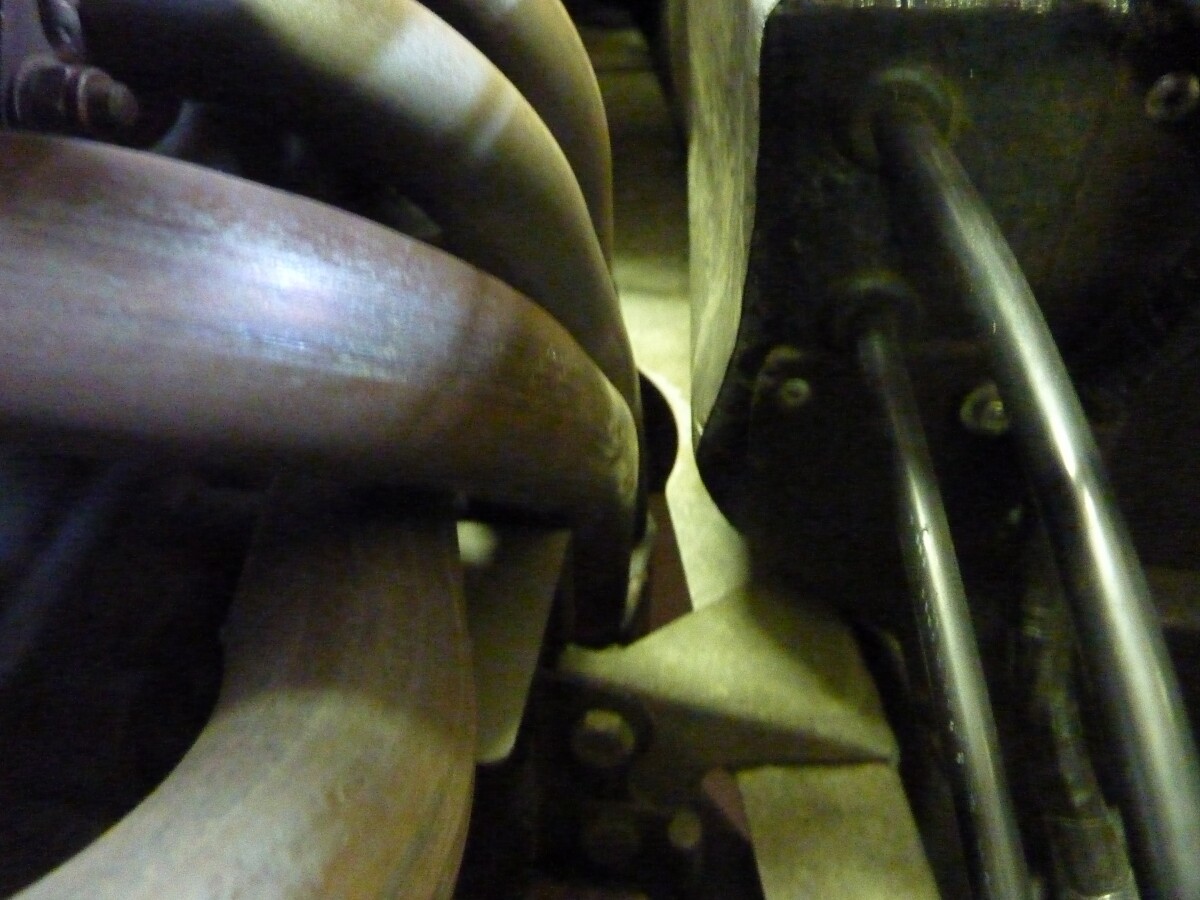
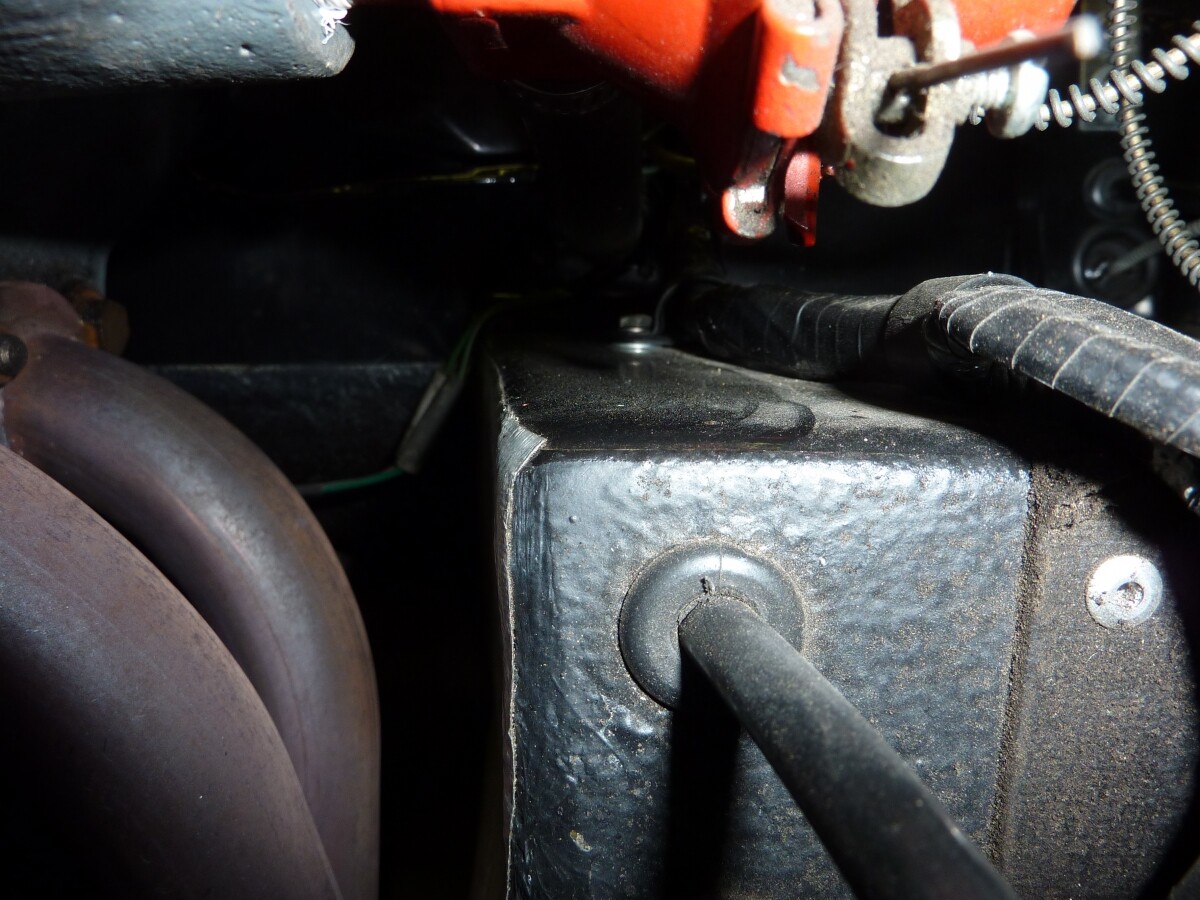
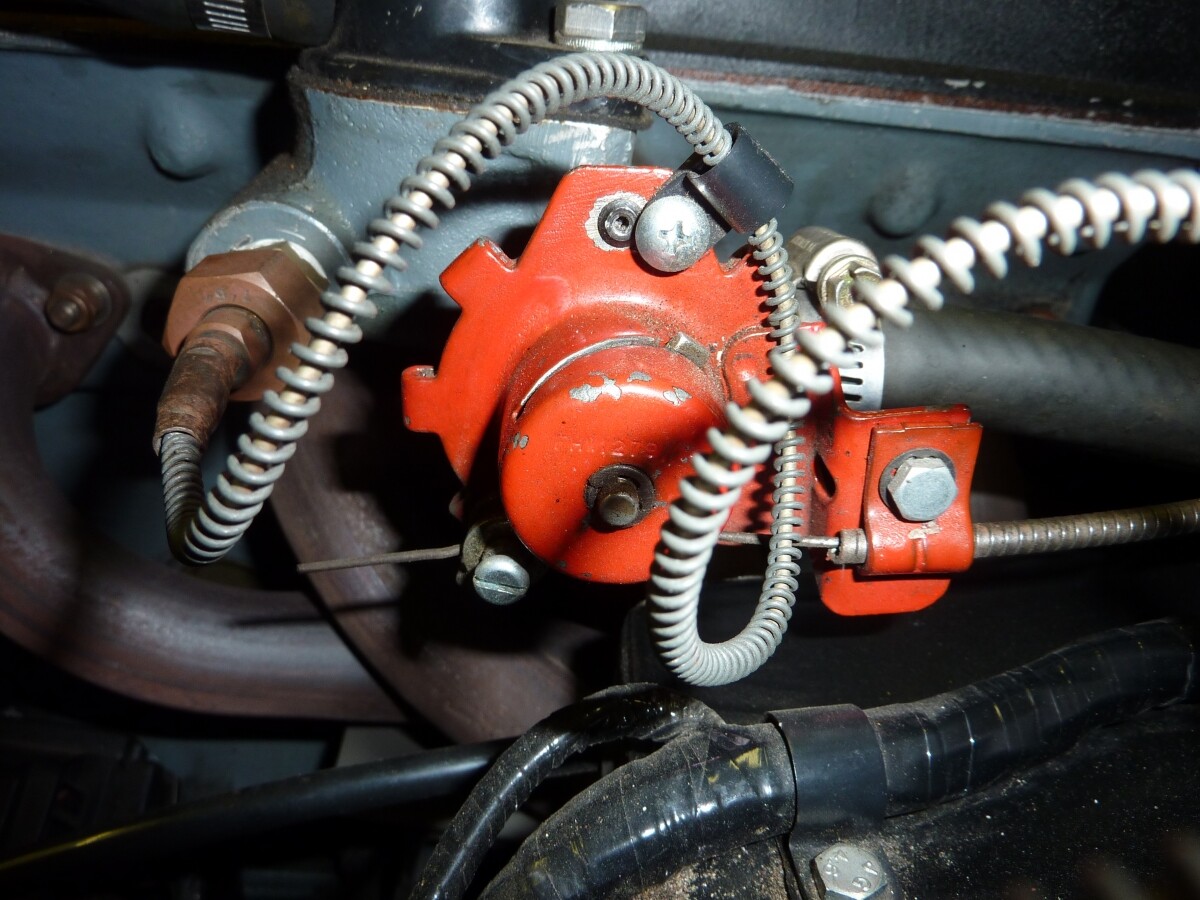
Rohan, Colin,
Really appreciate your replies, thanks for the in depth info and great pictures.
Colin,
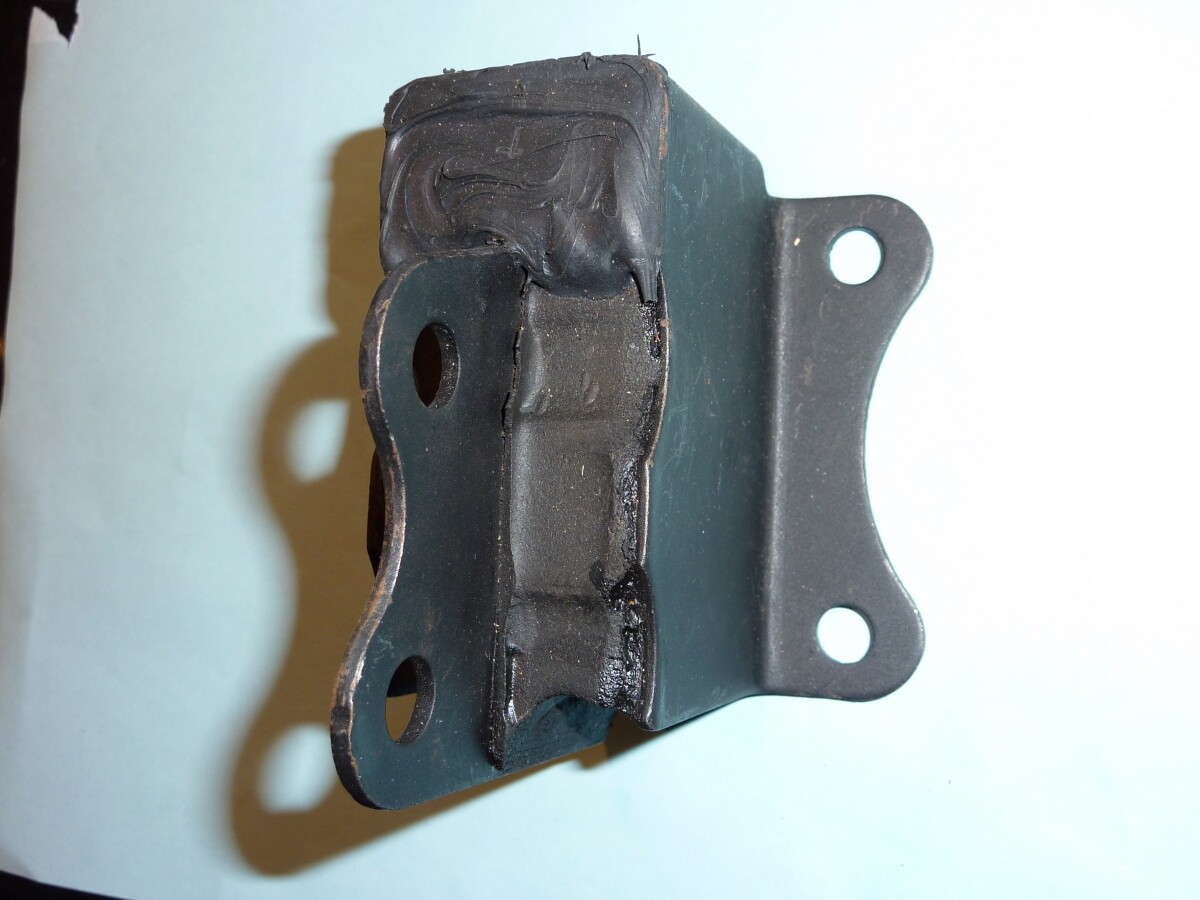
Wow ! the picture of your L/H engine mount is miles different to mine, massive amount of clearance compared to mine! ( although, I suppose it does compress a little when weighted down with the engine ? )
Just can’t understand why my mount has collapsed - never had the engine running since being installed !? - unless it was one from the ‘bad batch’ perhaps ?
I’ll definitely buy a new one now!
Must admit, it was difficult to install the pipes - (but still didn’t need to notch the chassis) but I guess if the engine position has sagged a little, it has maybe caused 'twist ’ and hence that’s why the pipes are nearer the fibreglass footwell ?
Rohan,
When you say ‘slot the holes’ - won’t this cause the engine to eventually drop again, due to friction giving way to the weight of the engine ? (Or do you weld up the top of the hole when slotted? )
Do you slot the engine holes, or the ones into the chassis - not sure what you mean?
I wonder which application my ‘opposite hand’ heater valve is from ? - as it does give a straight pull / push on the cable operation - which I quite like !
I’ll obtain and fit the new L/H mount and see where that puts me, before replacing the other items.
Great support, thanks once again!
Regards,
Phil.
I slot the engine mount holes if I need for engine vertical alignment fine tuning. I don’t touch the chassis holes. If you clamp up the bolts tight it will not move in the slots. However if you want to be certain of a positive alignment you can then tack weld a washer in the position you end up with just be careful not to put to much heat into the mount or you will damage the rubber when doing the tack welds
cheers
Rohan
Rohan, Colin,
Thanks for the reply, I understand what you mean now. I’ll obtain a new engine mount first.
I just can 't believe how much more rubber there is on the green engine mount, should / are they all this sort of set up, (I don’t think mine was ever quite like!)
If I can obtain one similar, it should sort out my original issue ok.
Can’t remember who I brought mine off originally, is there a preferred supplier of the larger mount - do you know ?
Regards,
Phil.
Phil,
The engine mounts are not larger than standard. The gap at the top is just filled in with rubber.
You can buy them from various places, here are a couple of examples:
rdent.com/ (select Elan parts and spool down about 2/3)
ON this page, you will find the engine mounts and the correct heater valve:
qedmotorsport.co.uk/qed-shop/lot … ncillaries
Here is a internet search for images of the engine mounts:
google.com.au/search?q=heavy … 24&bih=690
Cheers,
Colin.
Colin,
I received my new mount from QED, also new heater valve from Sue Miller (nice fast delivery on both, by the way!) the mount is one of the heavy duty ones you recommended and appears to be less likely to sag.
The heater valve is now the correct orientation also.
I won’t be fitting them for a few days, but I’ll post a reply when complete, to hopefully wrap up the issues I’ve experienced.
Thanks for your help, also to everyone who assisted,
Regards,
Phil.
Phil, your 1/8" clearance issue between the pipes and the footwell bulge is likely to cause problems when the whole area heats up. Unless you can do something to reduce the heat transfer you’re likely to start damaging the glassfibre.
My previous set of pipes had a little more clearance than that (about double - 1/4") and over a month or two the area round the bulge started delaminating. I ended up both wrapping the pipes (not a good idea long term) and sticking some heat insulation on the footwell (the original version was a plumbers soldering mat from B&Q!). The pipe wrapping’s gone now but the the insulated pad remains.
Stuart,
Thanks for the reply.
I am trying to fit the new heavy duty engine mounts, but oh boy is it a job when the exhausts are still in place !
Any ideas if the bolts heads should be exhaust side or radiator side of the engine mounts?
Just wondering how I’m going to get the washer and nut back on after replacing the mount, unless the 2 bolts are ‘reversed’ in the mounts ?
Aaaaaaaaagh !! - didn’t want to remove the down pipes but just can’t get at the rather blind nuts!
Regards,
Phil.