Looking great! No updates on my headliner replacement project yet.
Mike, I appreciate your progress and love seeing another Plus 2 resurrected! Just two questions, having studied your photos closer and after “dry-planning” my own project:
- will you leave the brake servos off? Interested in your comments;
- there seems to be some electrical gizmo on top of the pedal box -??
My car looks in better nick than yours when you got it:


So shouldn´t be too difficult. Inbetween jobs I am leisurely collecting all the bits which are wrong on this car. Main headache is the need for a complete bare-body respray. It looks like you are nearing the windscreen bonding job and I am most interested in this!
Wishing all a Healthy New Year -
Matthias
2 Likes
Looks great Mike! Like it in the red
Great effort and a real inspiration to the rest of us.
Well done.
Hello Matthias,
Thanks for your email. I’d be happy to answer your questions.
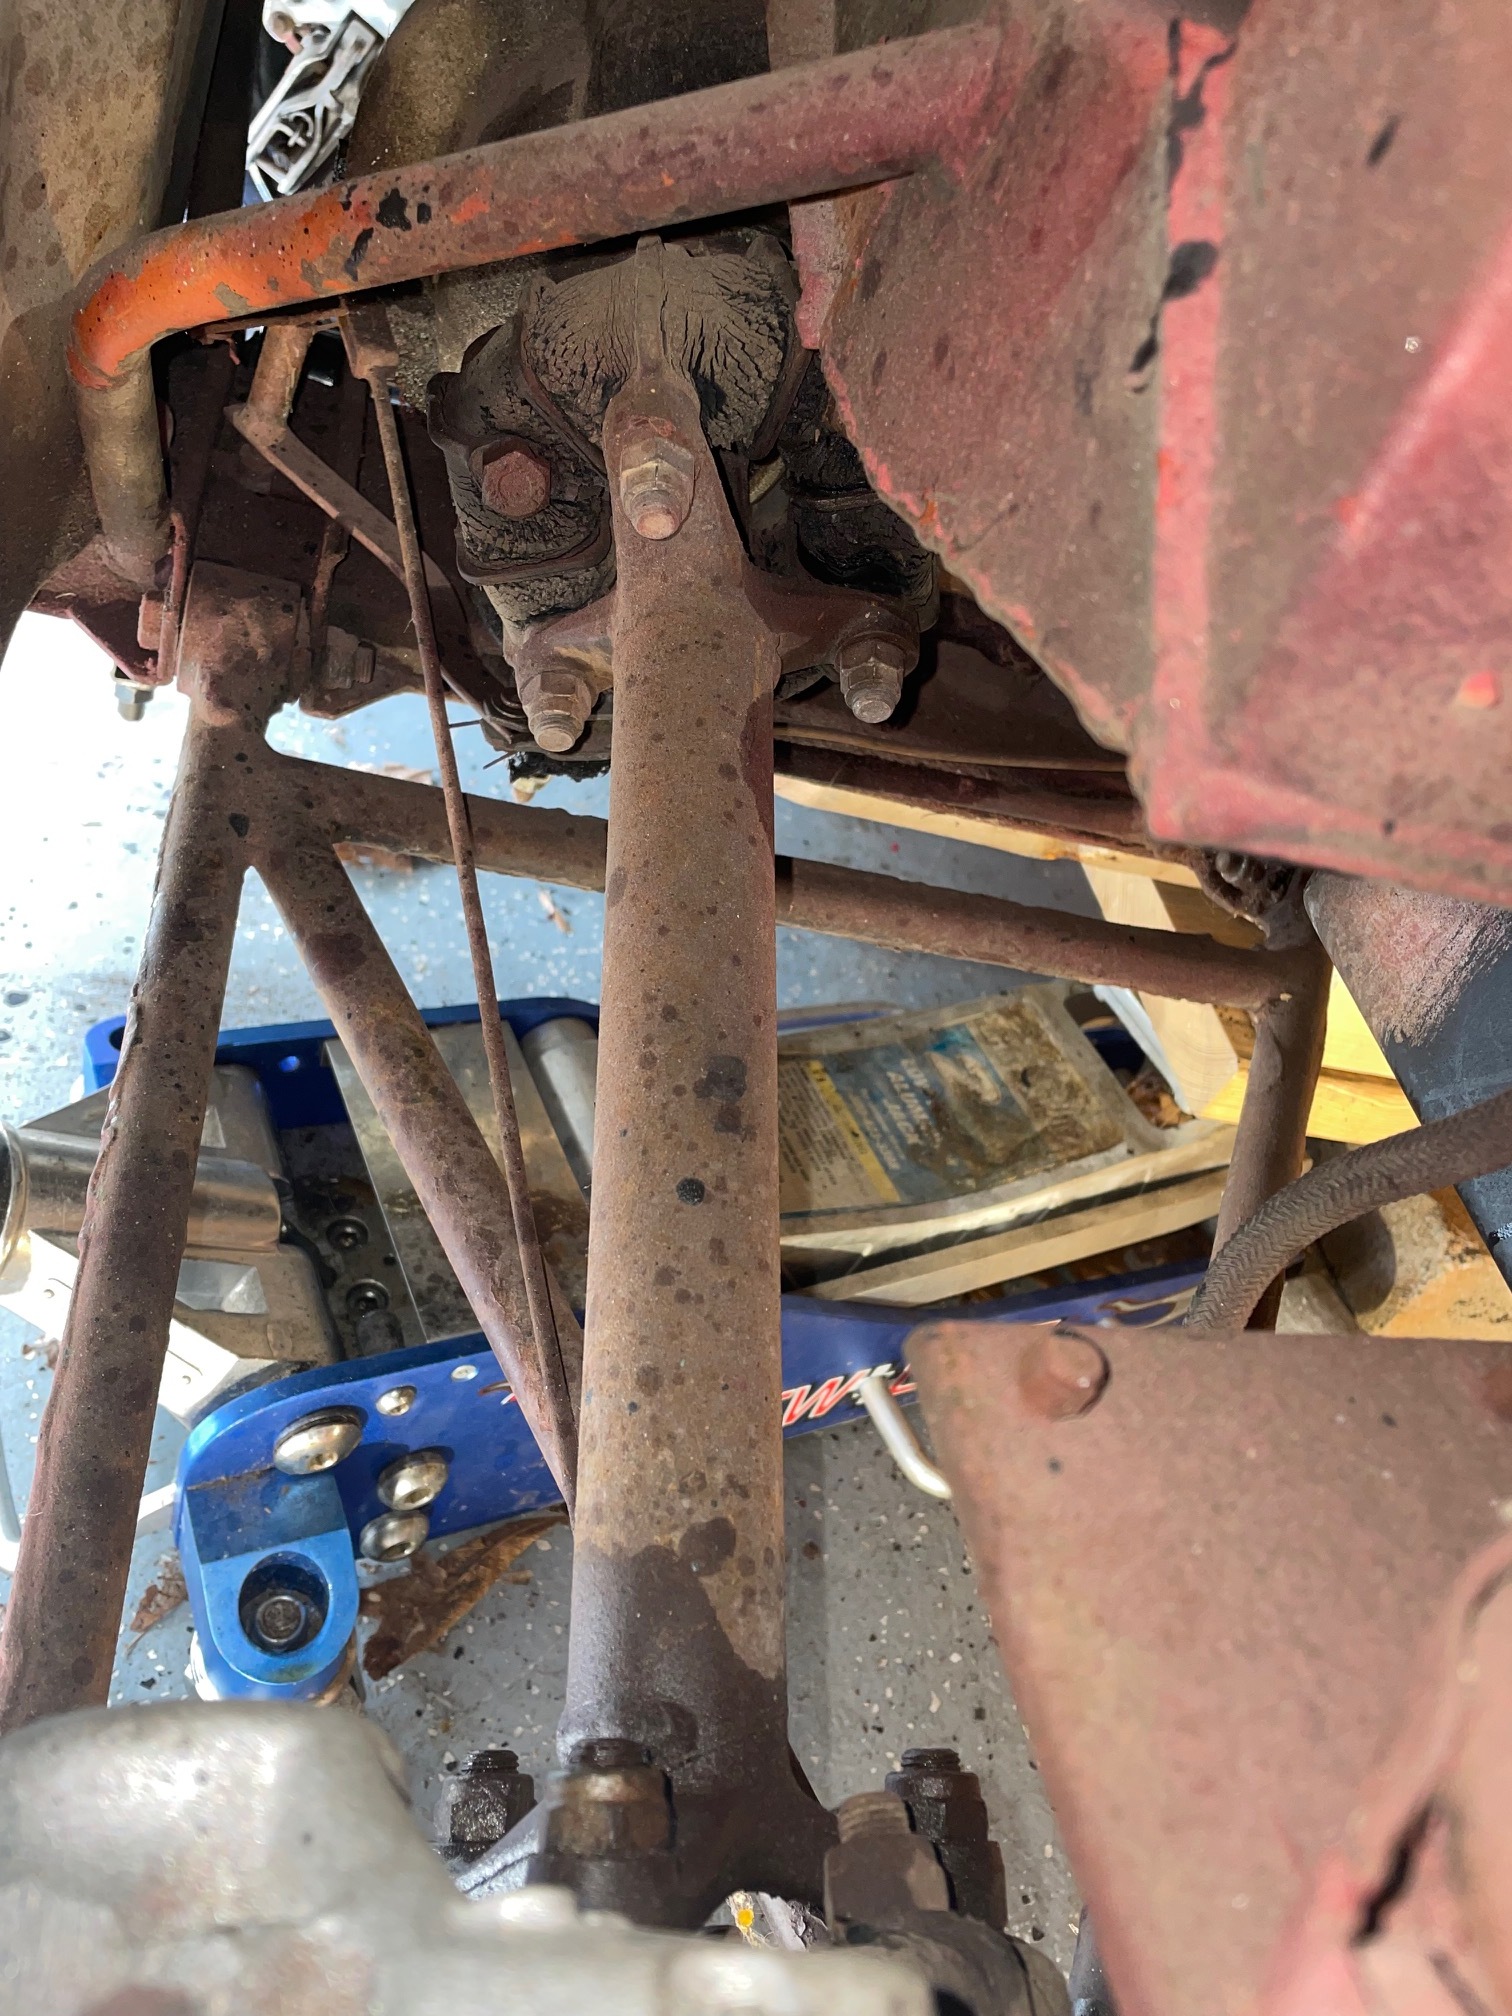
Yes, the brake servos are gone and they are not missed at all. The master cylinder was overhauled at White Post restorations since it is no longer available. New calipers, pads, and front brake lines installed. Banjo fittings were eliminated as well. Spent considerable time on the hydraulics, many setbacks -it was quite painful, but it now brakes really well.
There is a Bosch Voltage Regulator on the pedal box linked to the alternator. I have seen this arrangement once before, but it is not very common. The alternator was installed when I got the car, however during the replacement of the engine bay wiring, there were some wiring modifications needed.
Yes,spot on. Those were GT6 discs from Moss motors. Much of the suspension is Triumph stuff. British Parts Northwest was also used a source. The Master cylinder was sleeved at White post restorations, and I replaced the broken reservoir with a Girling OEM replacement from RD enterprises. I generally used Dave Bean, and RD enterprises in the US, and SJS sportscars in the UK for the trickier hard to find stuff. Seat belts were refurbished in the UK as well. Some stuff was simply unavailable, such as a nice replacement suite of dash rocker switches similar to Lotus OEM. That would have been really nice. However, that is an original Lotus OEM gear shift knob from the 1970’s which made my day. Some more dash before/after pix below.


1 Like
Congrats Mike! That first drive after so much work is always a thrill!
Hello fellow Lotus fans. Just another update to my last update, posted at the end of 2023;
“Still need to add some windshields, CV joints (DONE), a headliner, trim (DONE), door panels (DONE), functional electric windows (DONE), and a working (electric) headlamp deployment mechanism.”(DONE)
Basically down to two big items left. Headliner installation, followed by the windscreen installation. Then its just performance testing and new tires. Here’s the "before/after on the CV joints, Rear wishbone, Differential torque rod bush replacement, and rear handbrake cable replacement (not pictured.)
I love it when a plan comes together. (-H. Smith)
Cheers!
Mike

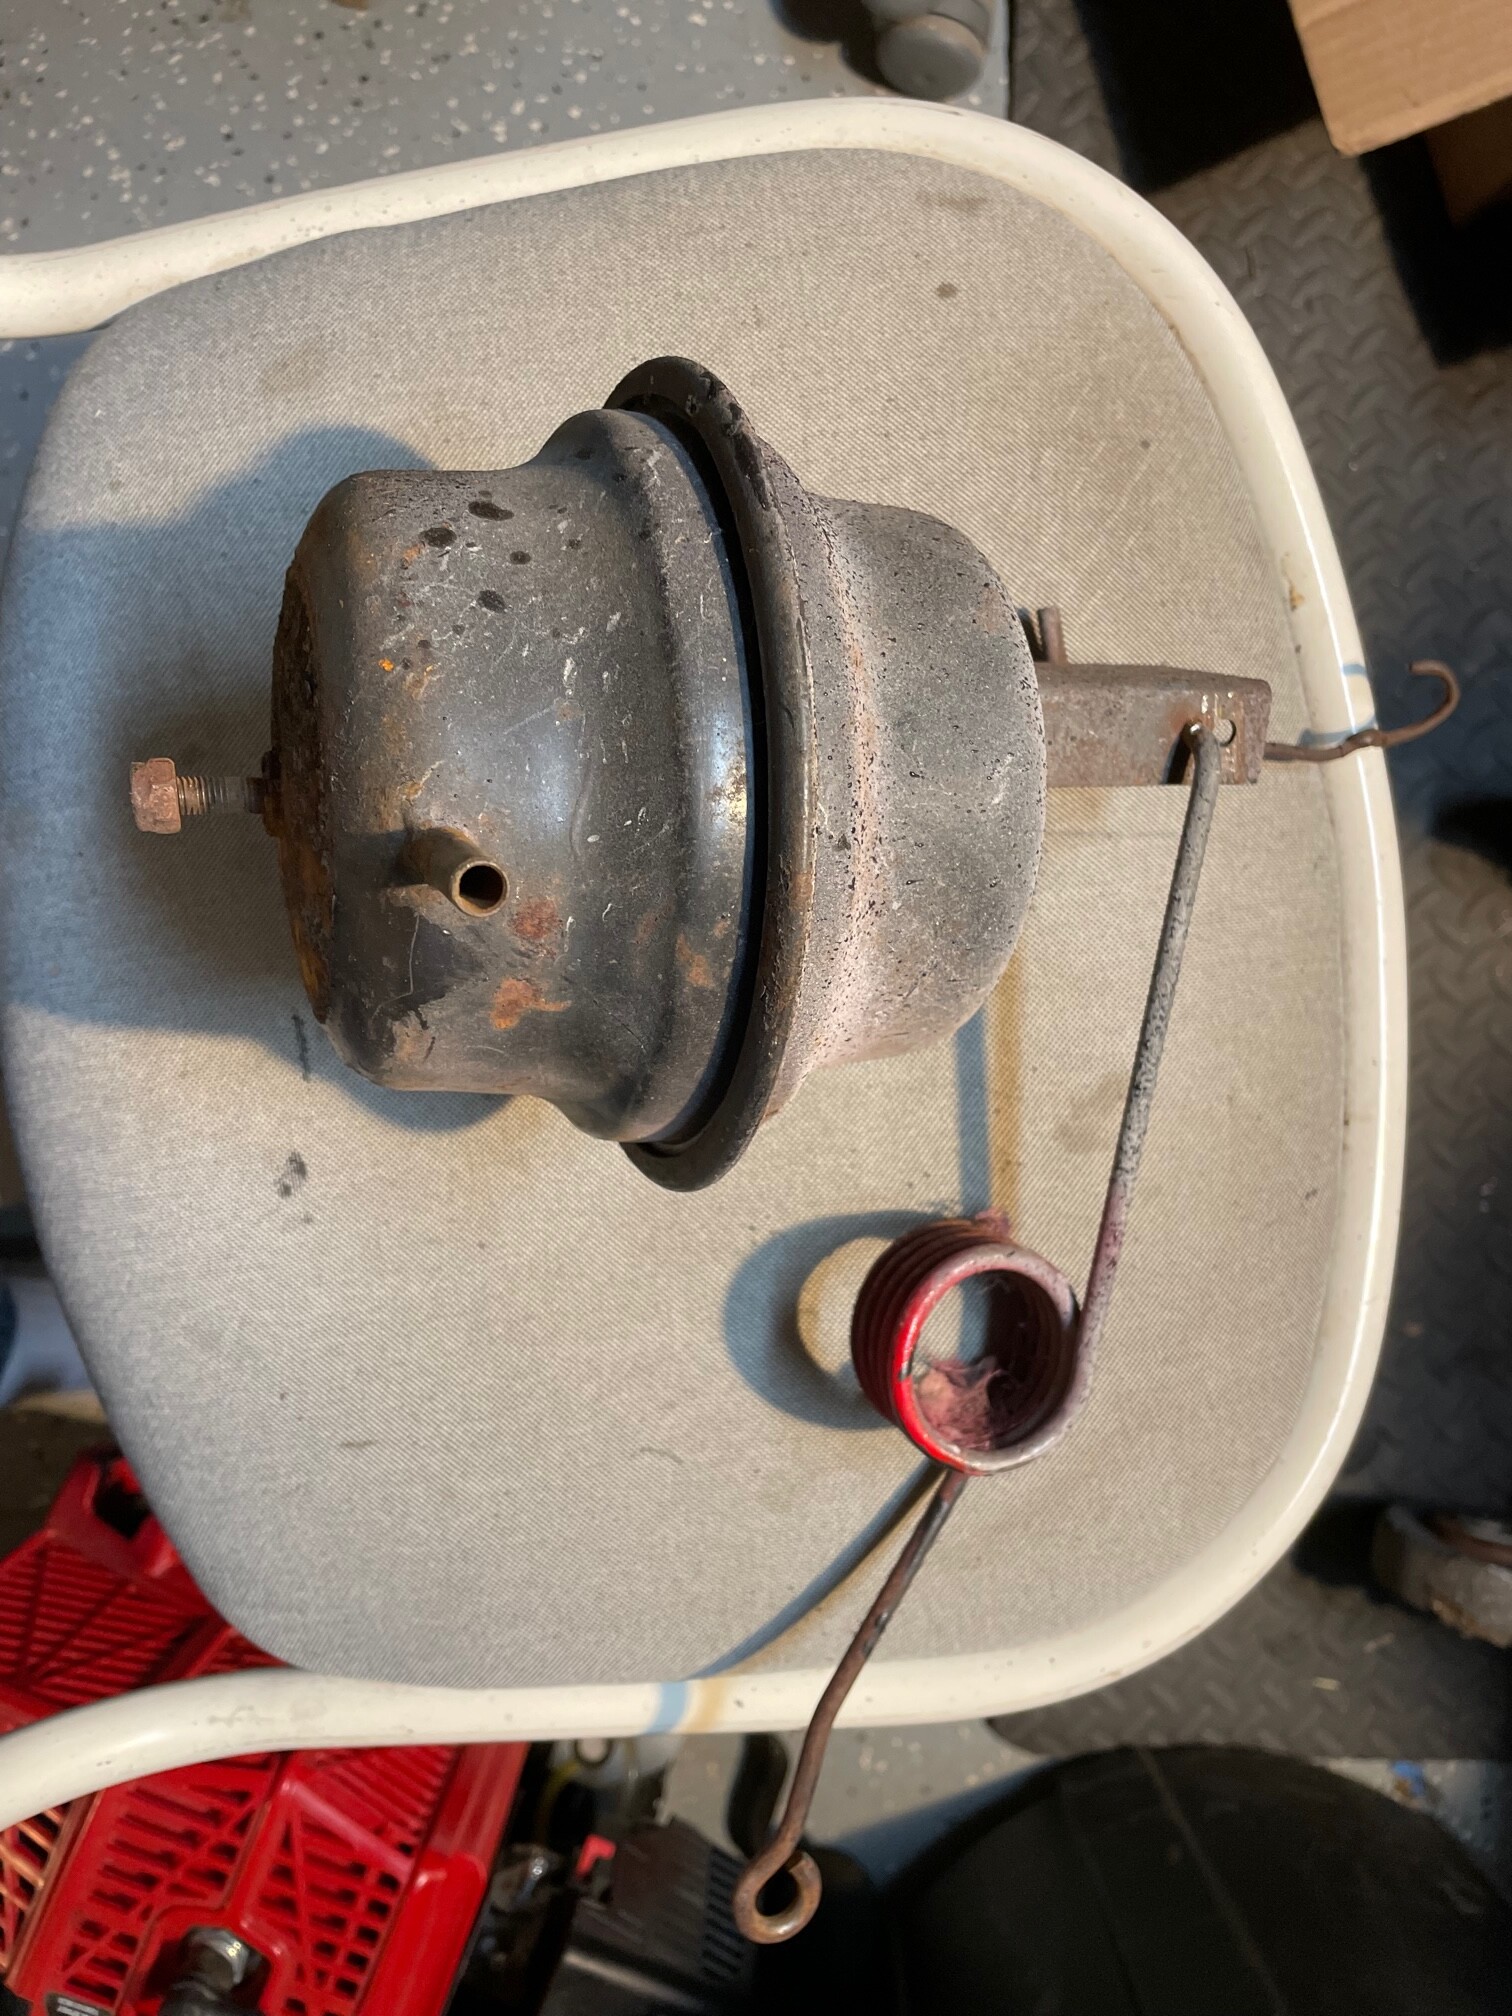
Here’s the electric light conversion kit installation effort (sourced from Spyder motorcars.) Took some serious time to sort the hardware installation for proper travel, and sort the pod mounting, and control linkage for full smooth operation. It took many hours of adjustments, and then came more adjustments. This was followed additional performance testing, and then came the final adjustments. Its finally over-I just hope I can adjust.
At the end of the day, this mod is very cool and fun. Photo 1, The original vacuum pod. Photo 2, the installed drive system. Photo 3. Better access thru the left front headlamp opening, than grill opening. Photo 4.The functional test result. (A small minimal pull switch was added to the lower valence next to the fog/spot light rocker switches to control the operation.)
Cheers, stay tuned for more after these messages…


1 Like
I was about to ask what that strange blue bracket on your car was when I realised what angle the pictures were taken from. ![]()
But nice work on both jobs!
I’m somewhat surprised though that the headlight adjustment took so long. When I did this install on my car the geometry of the linkage was at least 90% right on the first try and only required a few minutes of additional fettling to get it just right. I shudder to think that I merely got really lucky with it.
Thanks for your message Veg!. The pods are what really needed a lot of attention. Specifically the pod I had removed and added back in later, was very stubborn. It rubbed on the car body when the headlights were raised after it was reinstalled. Also the transverse bracket had to work in synch with both pods. The pods had some mounting wear and tear, that had to be dealt with, with worn attachment points/ fittings. Spacers/washers were also needed to make it all work well.
Are you gonna help me get this headliner in next? I am gonna pm you when I start…lol
Ah OK. Problems with the pods would definitely make things more difficult! Glad you got them sorted.
Re: headlining, yes- check your PMs.
Great work Mike, looks amazing!
Thanks all for your comments, support and encouragement. -Will update this post with the headliner, and windscreen installation in the coming weeks!
Doing my best with the headliner. More arts and crafts work. Its coming along. My technique may not be the best but its seems to be getting there. Its all on the job training. Still many wrinkles, and some stains, to remove. Much more effort needed to make it right. But its a start! My benchmark is set at “better than it was.” So I’ve met my goal. Working with contact cement is “sticky business.” Final photos will be posted this week. The forward and rear windscreen glass goes in on Thursday Mar. 21. (The glass install is the only job I’ve outsourced)


Be sure to take good pics of those markings on the underside of the roof. Not for any practical reason except to know what’s there, as those little glimpses into your car’s past can be interesting.
As mentioned, the window glass installer guys visited yesterday to do the forward and rear windscreen installation. Good bunch of guys. They seemed very knowledgeable during our pre-game brainstorming session, that we had a few weeks ago. We did a dry run and reviewed the installation parts I had purchased from SJS Sportscars. Installation was completed yesterday, however we had some setbacks. The new front window trim molding I bought did not fit well. So we are trying to source a local substitute.
Installing the rear windscreen was difficult, and a royal pain in the glass. The expansion strip put up a real good fight, but in the end it was done. Photos are attached.


1 Like
Today the front windscreen was installed professionally. The trim I had ordered from SJS sportscars did not work well for us for some reason. However, the windshield guys found a great substitute. While somewhat thinner in the width, you could turn a corner and use one single piece. It looks very clever, and there is no need for the corner adapter pieces to cover up any sins. Very pleased with this effort and the resourcefulness of the installers.


1 Like
Hi,
Windscreen looks good!
Difficult to see from the photo but have your screen fitters still bonded the screen in as was original on a late +2 S130?
Or have they fitted it with used a rubber seal alternative?..In which case I wonder what profile rubber seal they used due to the lack of a high edge for a seal to fit along the bottom edge on the S130? From the photo it doesn’t look very wide.
Alan
Hi Alan,
I’ll explain it as best as I can as I am not a windshield guy. The 17mm molding strip was bonded using their own “pro-adhesive” from a large caulking gun with a bead placed around the perimeter. (once the strip was installed on the glass.) The strip and window opening were both primed using a bottle black fluid of some kind.
The molding strip had the decorative “silver strip” as part of the strip. That silver strip is not an insert of any kind. (It is also “silver metallic” in appearance, not chrome-like)
The trim and window assembly were placed into the opening as a unit and allowed to cure. This arrangement shows less trim molding and more car body-which I actually really like. It is not a technically accurate representative of the original. But It was an easy install, took less than 1 hour in total, it’s very secure, and I think it looks pretty good…I really like how it handled those awkward lower corners.


1 Like