Lovely car. I saw that on BAT and really liked the look. I’m not usually a fan of the baby Elans.
I know what you mean about the aircooled 911’s. I have a 993 that I bought in 2008 (I think it was) to replace my last +2. It is an absolutely fantastic car, especially seeing as it is so well sorted. I still own it. I then bought a 986, but it did not scratch the itch caused by the loss of the +2 so I sold that and am now back in a (Zetec) +2. My brother has a 996.
I love building and mucking around with cars so most of mine have been projects or projectish.
I have a Europa TCS that I intend to restore also.
The Mockup
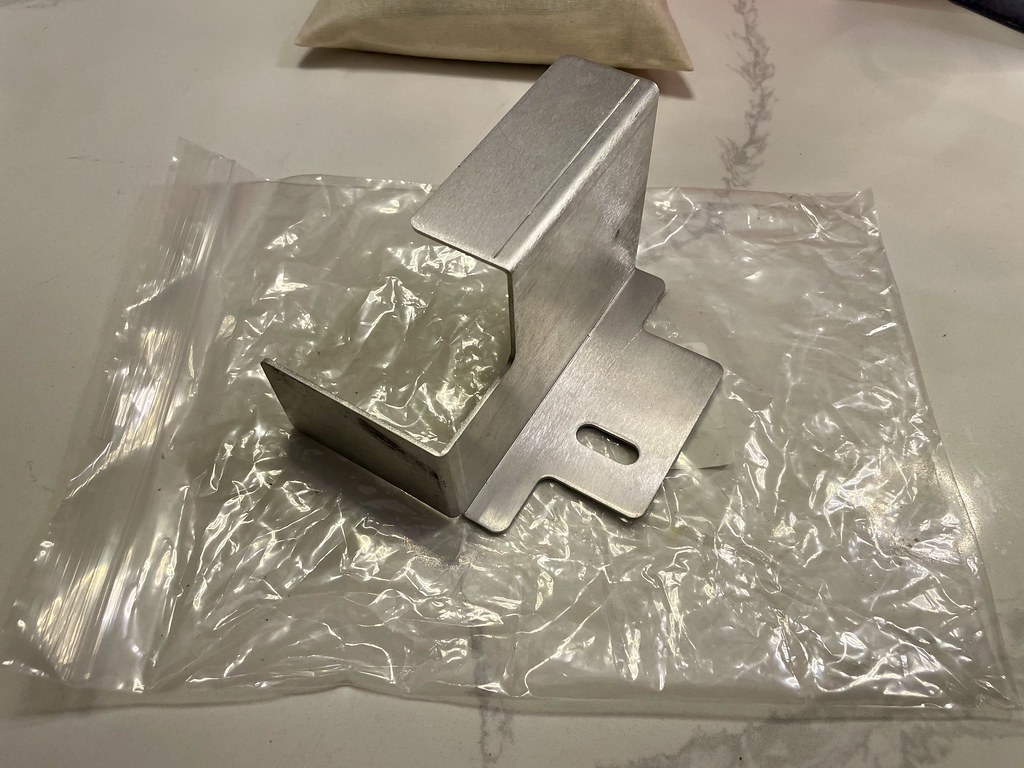
The battery tie down looks good, however the slotted hole for the tie-down appears to move it too far into the inner trunk area, but theres enough metal for me to drill a new hole. This should also help to place it tight against the inner body.
Prepping for Project (2)
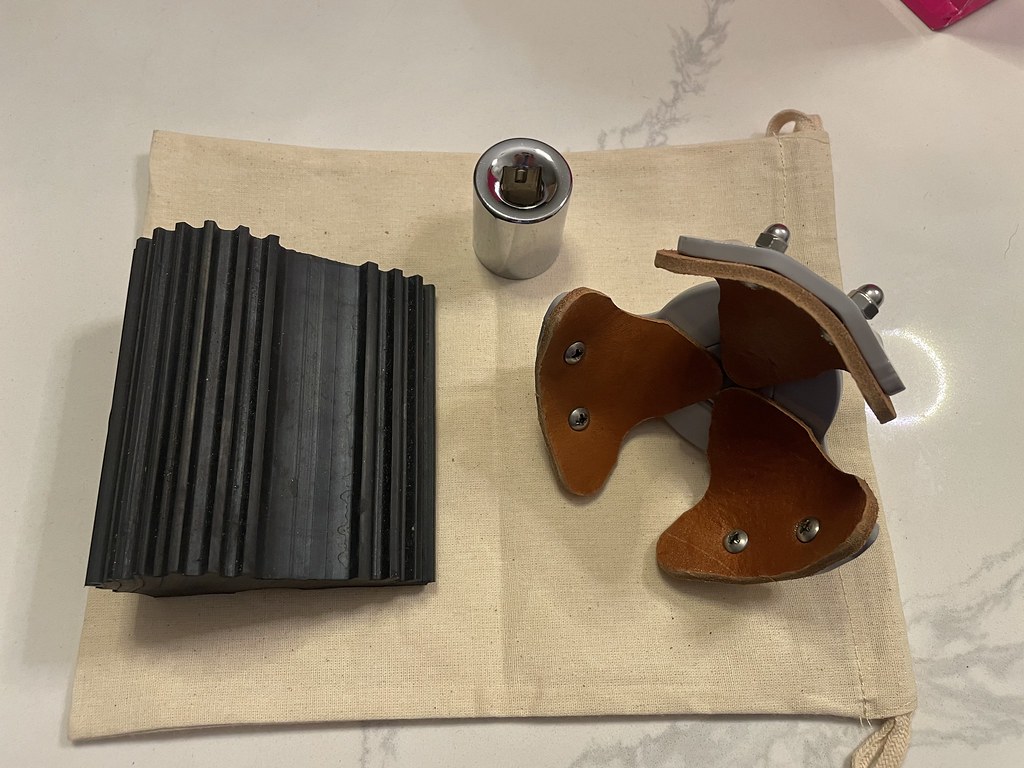
I wasn’t sure what spares the car came with an wanted an elegant solution to the knock-on wheel removal. I knew there was a few options, but the RD Enterprises option was my preferred method. Arrived and looks great, just need to get a 24" Breaker bar and find a good way to keep it secured in the trunk.
Have you tried the lead hammer?
It seems brutal but the components were designed for it and the amount of cumulative torque you can get from flogging with a hammer impact is massive. IIRC those wheel nuts want to see upwards of 300 lbft to withstand hard braking.
Went through most of the spares that came with the car. I have a fuel set of front brakes that Im not likely to use (calipers and rotors) that appear to be I. Good condition. Thinking about letting them go to reduce the clutter but not sure what I should look for to confirm condition and prices…there’s more but let’s focus on the fun parts:
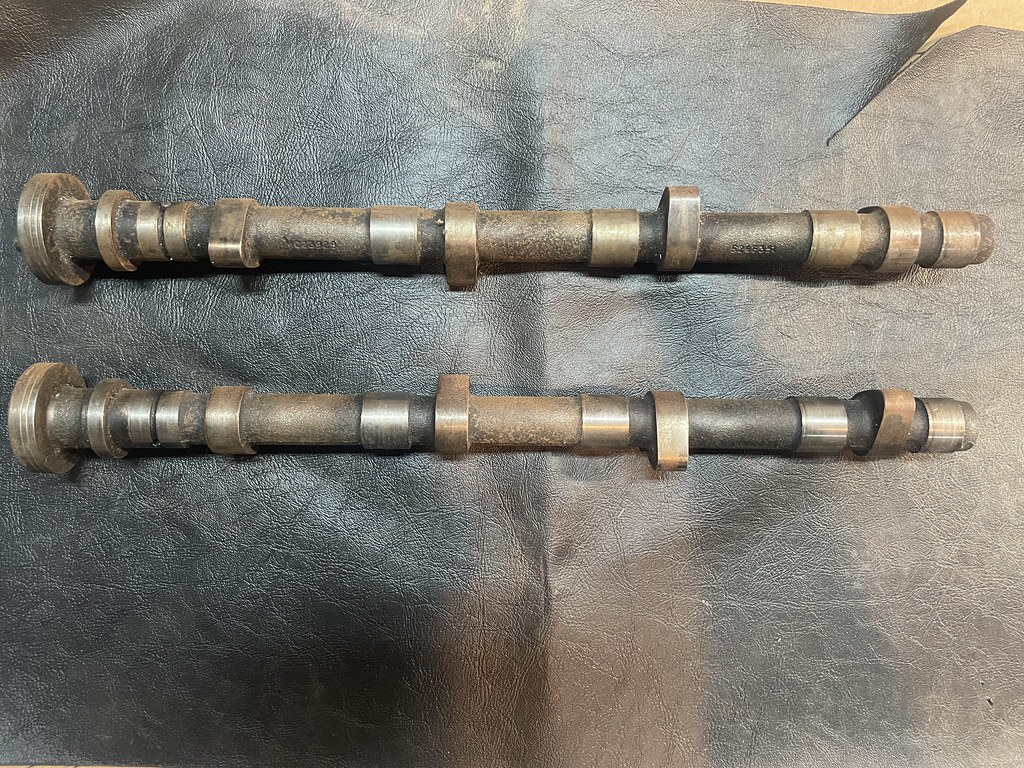
I believed these were the old original camshafts but I used this as new cause to open up a line of communication with Sean, the gent who restored the car back in the UK. Turns out he believes these are actually Sprint camshafts. This is great news, but not sure how to verify.
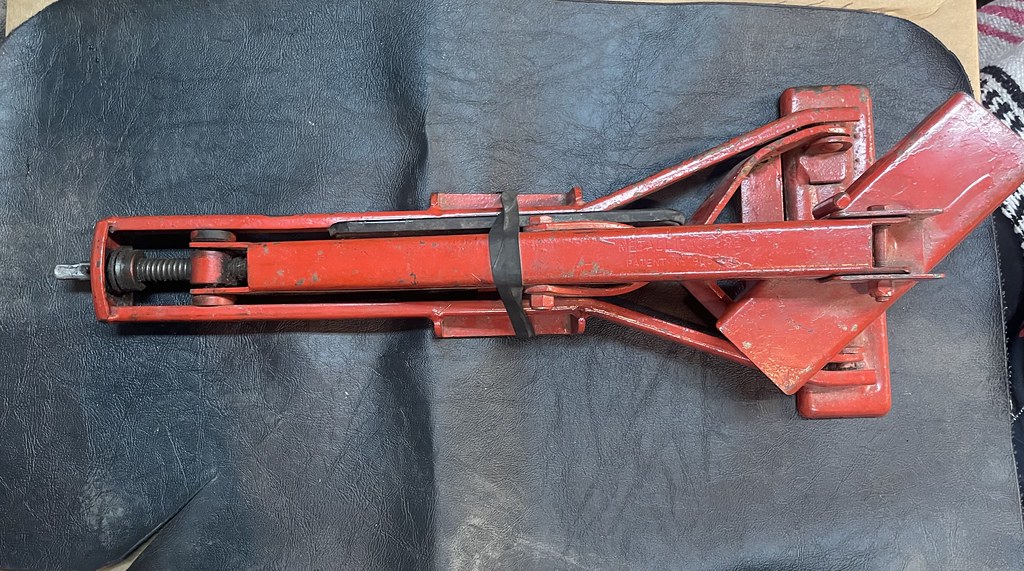
The next item I want to add to the car is the jack. Yes, sacrilege to add weight to the car, but I figured if I have the tool kit, a jack would also be a good piece of insurance. Where were these kept originally?
Finally, I have what I believe are the pieces for the original parking brake, but I’ll start another thread for that just in case someone else is looking to restore an inoperable e-brake, so check that out soon and LMK
The two ring grooves on the camshaft hub indicates the sprint cam assuming they have not been reground. The sprint cam lift above the base circle was 0.360 inch and base circle was 1.160 inch dia.
Small update to keep everyone in the loop of whats going on…
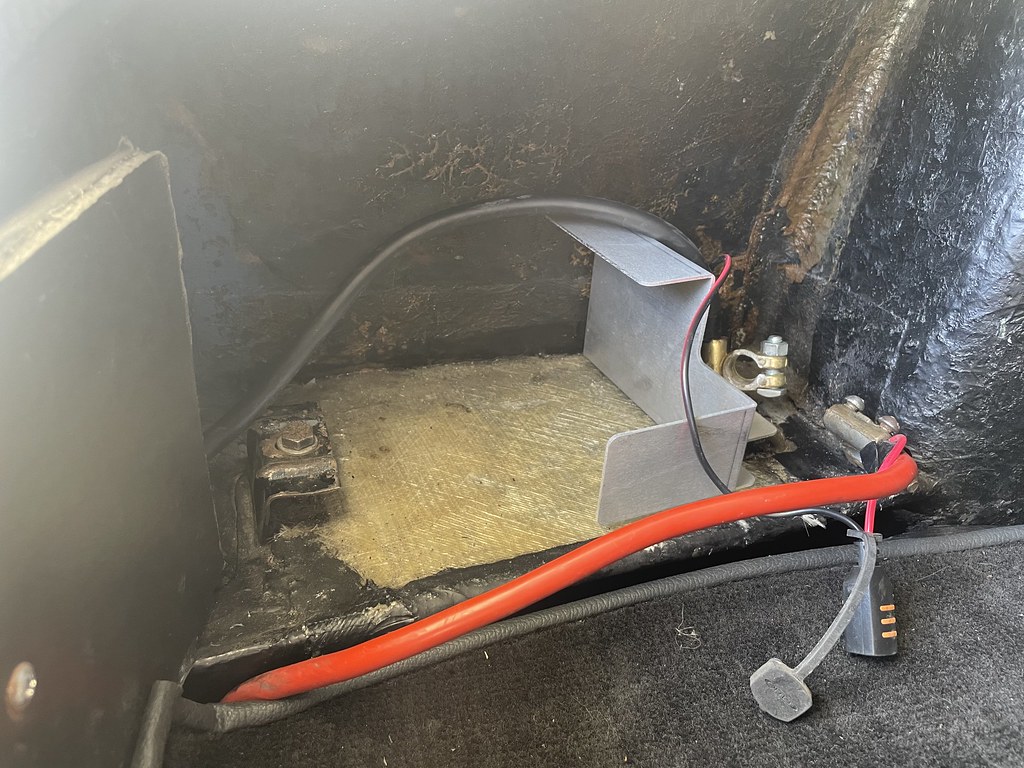
I should have some progress with the battery install in the next few days as I have the battery and the battery mount on hand. Just need a few uninterrupted minutes in the garage…
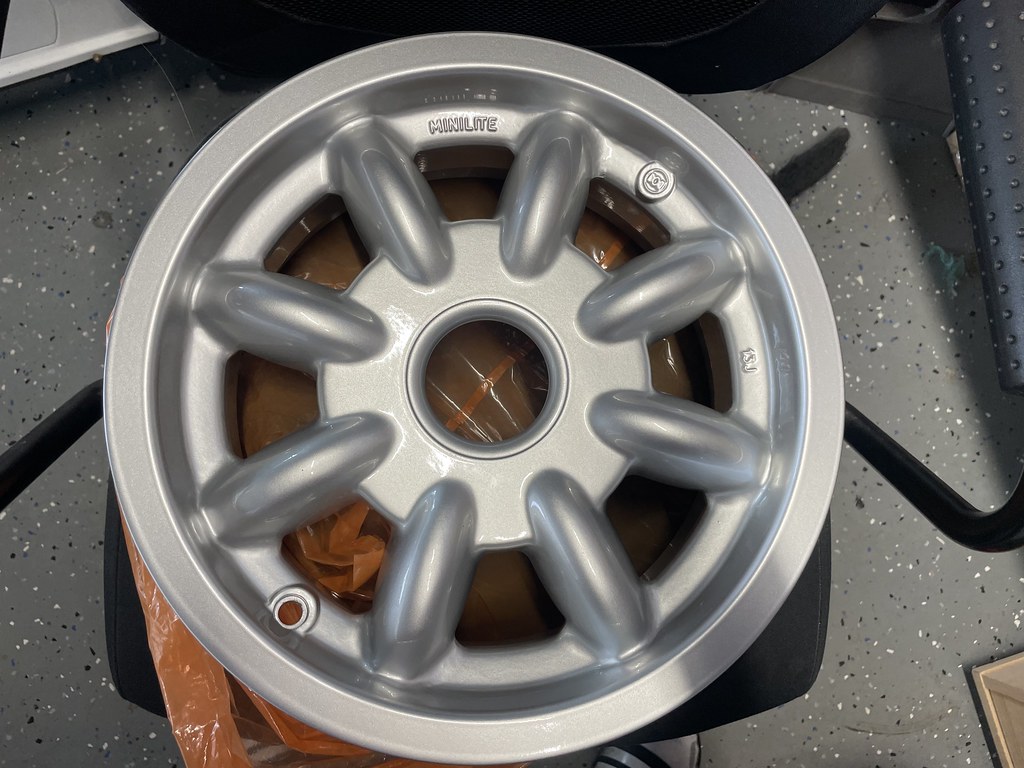
Hopefully that should wrap up Project #1 and I can keep making progress with Project #2. In regards to this, I also received my 5th Minilite from TTR without issue from customs. We’ll see what happens with my next order thats supposed to come from the UK.
While the car is up in the air for Project #2 I will be working on my sidequest project of sorting out the handbrake. I wont bore you with those details here, but will say that I spoke with Dave Bean and he should be taking care of the handbrake components and we will see what else is hiding under the car. I
I also got my Singer style reflectors and did a quick mock up and thats just not going to work, so I think I will see how difficult it will be to remove the Existing headlights and mount a set of brand new 7" Round lights I have. If they work out well, and I like the look I will likely upgrade to a set of the Holley Retrobrights so I have strong headlights for night driving…
That should also bring us to Project #4 and ideally I will have the chrome vinyl wrap soon to re-wrap the bumpers.
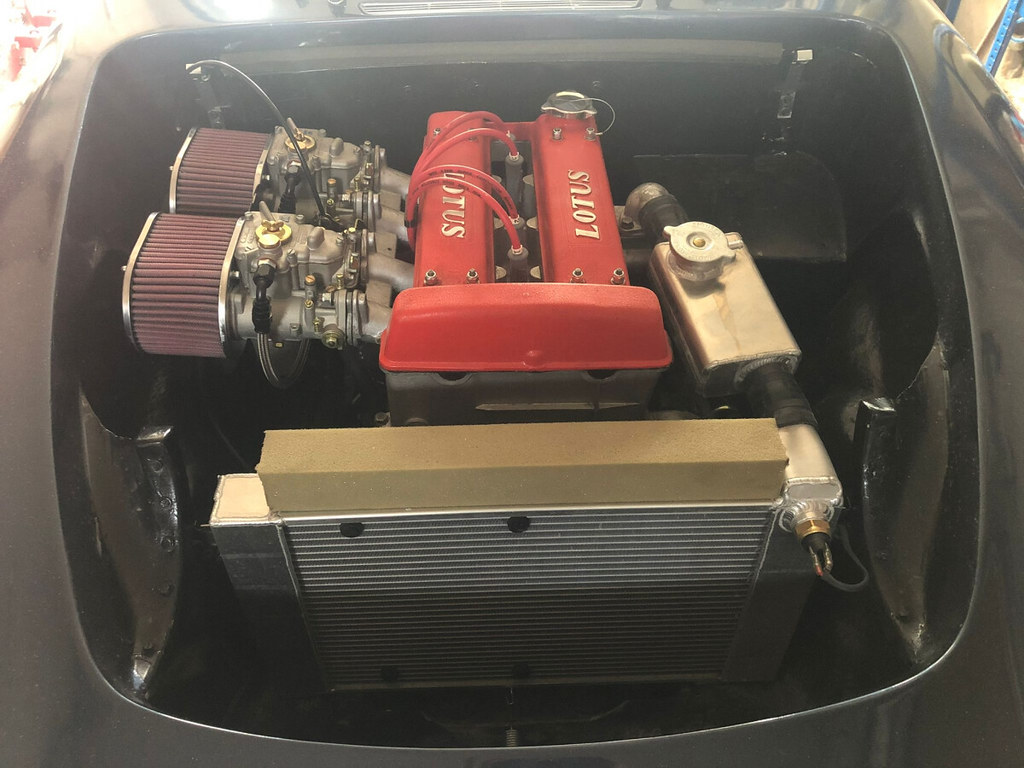
The BIG thing I have been quietly working on is the BIG project I have been wanting to do, and thats an EFI conversion. I have always wanted to throw on a set of Jenvey Heritage Throttle Bodies to keep the engine bay looking as good as it has since Sean rebuilt the car ~5 years ago…
More on that to come, stay tuned!.. on that note, a shameless self promo. Please subscribe to my youtube channel and follow me on Instagram as I’m trying to do something I haven’t and that requires more support and more eyeballs on my stuff.
The car will go better with the original design of air inlet. If you are going to be messing with the carbs anyway, I would get an original airbox, backplate and trunking - but a modern cone filter to fit in front of the rad.
There are a number of reasons, cool air and a small pressure pickup will improve performance, the engine will be quieter, less chance of fuel soak into the filters with attendant fire risk and having the backplate in place stops the carbs moving relative to each other and messing up the carb balance. Blocking off the sides of the rad (with the trunking) will force more air through the rad and improve cooling.
If ultimate performance is a concern, deeper airboxes are available which solve the problem of the rear cylinder inlet being partially masked by the original design of tapered airbox.
Alright folks, the plan is starting to come together. This is the ultimate side-quest derailment project that I wasnt planning on doing yet, but here we are…
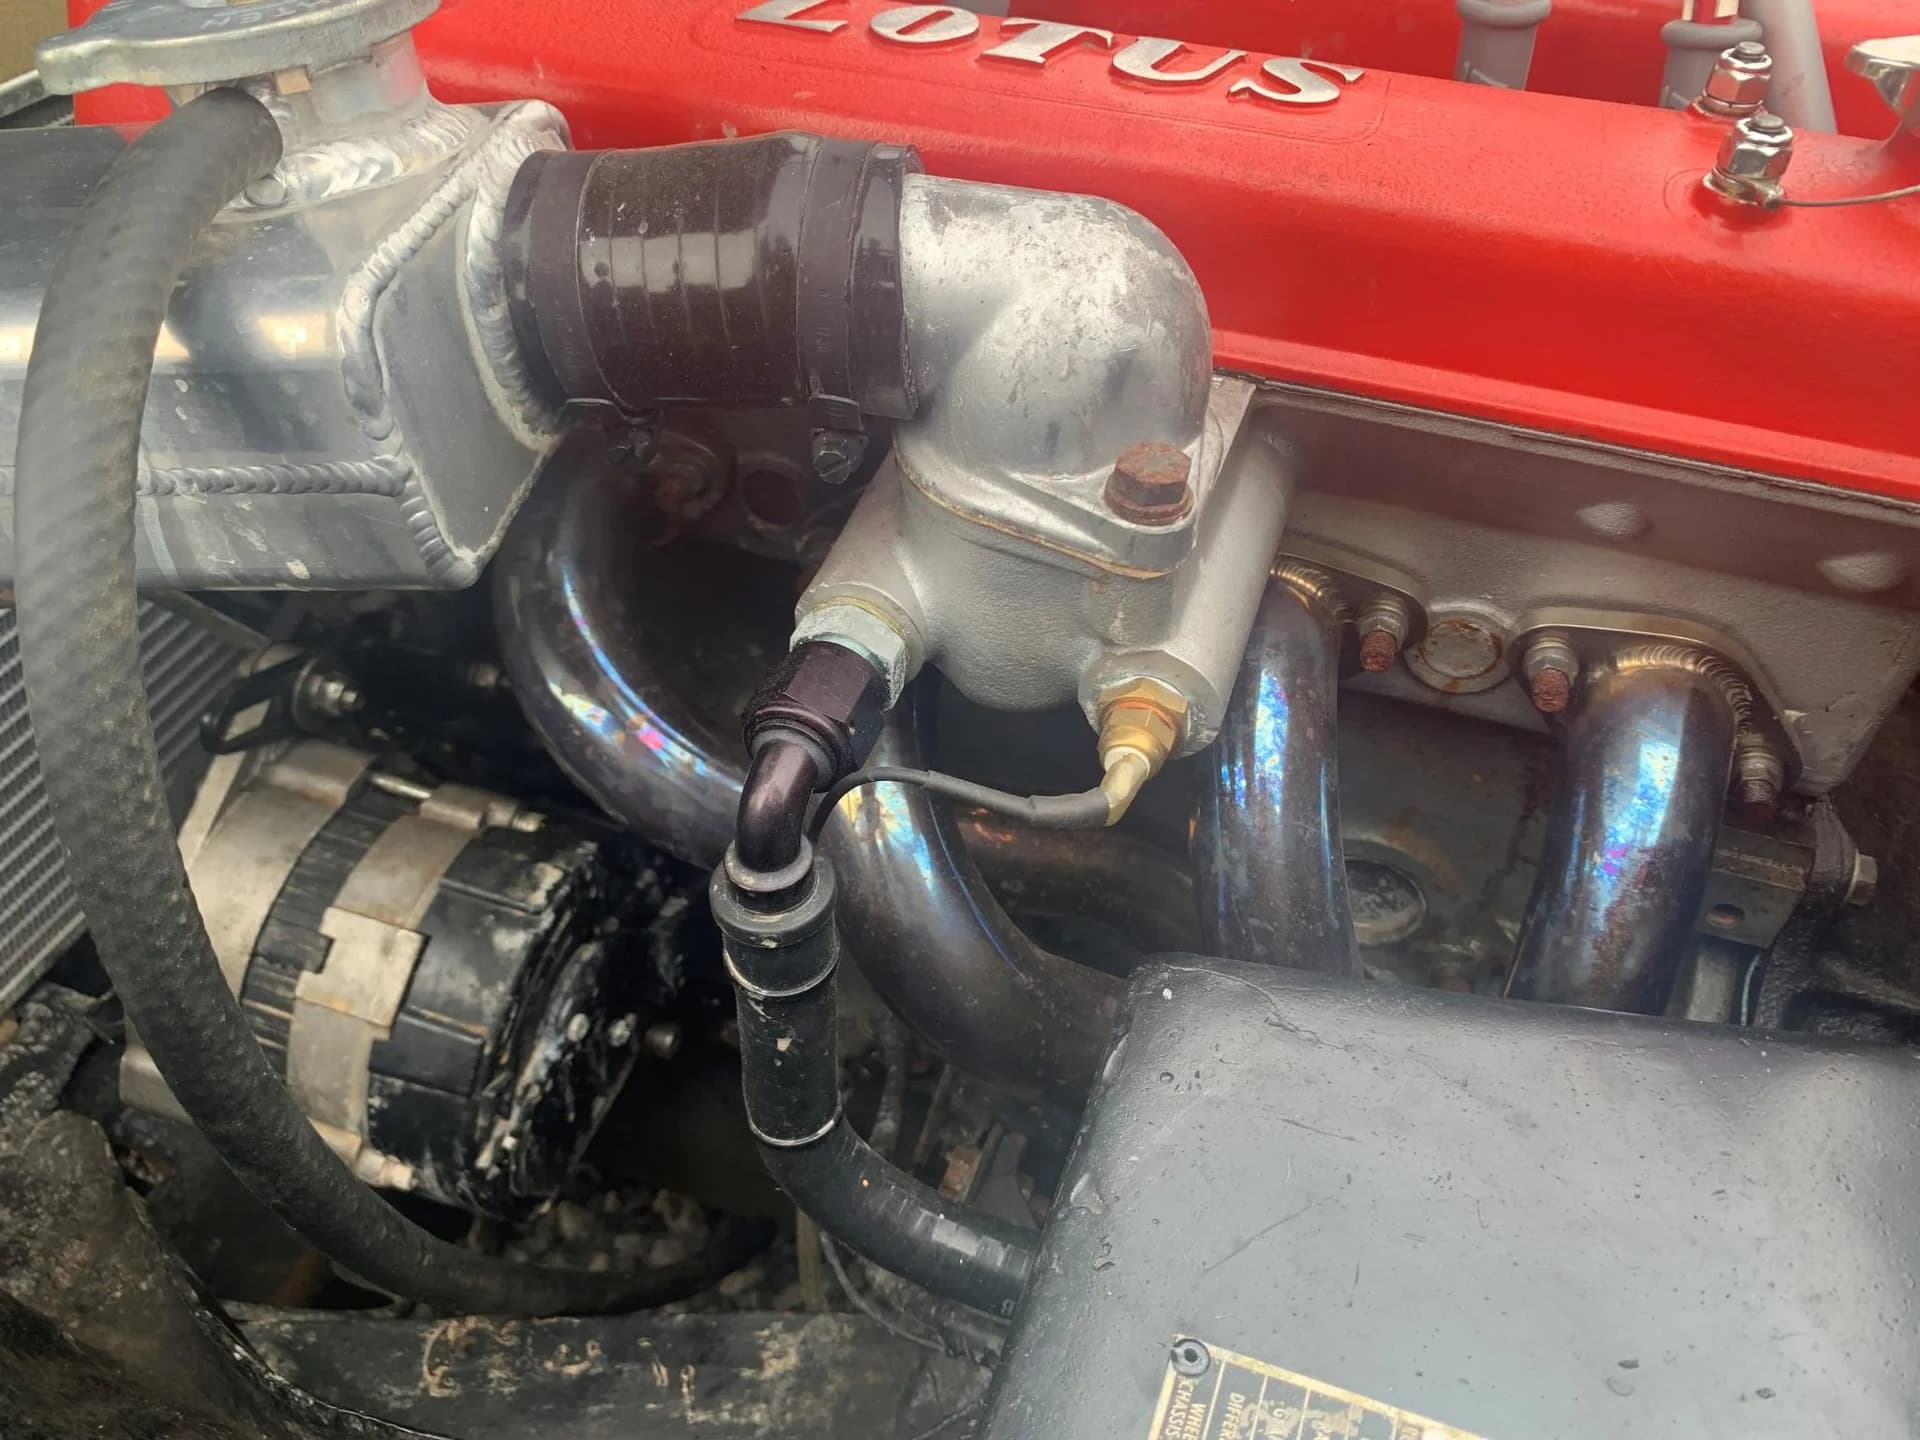
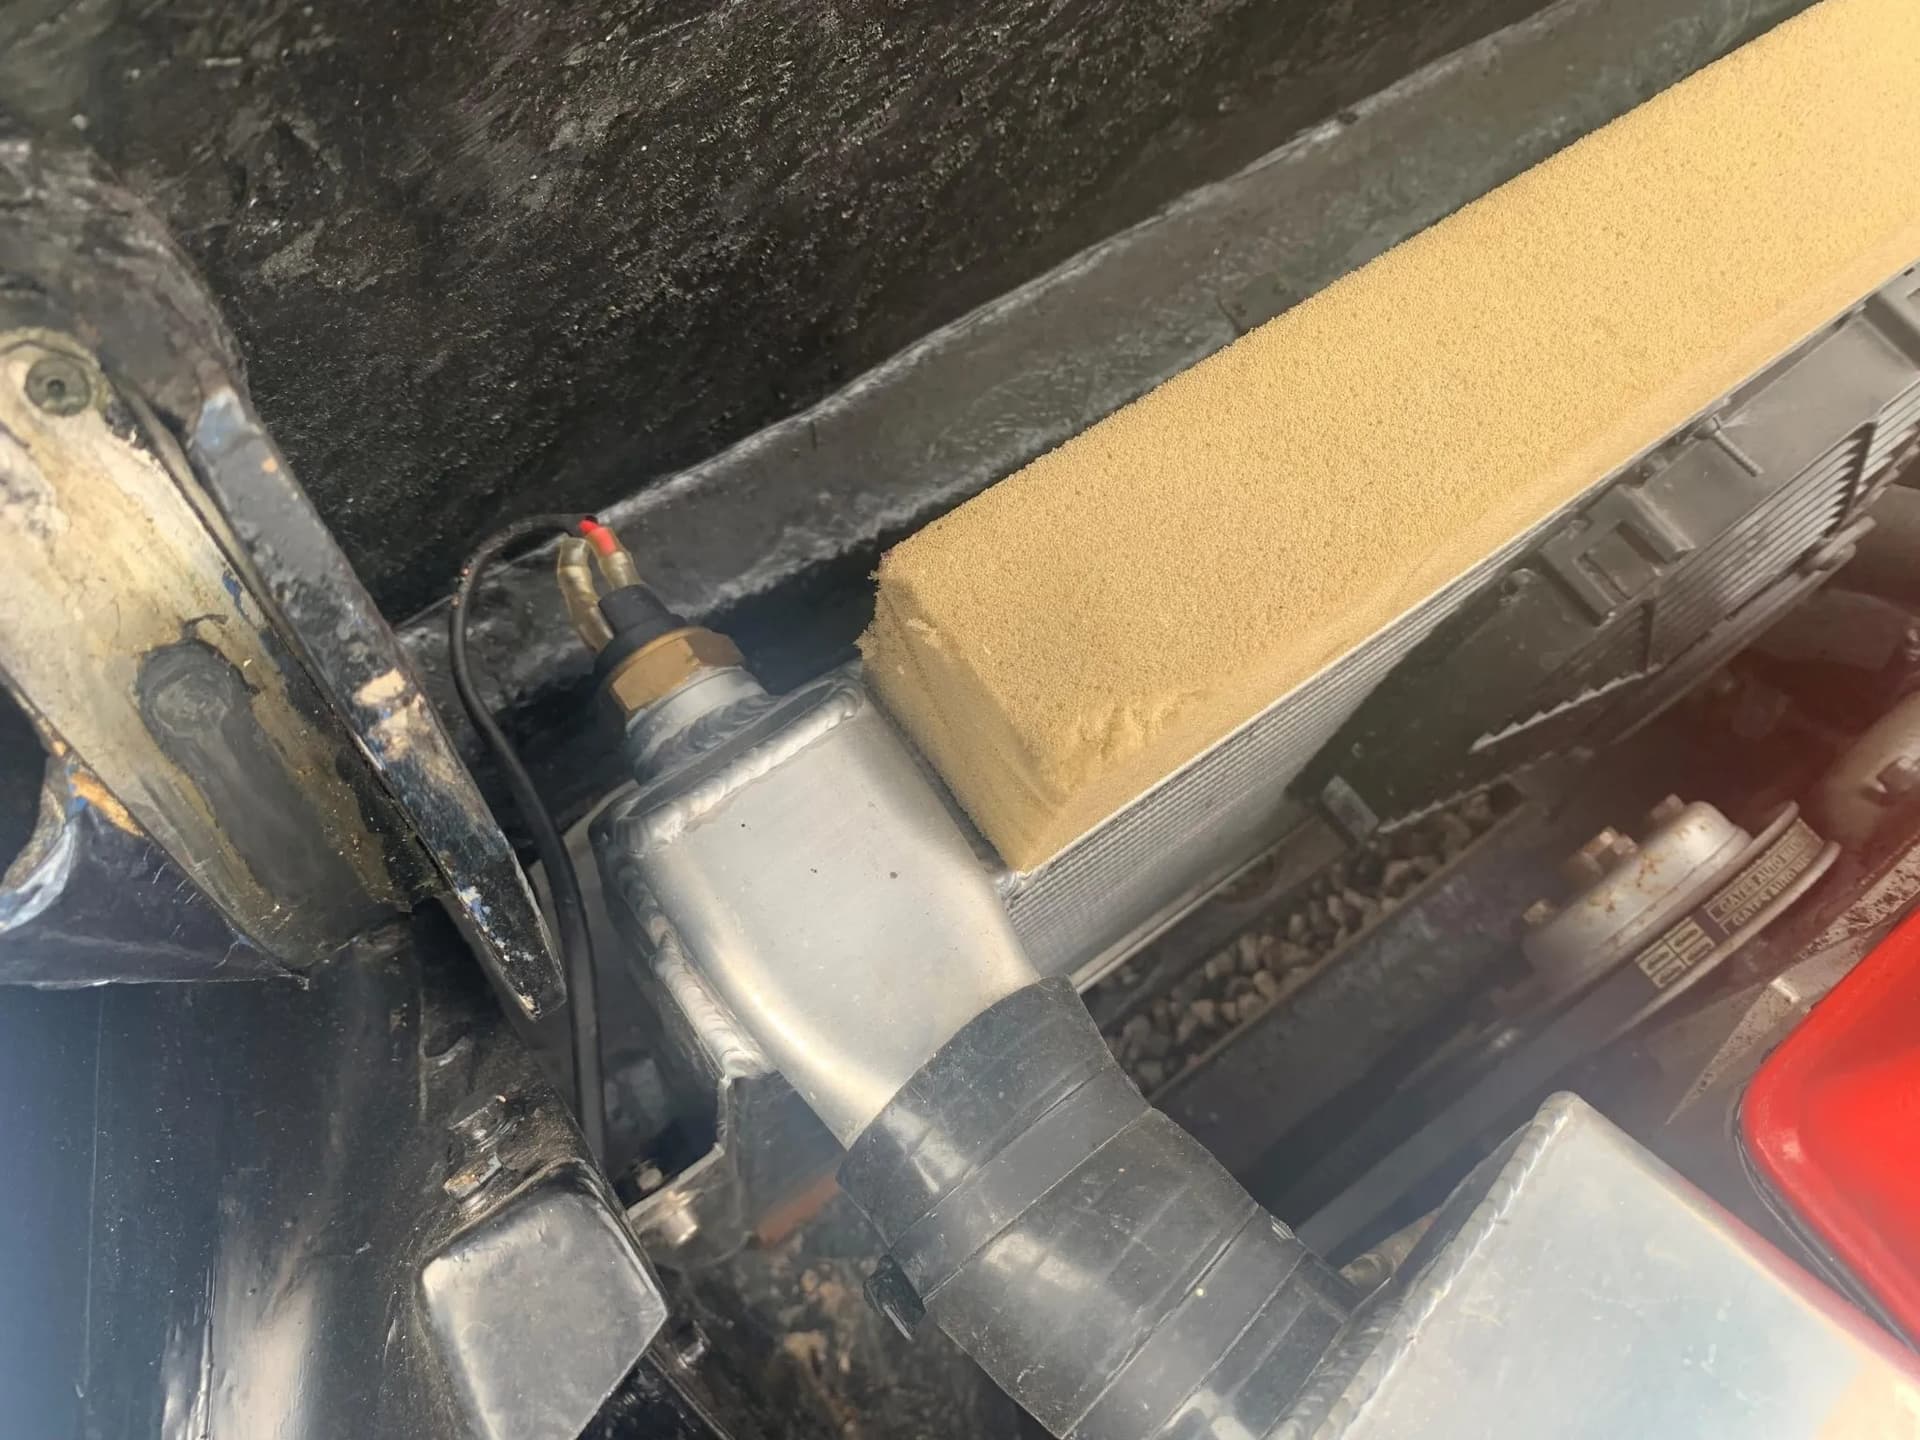
I know I need to figure out where to adapt some sensors. QED is supplying the toothed crank pulley along with the Ford crank position sensor and a few other bits. My current headscratcher is the coolant temp sensor. Initially my idea was to tap into the thermostat housing, but it seems like I might be asking too much from this. My plan was to use the sensor location and instead of a single wire, to replace it with a 3-wire sensor so two can be used for the incoming ECU and the third for the gauge. Still exploring this, but it also seems like the thread would need to be re-tapped and that makes it sort or irreversible…
Then I recently had a moment where I saw that the radiator also has a sensor on it and now I’m wondering 2 things… (1) Where is the gauge getting is info from and, (2) Is this a better place to accomplish my goal?
I might be a bit of a contrarian at times, but here’s why. The temperature indication to the gauge/warning should ideally be below the thermostat if possible. From personal, expensive experience if the cooling system starts to lose coolant, the temp sensor in the top tank of the radiator will not show the temperature rise. There is simply no flow of coolant to the radiator and sensor. The outlet neck may or may not indicate over heating.